• About
  • Contact
  • E

Petal + Ply

formerly Dear Emmeline

  • Make + DIY
  • Home + Decor
  • Life + Style

December 7: Ribbon Candy Wreath

December 7, 2013 ·

Here we are on day 7!  Can you believe we’re already a full week into December?!  
Today I want to share a quick holiday decor idea that has a lot of impact?!
Ribbon candy is one of my dad’s favorite holiday treats.  Every year we all break into his annual box and help him finish it off!  Last year the usual gifter couldn’t find it in stores. Bummer.
This year I decided one way or another we were having some ribbon candy!
I’m going to show you how easy it is to make some ribbon candy that will last for years.
You’ll need:
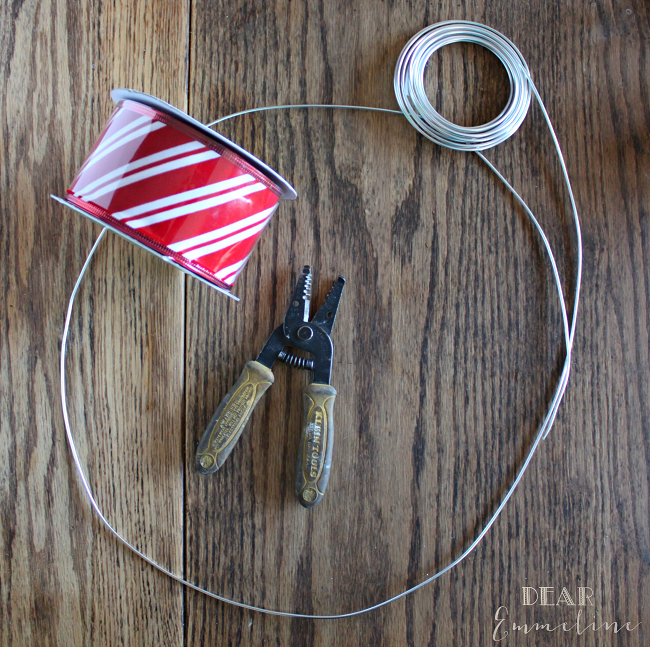
  • roll of medium gauge wire (think: coat hanger width)
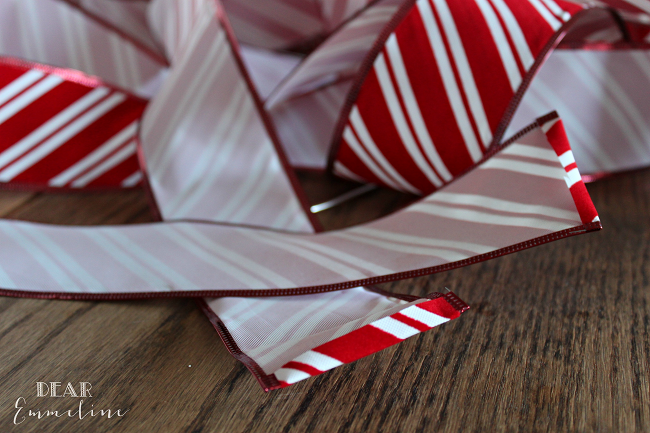
  • spool of 2 inch striped ribbon (9 yard roll)
  • scissors
  • wire cutters
  • hot glue
  • white electrical tape

Let’s get going!

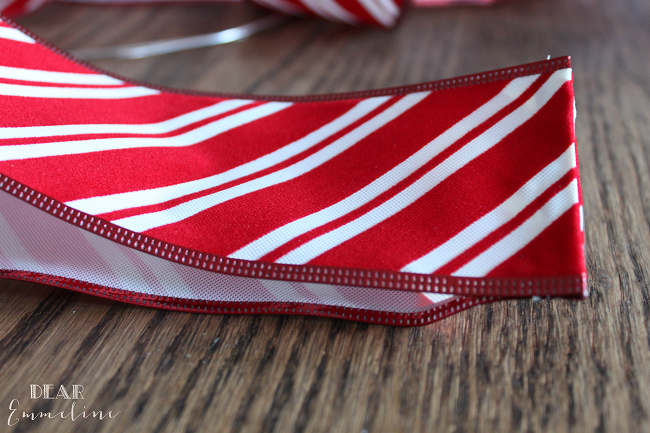
1.  Unwrap entire spool of ribbon. Fold over and secure ends with hot glue.

2. Glue the 2 opposite ends of the spool of ribbon together.  The entire roll of ribbon should be folded in half so it now appears to be double sided and half the length.

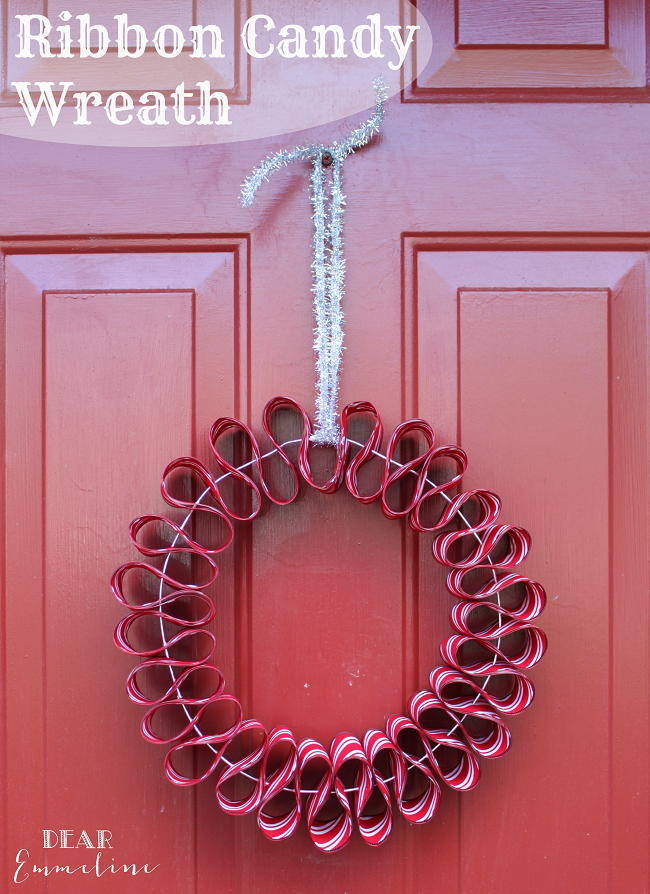
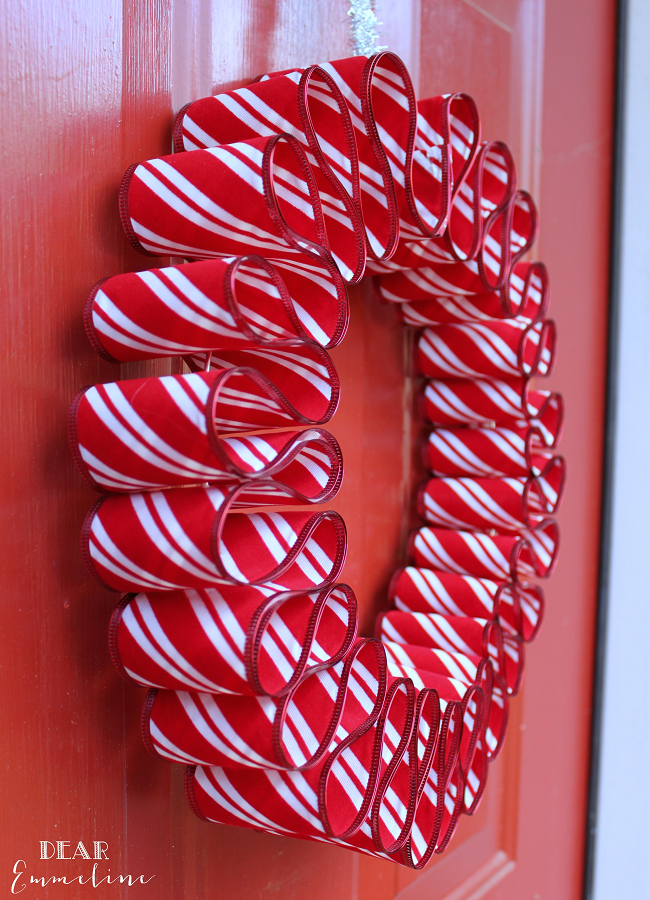
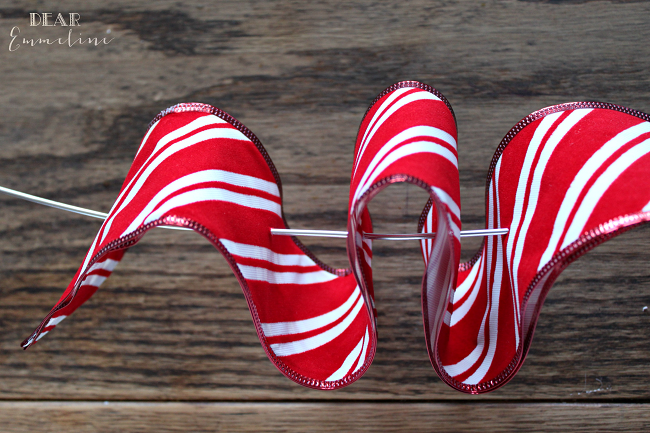
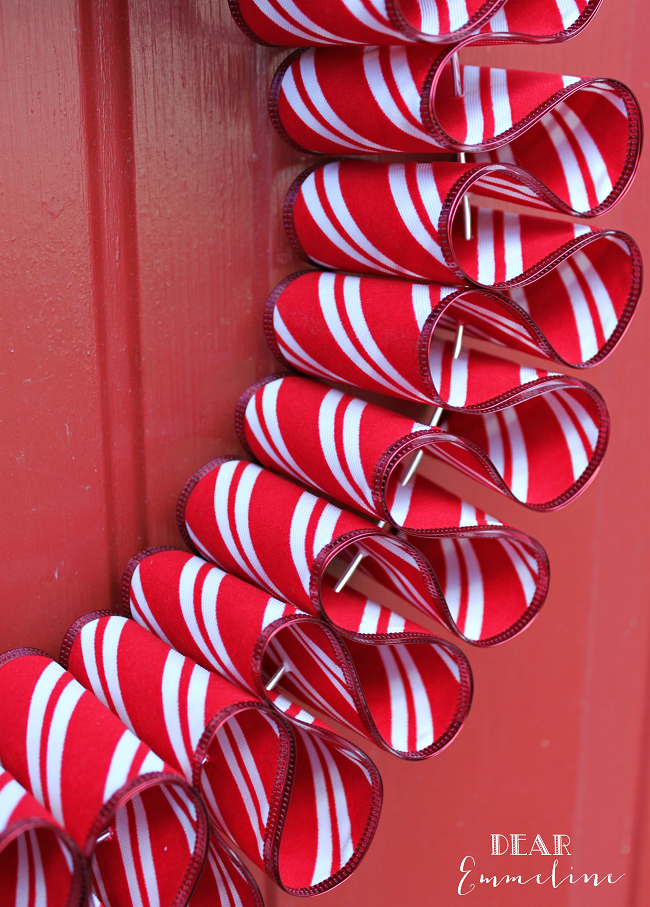
3. Poke ribbon 1.5 inch from end onto wire. Accordion fold ribbon poking wire through approximately every 3″.  Continue until all of the ribbon is folded onto the wire.

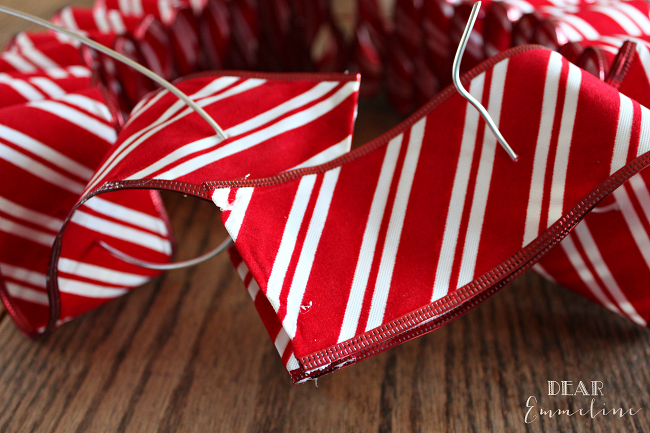
4.  Glue ribbon ends together leaving a 3″ gap between the final wire holes on each end of the ribbon.  This will allow enough ribbon to create the final curl on the wreath.  Secure wire ends together with electrical tape.

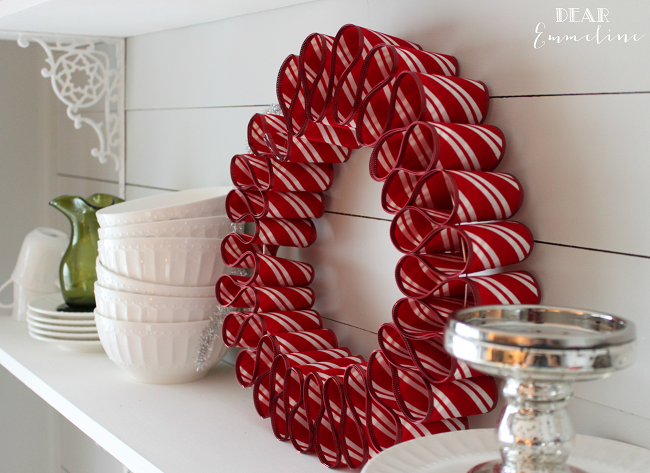
5. Use a festive ribbon to hang.  I tied my ribbon over the electrical tape!

A festive wreath for indoors or out!!  Right now mine is decorating the shelves in our kitchen.  We’ll see if it stays there.  I tend to move things around a lot.

Come back for another new post tomorrow!  Don’t forget you can use the interactive advent calendar to easily follow along!

***

If you’ve missed any posts, catch up using the project gallery below.

Shared with:
The Gunny Sack– Time To Sparkle
The D.I.Y. Dreamer– From Dream to Reality
Newly Woodwards– Dare to Deck the Halls
   

Filed In: Uncategorized / Tagged: 2013, 25 Days of Christmas, Christmas, holiday, ribbon candy, wreath

Comments

  1. Danielle says

    December 7, 2013 at 1:43 pm

    So pretty! x

  2. Julia Konya says

    December 8, 2013 at 12:55 pm

    This is seriously one of the prettiest wreaths I have seen. Pinning!

  3. Chelsea @ Making Home Base says

    December 9, 2013 at 12:18 am

    Beautiful, Jess! I especially love it on the shelf with all of the white – it really pops!

  4. Caitlin @ Desert Domicile says

    December 16, 2013 at 5:26 pm

    I love your wreath! So creative! Pinning 🙂

  5. Dear Emmeline says

    December 16, 2013 at 7:36 pm

    Thanks Caitlin!

  6. Kim @ NewlyWoodwards says

    December 17, 2013 at 2:35 am

    This is adorable! I didn't even realize it was ribbon at first.

    Thanks so much for linking up to Dare to DIY! I hope you'll link back to NewlyWoodwards, too!

  7. Cassie @ Primitive & Proper says

    December 17, 2013 at 8:18 pm

    so adorable- you always have such fun and clever ideas!

  8. Emma says

    November 18, 2014 at 11:18 pm

    This looks great! How much wire do you use?

  9. Dear Emmeline says

    November 19, 2014 at 12:53 am

    There isn't really a set amount of wire to use. Make the circle of wire whatever size you want your wreath. I would say mine probably has a 12-14 inch diameter. A diameter of 13" requires approximately 44" of wire (app. 41" circumference and 3" extra for overlapping)

  10. Sharon says

    September 19, 2016 at 10:29 am

    when folding the ribbon how deep are the folds? You said every 3 inches but if I do that my folds are very tiny. Does the ribbon have to be cotton ribbon? I have holiday ribbon and it is very hard to push the wire through. I am using 16 gauge wire. I am so anxious to do this wreath iot is so pretty.

    • Jessica says

      September 19, 2016 at 2:21 pm

      If you pierce the ribbon at every 3 inches then the top of each wave should be approximately 1.5″ and the bottom should be approximately 1.5″ making the total width of each full wave of ribbon be 3″. I did not use a cotton ribbon. I took some muscling to get the wire through. If you cut the wire at a sharp angle it acts more like a needle which makes the process a bit easier. I don’t know much about wire gauge. The wire I used came in a round bundle and was labeled medium gauge. Hope that helps!

      • Sharon says

        September 20, 2016 at 11:10 pm

        Thank you. I will have to do some practice with it. Thanks for
        you reply.

  11. Pat says

    October 3, 2016 at 7:25 pm

    I love this..
    I think I’ll make this for Florida

  12. Caro says

    November 1, 2016 at 4:45 pm

    Fabulous, what a stunning visual effect. Love this pin, plese can you tell me what type of ribbon this was made with? Thank you

    • Jessica says

      November 3, 2016 at 1:19 pm

      Thanks! I made this with wired ribbon from the craft store.

Trackbacks

  1. 100 Cheap & Easy DIY Christmas Decorations - Prudent Penny Pincher says:
    November 10, 2016 at 7:45 pm

    […] Tutorial here […]

  2. 17 Festive DIY Christmas Wreaths Ideas You Can Easily Make - Style Motivation says:
    November 25, 2016 at 4:41 pm

    […] http://www.petalandply.com […]

  3. 17 Festive DIY Christmas Wreaths Ideas You Can Easily Make – chuckiesblog says:
    November 25, 2016 at 6:19 pm

    […] http://www.petalandply.com […]

  4. Amazing DIY Christmas Wreaths Tutorials says:
    December 7, 2016 at 5:22 am

    […] http://www.petalandply.com […]

  5. 17 Festive DIY Christmas Wreaths Ideas You Can Easily Make | Ctacy says:
    January 24, 2017 at 5:36 pm

    […] http://www.petalandply.com […]

  6. 17 Festive DIY Christmas Wreaths Ideas You Can Easily Make – Ctacy says:
    January 24, 2017 at 5:39 pm

    […] http://www.petalandply.com […]

Welcome to Petal + Ply

Join the List

Join our mailing list to receive updates from our blog.

as seen in

Popular Posts

Olive You! {Baking Soda Paint Recipe}

DIY Easy Embroidery Hoop Pendant

Eclectic Farmhouse Foyer | One Room Challenge Reveal

Cross Stitch Dresser

Archives

Categories

  • Home + Decor
  • Life + Style
  • Make + DIY
  • Uncategorized

Browse

  • Journal
  • Portfolio
  • Press
  • Sponsorship
  • Privacy Policy

Join the List

Join our mailing list to receive updates and more from our website.

About Us

Welcome to Petal + Ply.

Formerly the DIY, craft, & decor blog Dear Emmeline. We decided it was time for a new site and new name!

More >

Theme by 17th Avenue · Powered by WordPress & Genesis