We recently got rid of our small china hutch when we found a LARGE one someone put on Craigslist. My husband did not understand why I wanted it and was skeptical, to say the least, about how it would turn out.
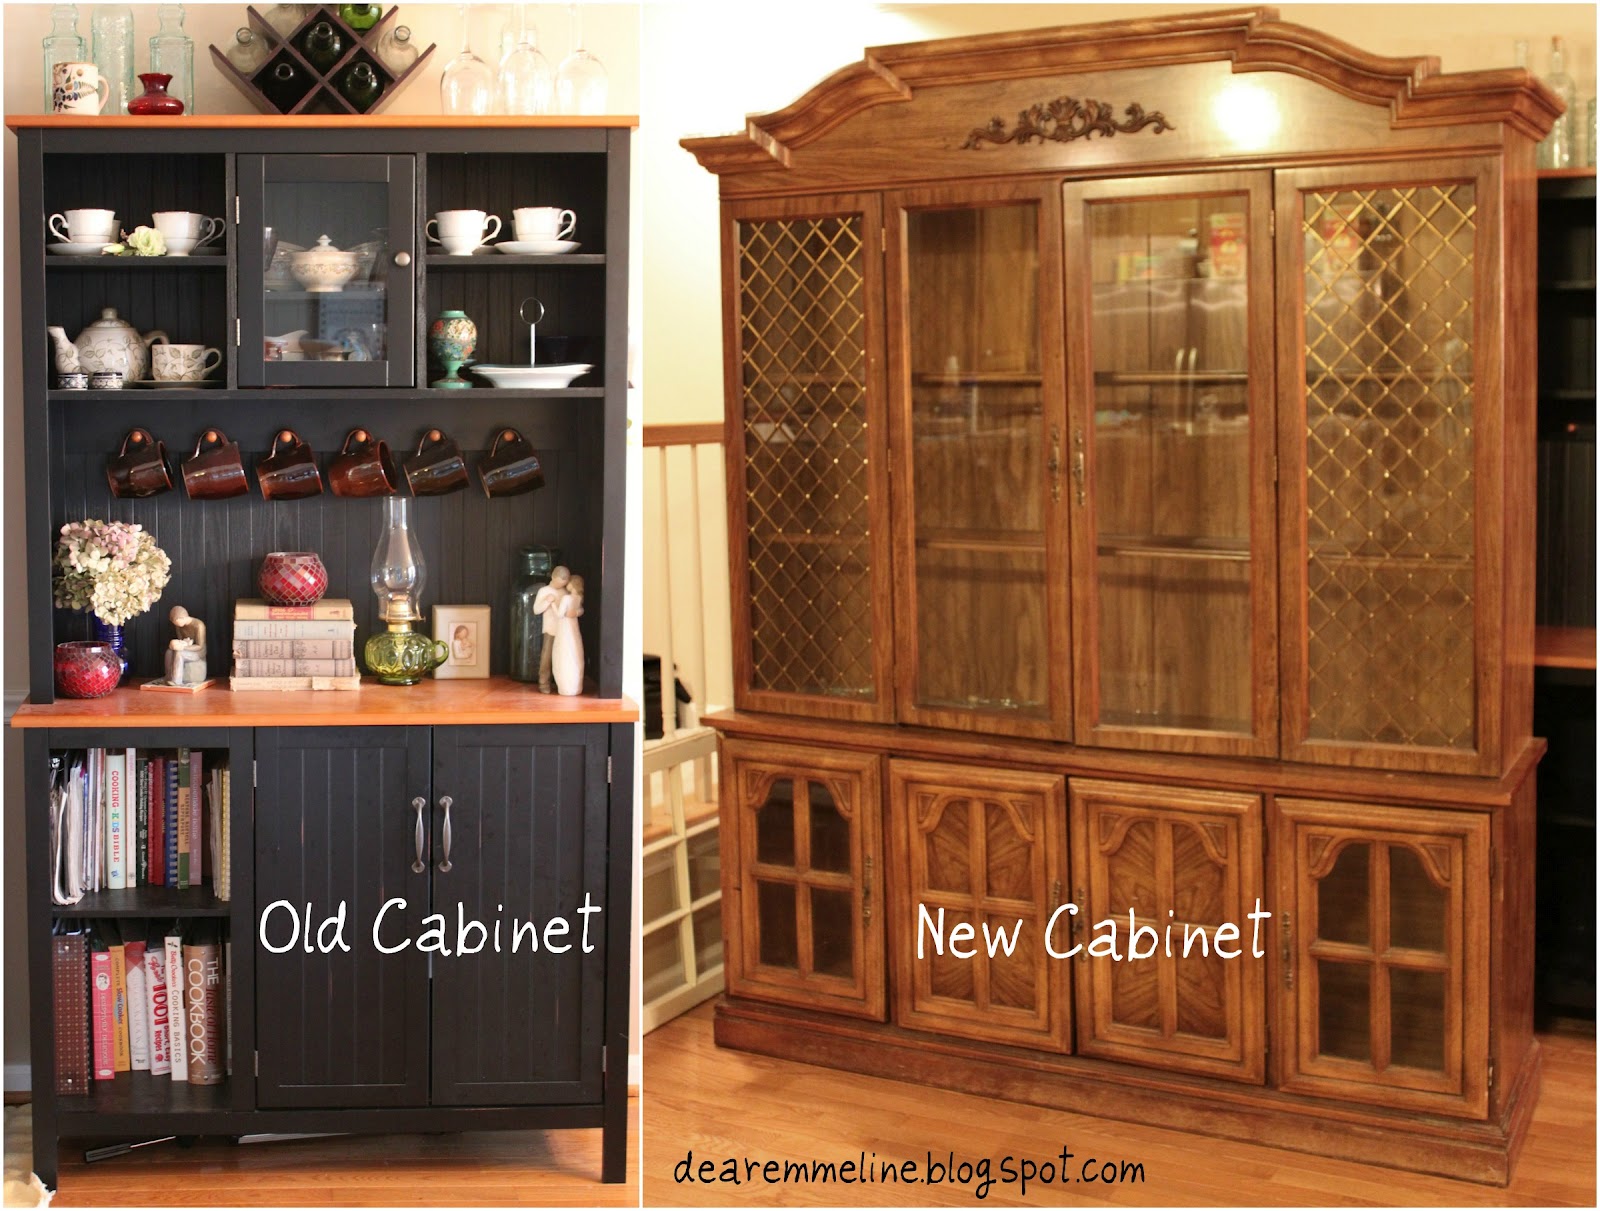
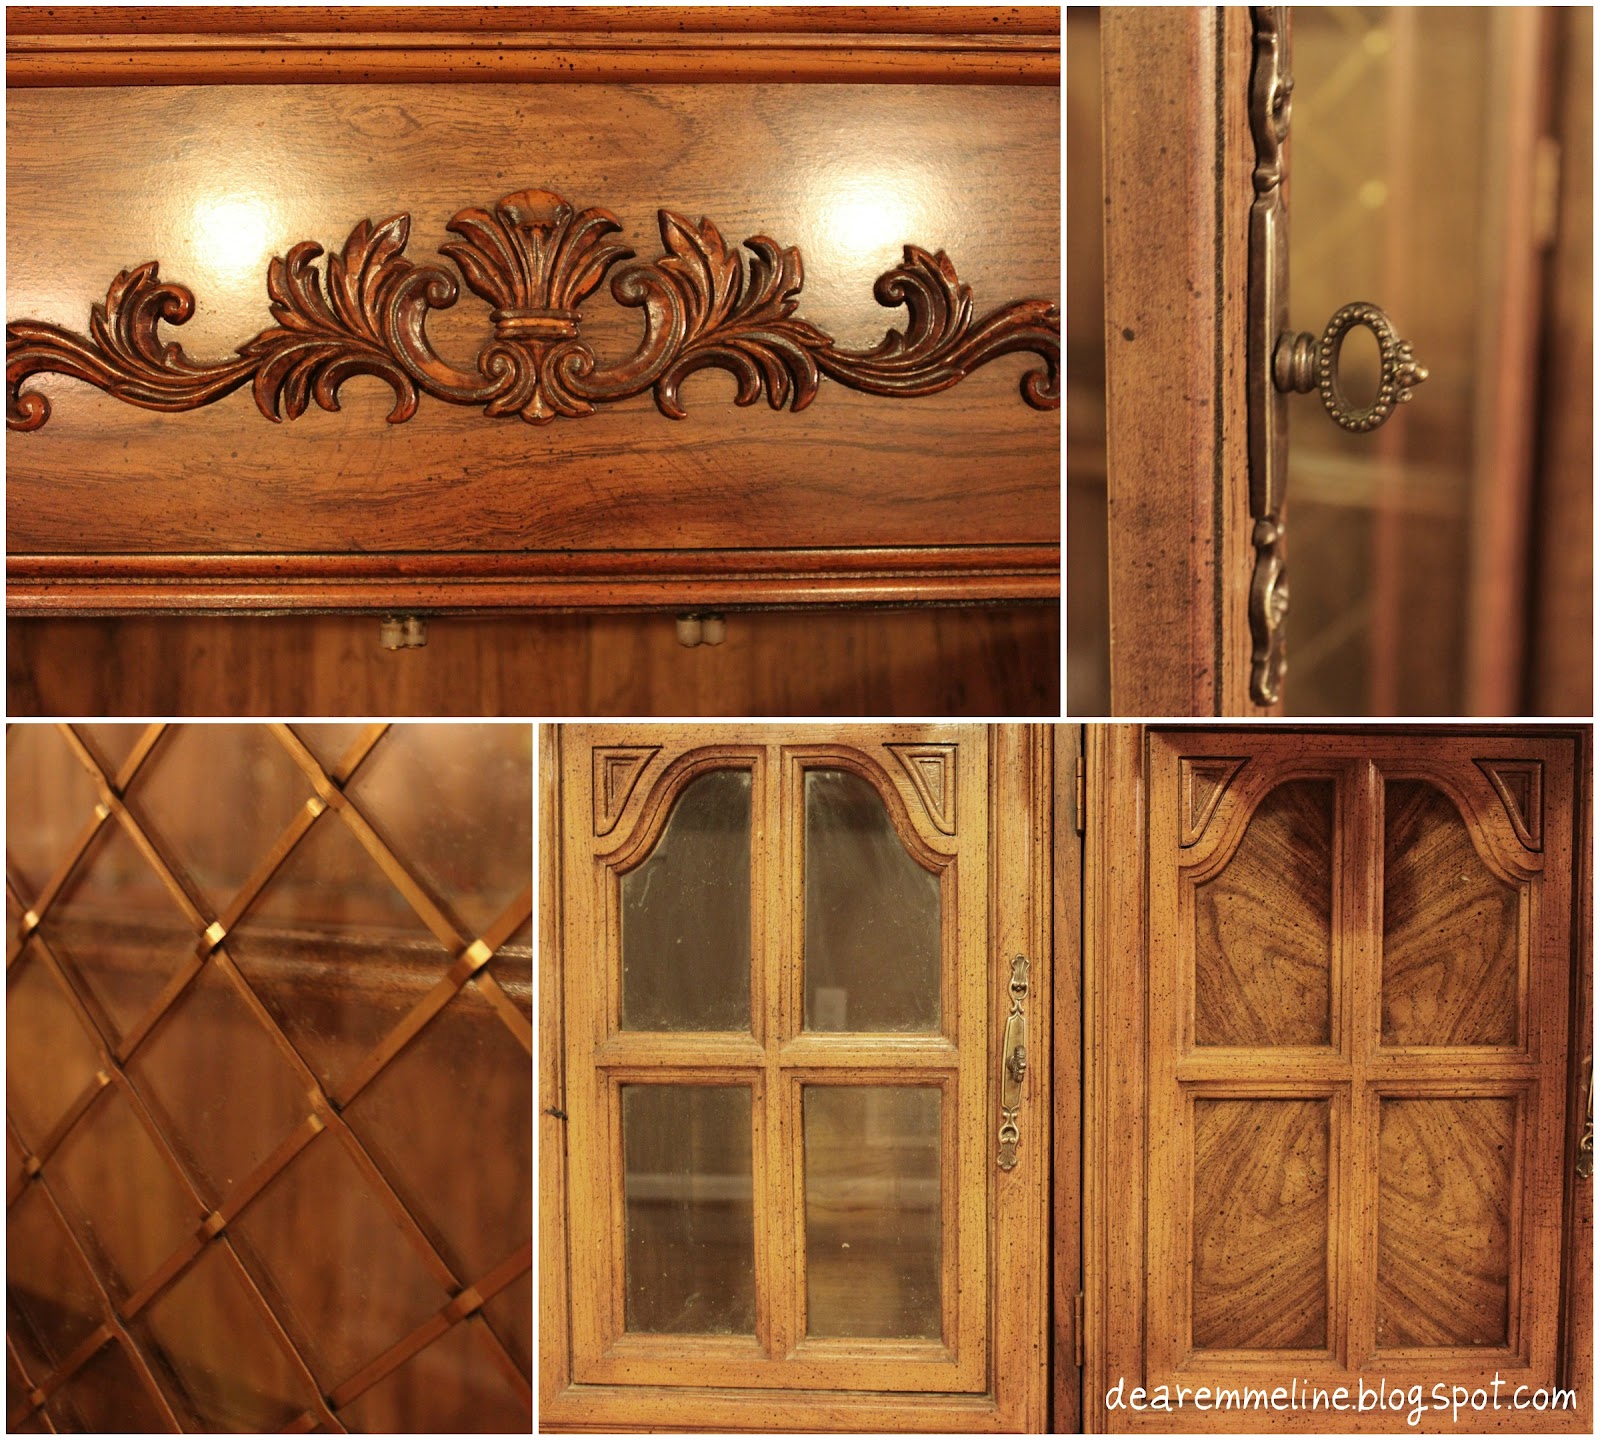
I totally agree that this piece certainly wasn’t much to look at, but I had BIG plans for this baby!
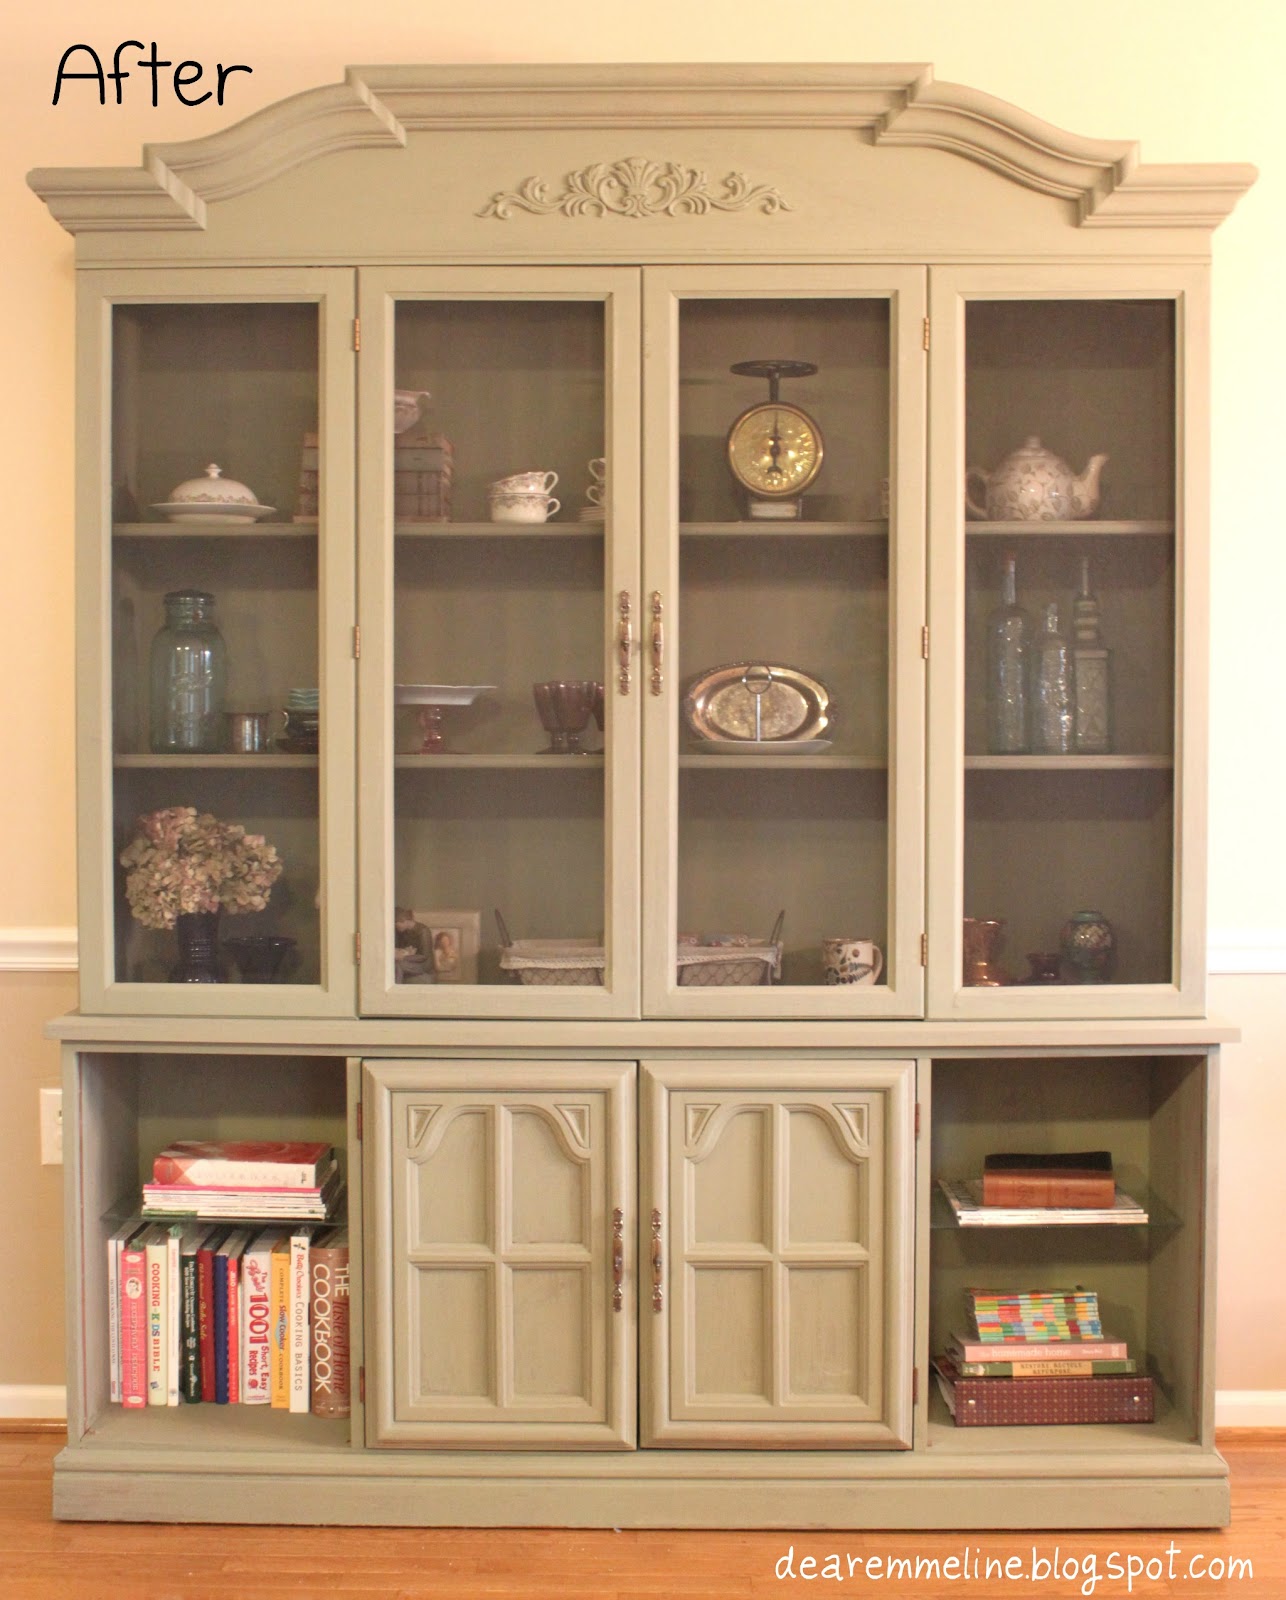
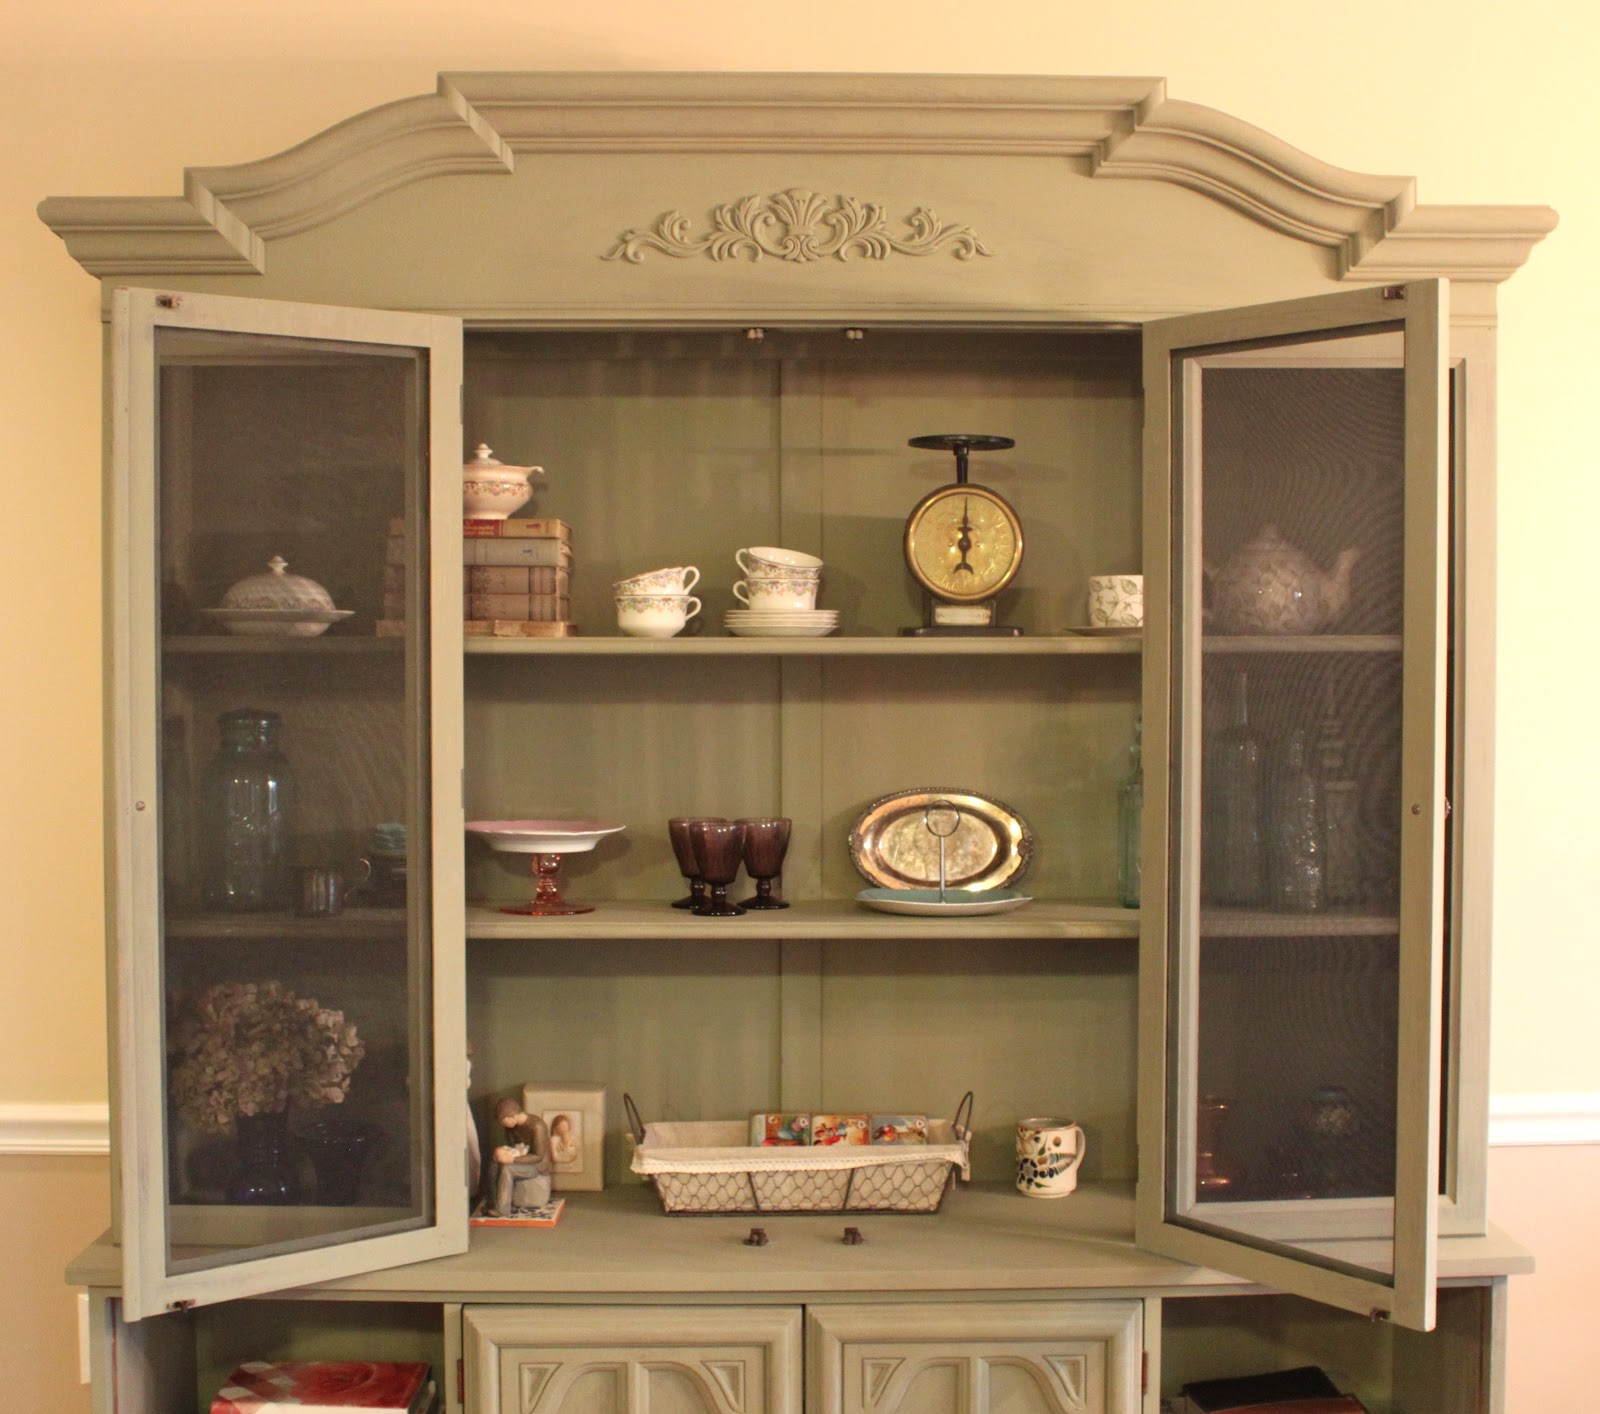
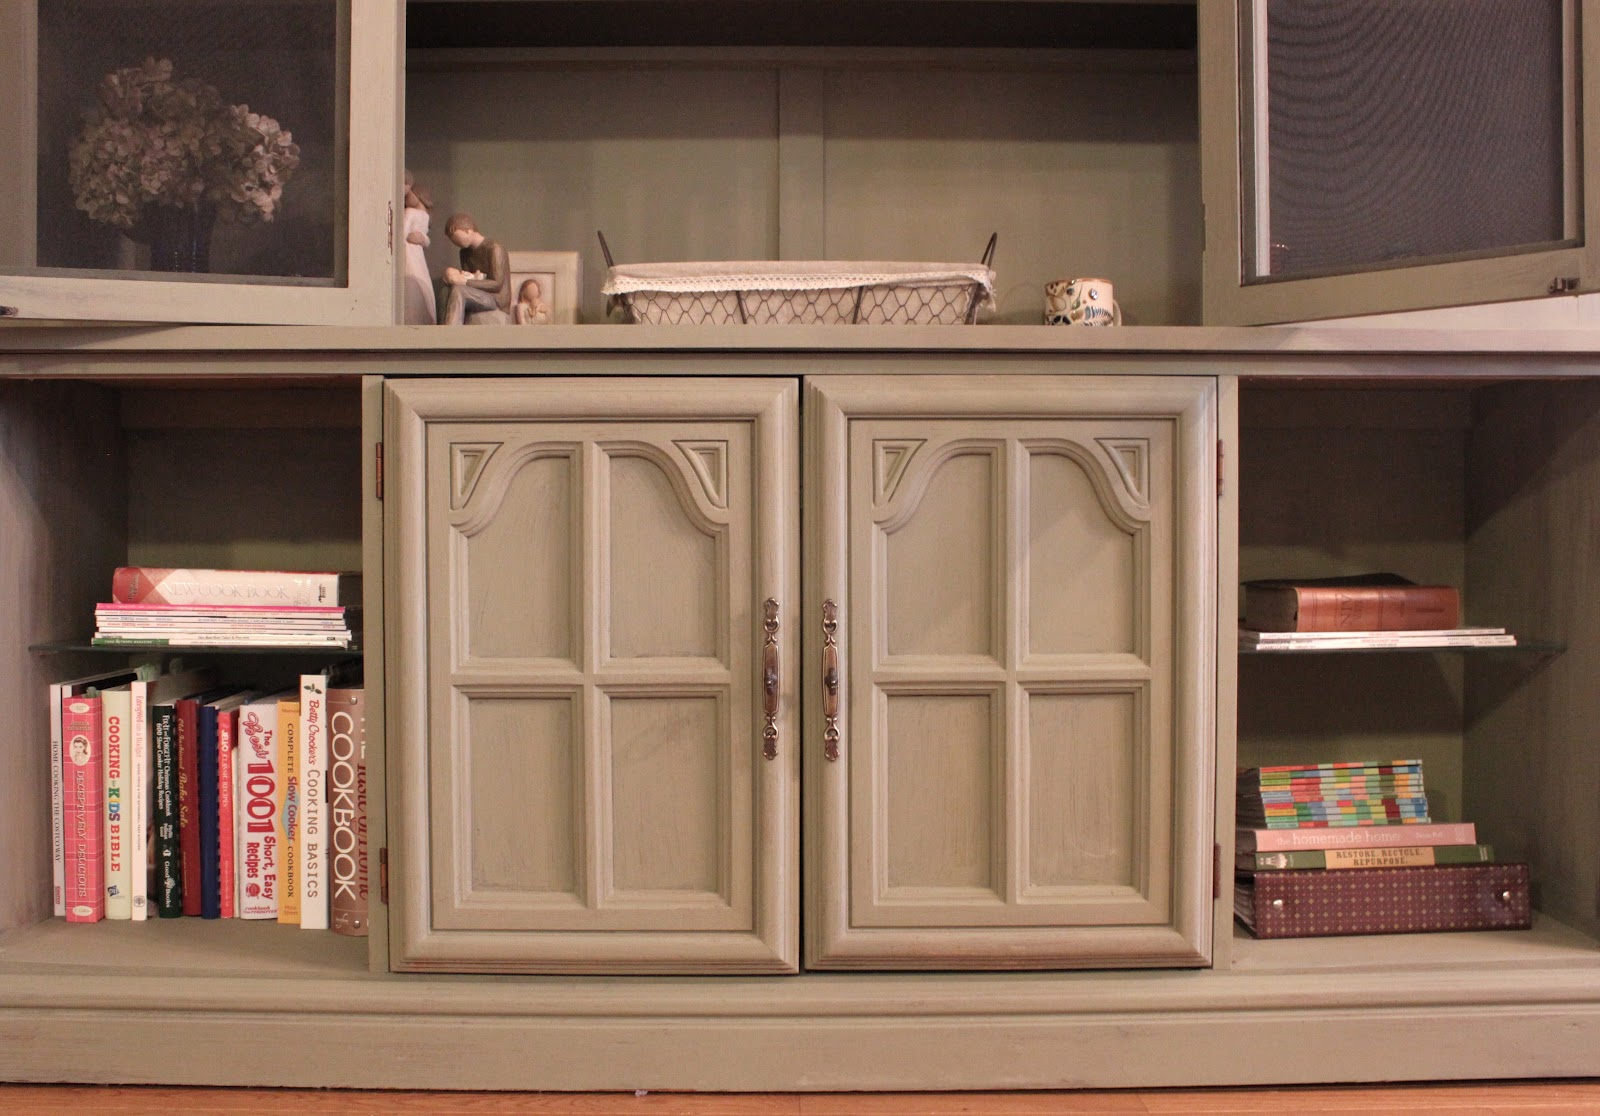
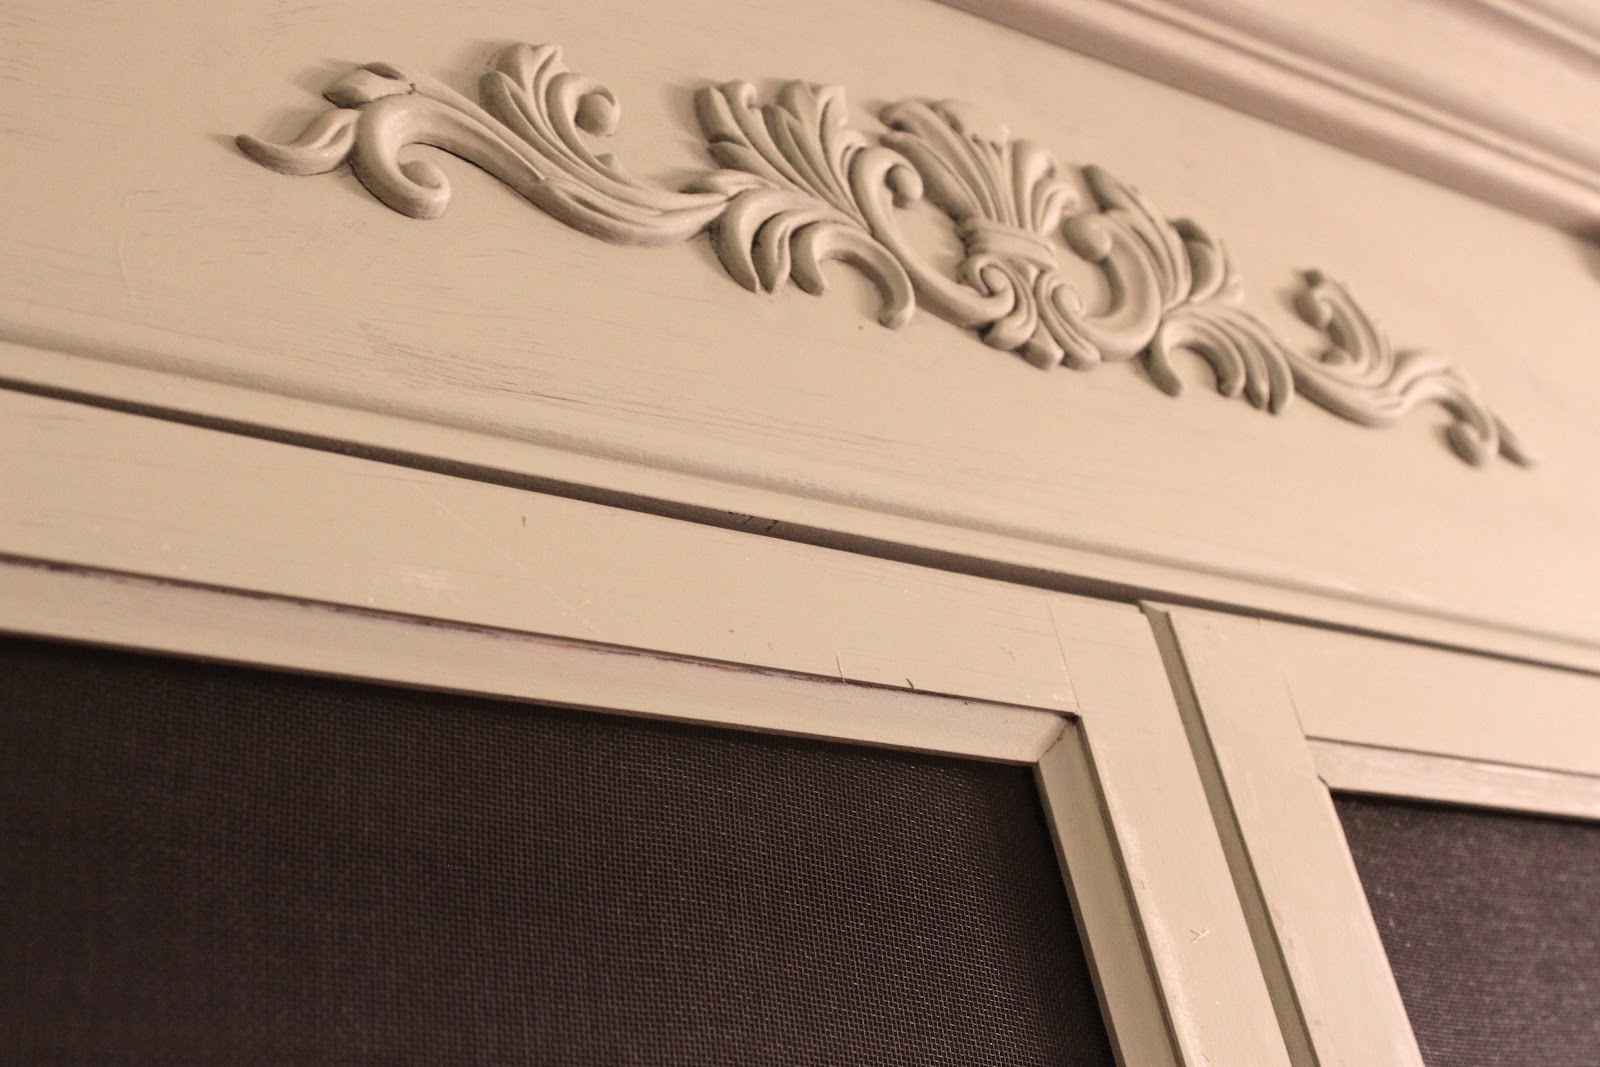
After a little leveling (by simply adding floor protectors to all of the corners), removing the glass and replacing it with screen, completely removing the outer bottom doors (because removing the glass ruined the backside of them), and giving it one coat of Annie Sloan Chateau Grey Chalk Paint this cabinet is now the farmhouse beauty I knew she could be!!
Did I mention it only took removing the glass and giving it a rough coat of paint before my husband started to see what I was envisioning! Take a look at the transformation in action.
 |
| Looking back I can see where my husband was coming from…..yikes! |
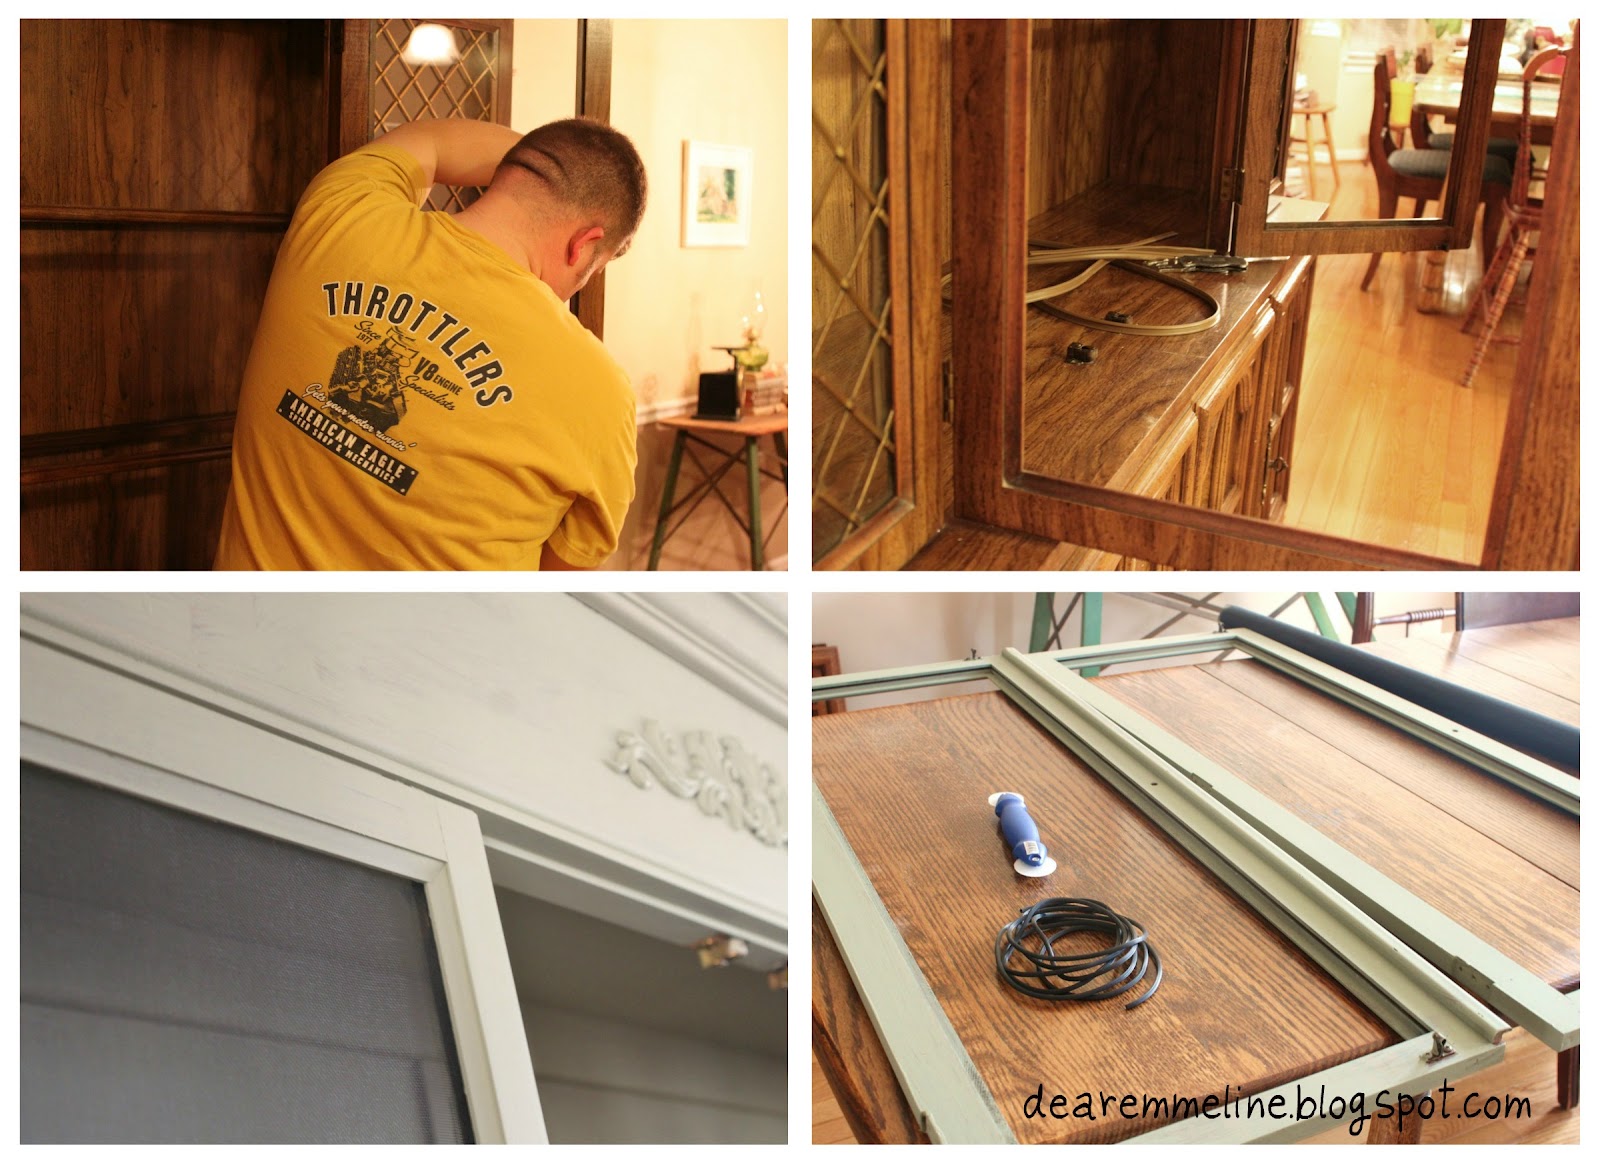 |
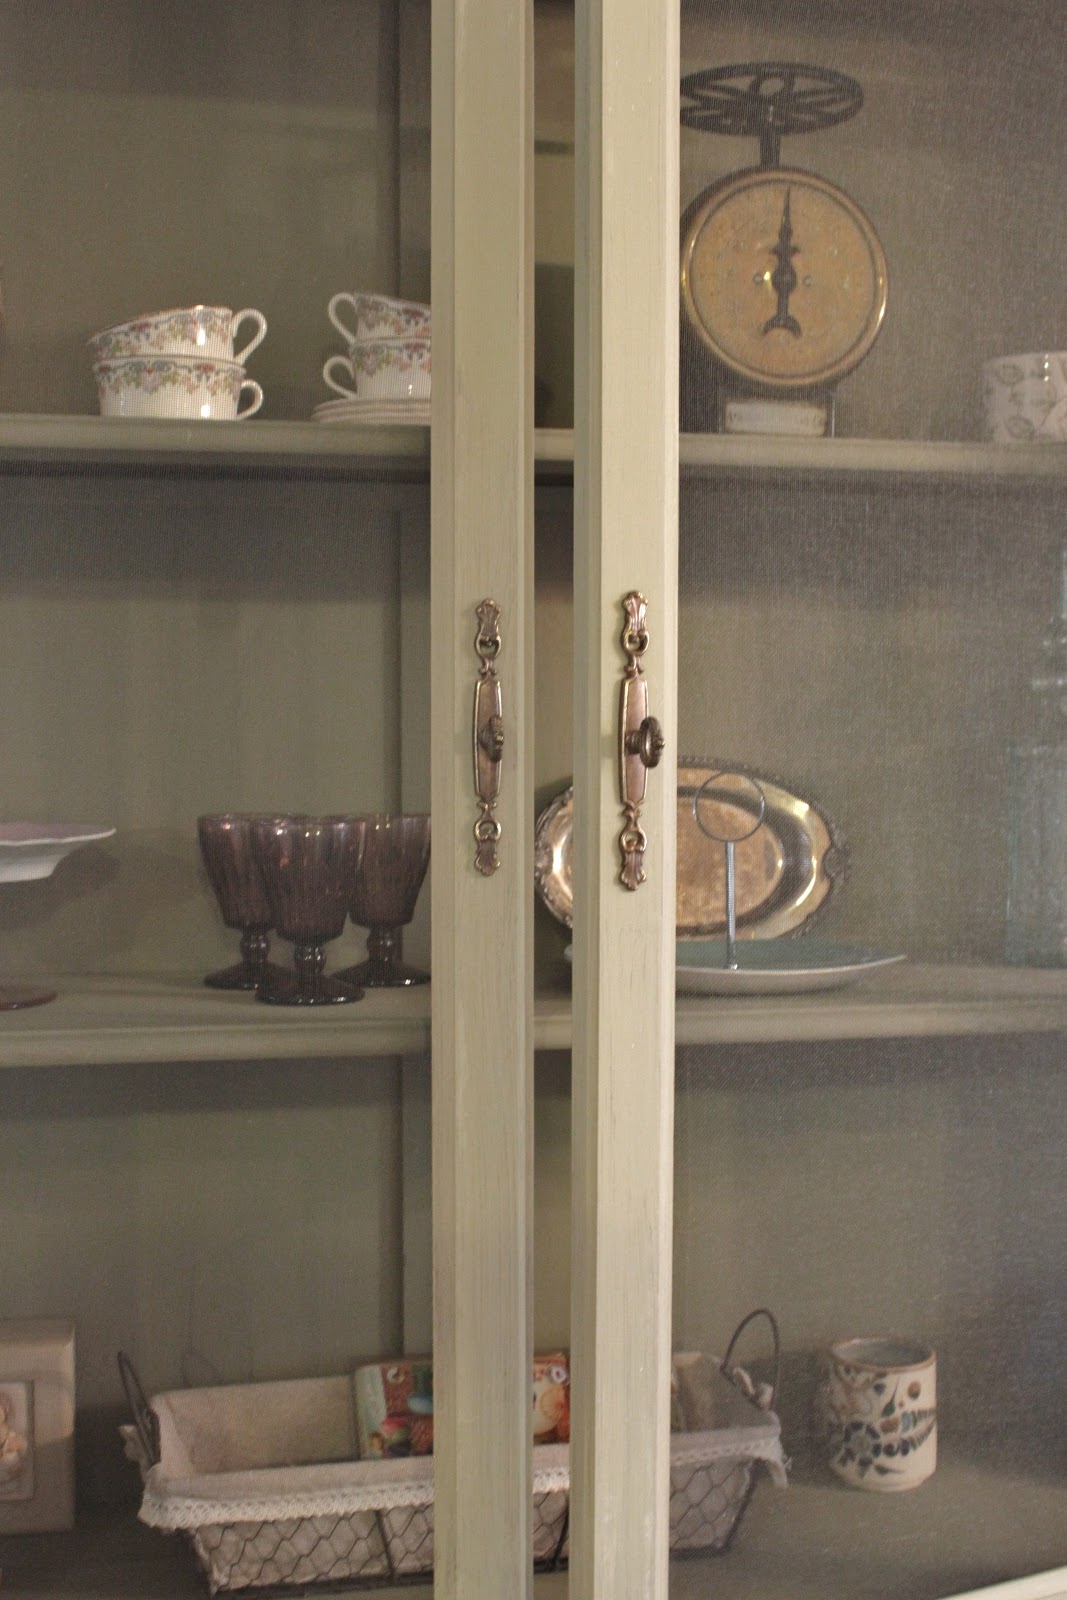
We started by removing the glass and metal screens. They were put in with some sort of rubber so all we did was pull the rubber out, and out came the glass! Easy peasy. In fact we plan on doing it to another display cabinet we have. Next, the doors came off and one coat of paint went on. Giving it one coat of Annie Sloan Chateau Grey gave it the perfect amount of color and age without needing to distress at all. One coat and it looked perfectly weathered and just slightly streaky on its own! I had to practically climb inside to screen the oustide panels (they weren’t actually doors) which was a bit of a pain but they came together nicely. Thankfully, I am a righty and my husband is a lefty so we teamed up and each screened one panel (I was becoming quite frustrated trying to lay inside the cabinet and use my right arm which was practically pinned under me to screen the right panel). Thanks hubs for the help!! The 2 doors in the middle were much easier to screen since they came off. We used Invisible Charcoal Fiberglass screening, .160″ diameter Black Screen Spline, and a Screen Spline Roller to complete the job. All of the screening supplies cost about $15.00 and the whole process was pretty easy to do. My only suggestion is to make sure you do not pull the screen too tight. We had one tear on us. We actually ended up leaving the tear since it was small and adds to the aged look!
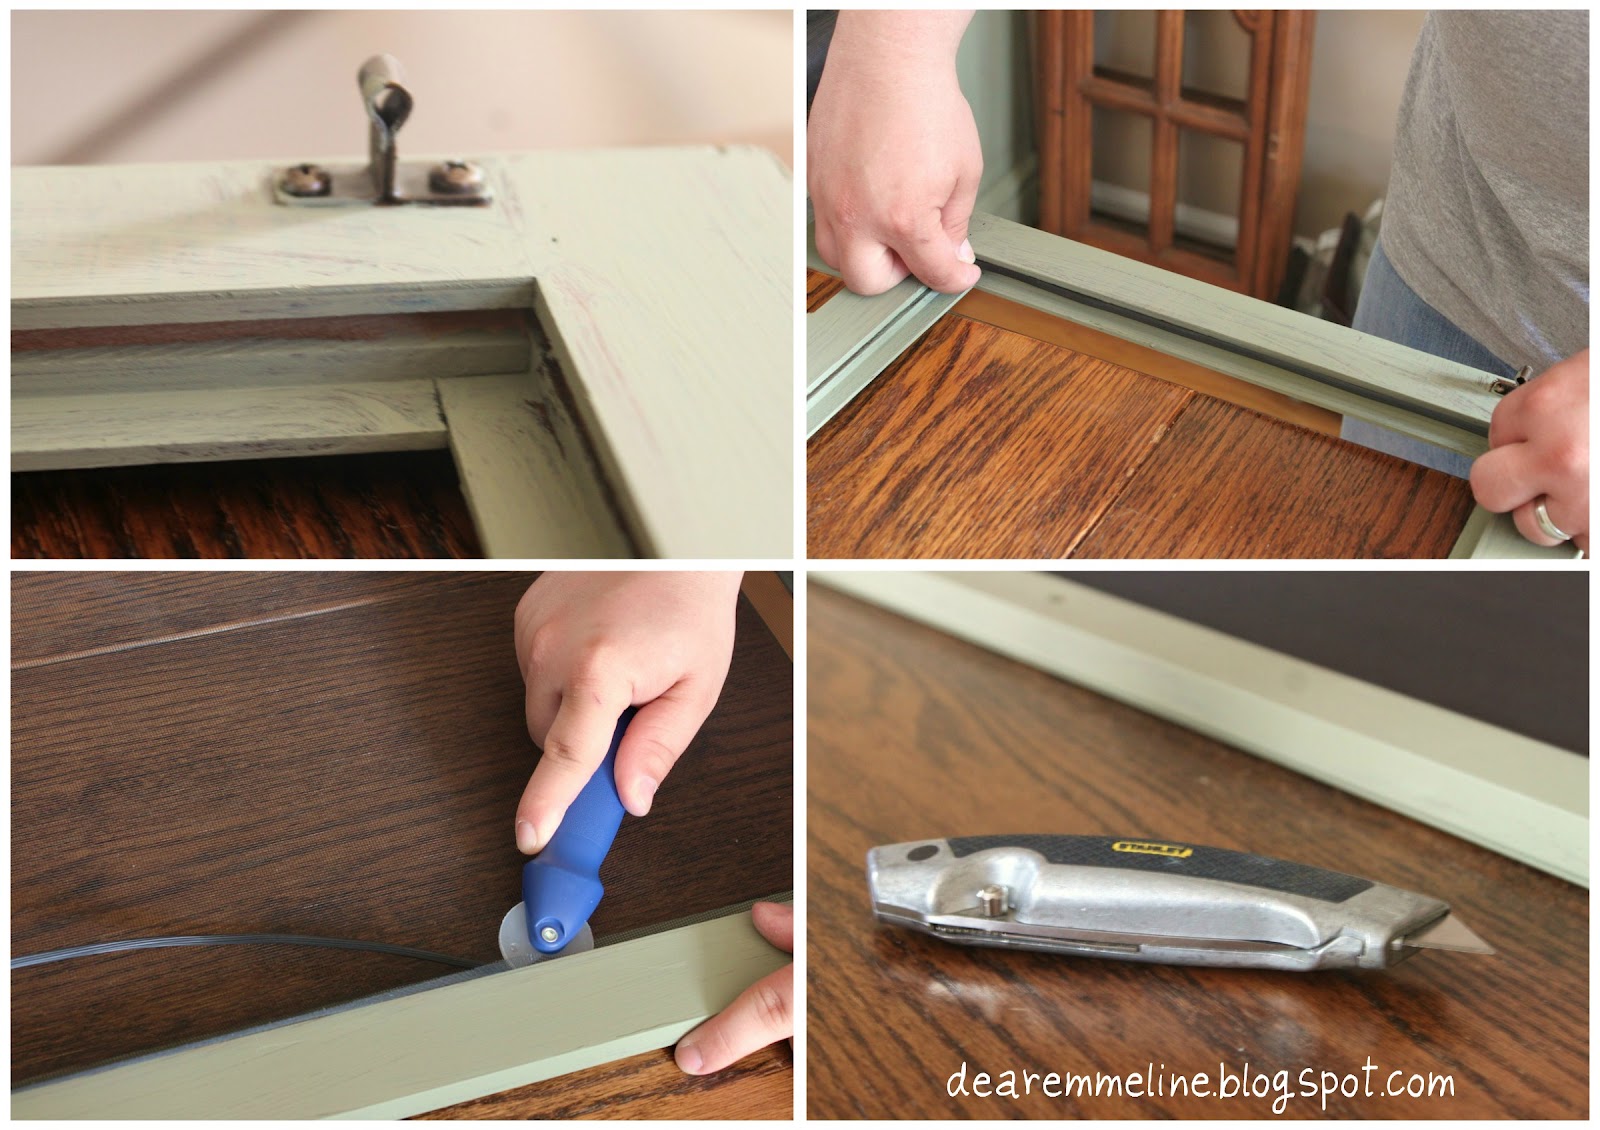
If your glass comes out and the frame has a nice “rut” then this treatment will work perfectly. We did not measure anything exactly…instead we measured our spline by holding it up to the frame (make sure to cut the spline a little shorter than you need because it does stretch a bit). We also layed the screen over the frames and cut (again make sure you cut a few inches extra in each direction). Hold the screen semi-taught as you roll the spline in. I would recommend having a friend help you by holding the screen while you roll the spline into place. This will help keep the screen from shifting and also help get the screen smooth. After the screen is in place use a utility or exacto knife to trim the excess screening. Tada! Your doors are ready to be reinstalled!
Okay, let me remind you of the before and after.
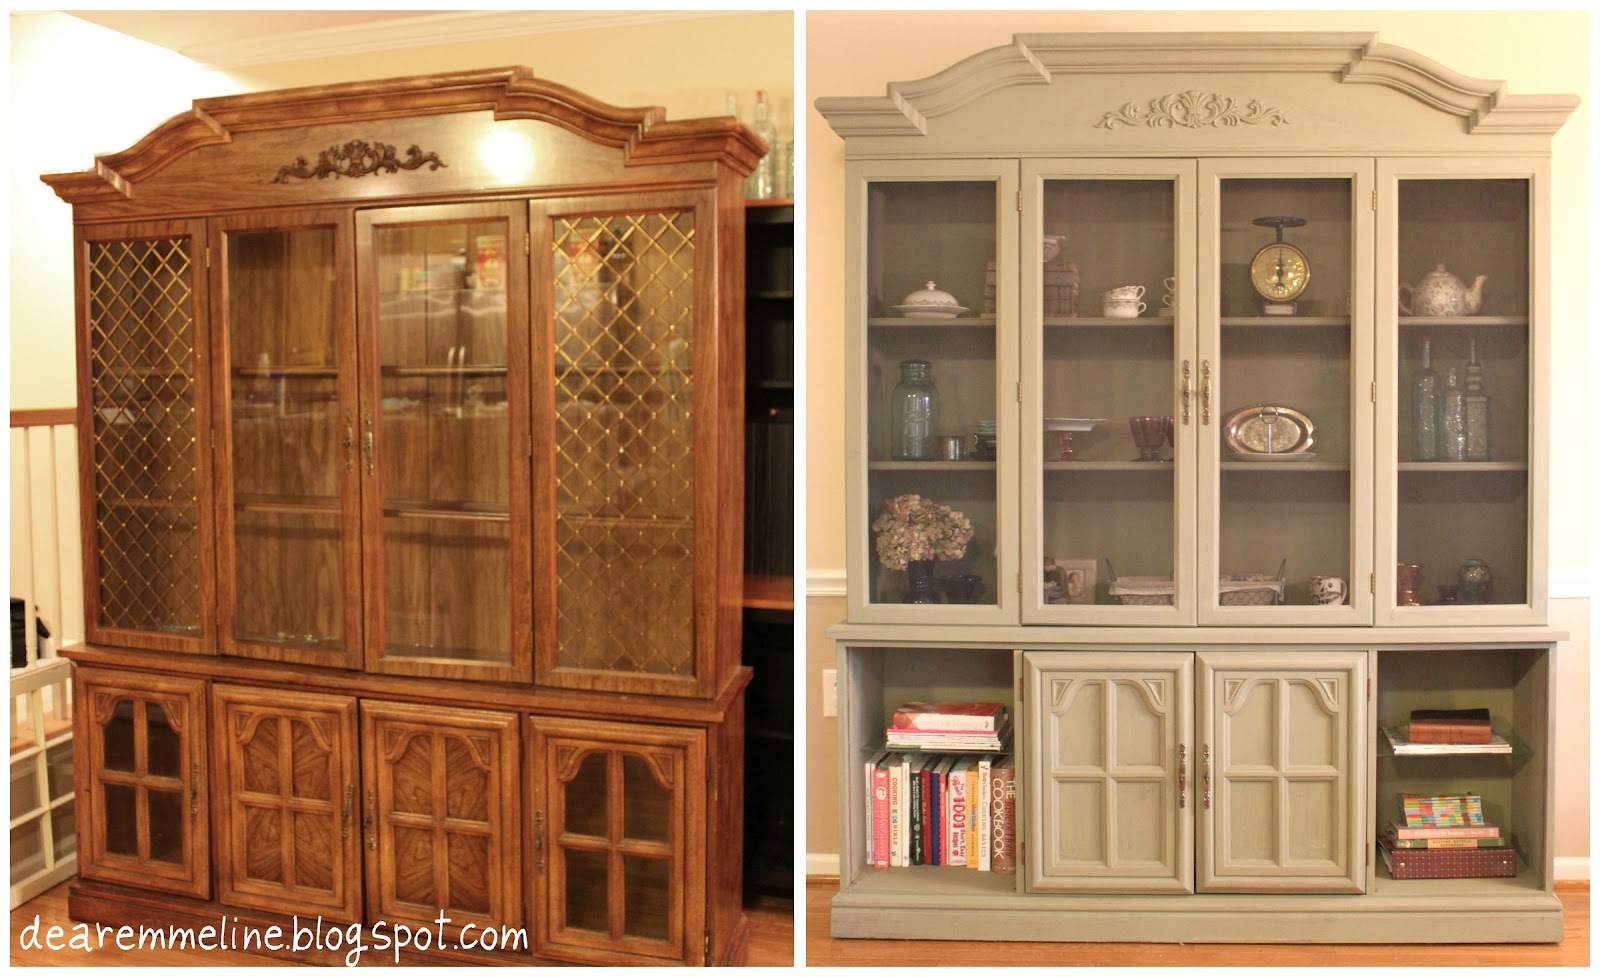 |
| Ahhh, talk about a 180. |


That looks just awesome – what a transformation! I have a china cabinet to redo which is sitting in the garage. It is a hulking project I need to gain momentum for. Seeing your helps – thanks :o)
Stacey
that looks amazing!!!
Thankfully, this project really didn't take very long to finish! Most of the time was spent ripping out the glass and replacing it with screen 🙂 the one coat of paint took about an hour max! Hopefully yours will be just as quick to complete! Thanks for stopping by again and checking out my post!
Thanks Linds.
that looks amazing! i love that you removed the bottom outside cabinet doors … it makes for such a more open feel!
Thanks Cassie! We were forced to remove the doors because removing the glass ruined them but it as a happy accident! We like it better without them.
Great vision! Looks great!
Danielle @ The Retail DIYet
Perfect color with the screen. Great Imagination, really nice work.
Anne
i love the screening, what a great idea. you pulled the whole project together perfectly.
Thanks Danielle!
I really like how the color turned out! Thanks for stopping by.
Thanks! Once we realized there was a place for the screen spline we knew it was the right route to go instead of chicken wire or some kind of metal mesh!
Wow; you guys did great! That cabinet doesn't even look the same now–so fresh, pretty with the new upgrades–fabulous!
🙂 thanks. now I'm just trying to decide if I want to repaint the inside of the cabinet white (or some other light color) so that the items inside are easier to see! hmmm.
This piece is GORGEOUS!! Love it, you did an awesome job transforming it!! Just became your newest follower would love if you followed back.
The hutch looks great and I like the screen! I wouldn't have thought of that but it gets me thinking…
I'm hoping to redo a hutch soon…thanks for posting this redo!
Sarah @ ThriftingAdventures.blogspot.com
You did such a great job! Ripping out glass can be fun! Thanks for stopping by my blog! Come again soon!
Thanks for following! Just visited your site and started following you too! Look for a comment under your Arles end table!
Thankfully our glass pulled right out in big sheets so no breaking was necessary…except to fit them in the trash can 😉
So lovely now! I really like your idea of removing those bottom doors… it opens it up more.
I second what everyone else said…just amazing! Great vision for this piece and great color. Impressive indeed :o)
Thanks for coming by to link up…I would love to have you back this week!
See you there!
Stacey of Embracing Change
What a good eye you had envisioning this piece's future-love the final result-following you from MMS-stop on by for a visit-I'm planning on featuring this on my saturday favorites of the week!!
I am so glad we went for it because I LOVE it in my kitchen/dining area. My husband initially thought he was waisting time and $ picking it up…but he came around!
I'm sure we'll be seeing more of each other! If I can ever get the time to sit down and think/plan I have an idea in the works for my own link party! I'll be sure to let you know.
sighhhhhh. soaking up the inspiration.
come visit anytime–great giveaway right here: http://hellolovelyinc.blogspot.com/2012/04/april-giveaway.html
smiles.
michele
Thanks Claire! I'm going to check out your blo0g right now!
Thanks for stopping by and leaving a comment Michelle. Can't wait to check out your site!
Amazing!! I love everything about this!! You must be loving it so much!
Thanks so much for linking up!! I'm featuring you today!
Thanks so much Emily!
What an amazing job! Visiting from The Rooster and The Hen! Love the open cabinets at the bottom 🙂
blessings,
karianne
Thanks so much Karianne! Just stopped by your blog and love it!!! Recipe wall…yes please! Berry sign…I'll take one of those too! 🙂
What vision – I was a bit frightened of the before but the after is amazing!
Love the screens you added and the doors you removed on the bottom – fun touches
Kelly
Simply amazing! I'm so thrilled to see a piece done in Chateau Gray — I've been contemplating that color for a project and can now see that it would be perfect. Job well done!
Heidi @ Decor & More
Thanks Kelly. 🙂 It was a beast to start!
I wasn't sure how it would look for a big piece but I really love it. It definitely looks more green than gray to me which is what I wanted and I love that since it has a "grayed" hue it isn't bright but more muted and faded looking!
Wow! Turned out beautifully. I just did a china hutch myself and thought it was the most time consuming project of a life time, and yours is twice the size!!! Really amazing job, and great vision!
Thanks Chelsea. Using ASCP really cut down on the total work time. No prep besides removing the doors and we just used 1 coat of paint to give it a more worn look. Screening the doors didn't take too long either but the two outer ones are built in so it was a bit of a pain to get the screen in those!
What an impressive piece and transformation! I'm sure your husband will never question your future makeover visions again. My husband and I work on projects together as well and he doesn't get it until I am almost done too. Well done!
Hmmm, It is pretty although I use Kilz primer, spray paint, and tinted gloss. I know the chalk paint is all the rage but I have used it and am not on the band wagon. The screen is amazing though!
Since we've moved and are redoing out kitchen it will be getting another makeover! I like chalk paint for certain paint projects but definitely use what I think is best for a piece (milk paint, latex, or spray). This time around it will probably be a milk paint mix or latex it's WAY to big for spray paint.
Great Job!! I'm so inspired I'm looking at exactly the same hutch on craig's list this very moment in my area! Tell me more about how the screening spline works? Also I'm thinking about going with an even lighter color. If I decide to take on this project I might need some pointers! I hope you don't mine if I copycat you!