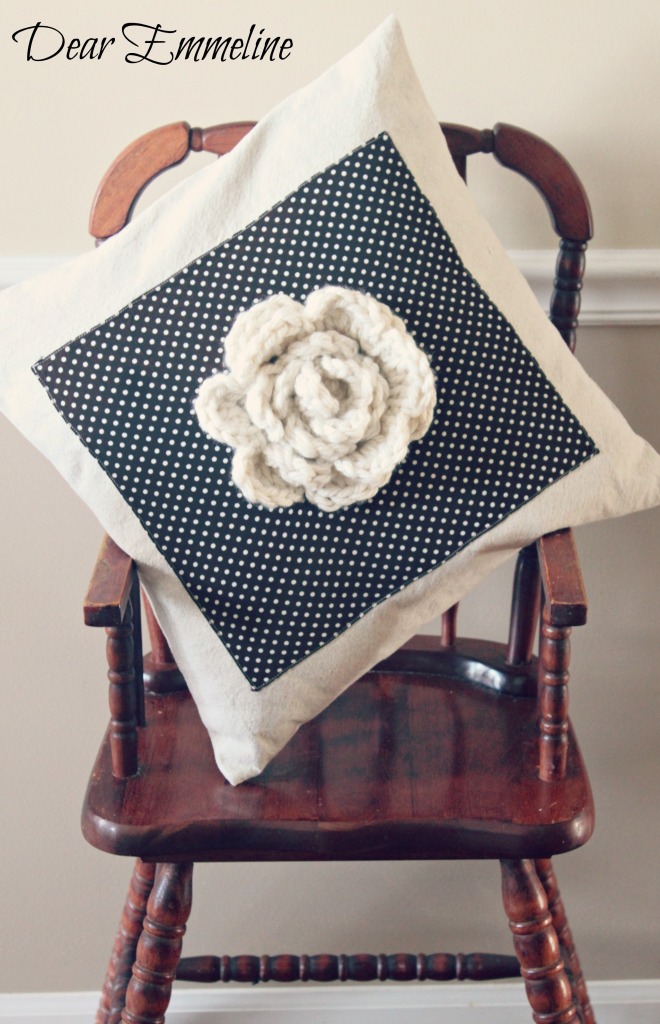
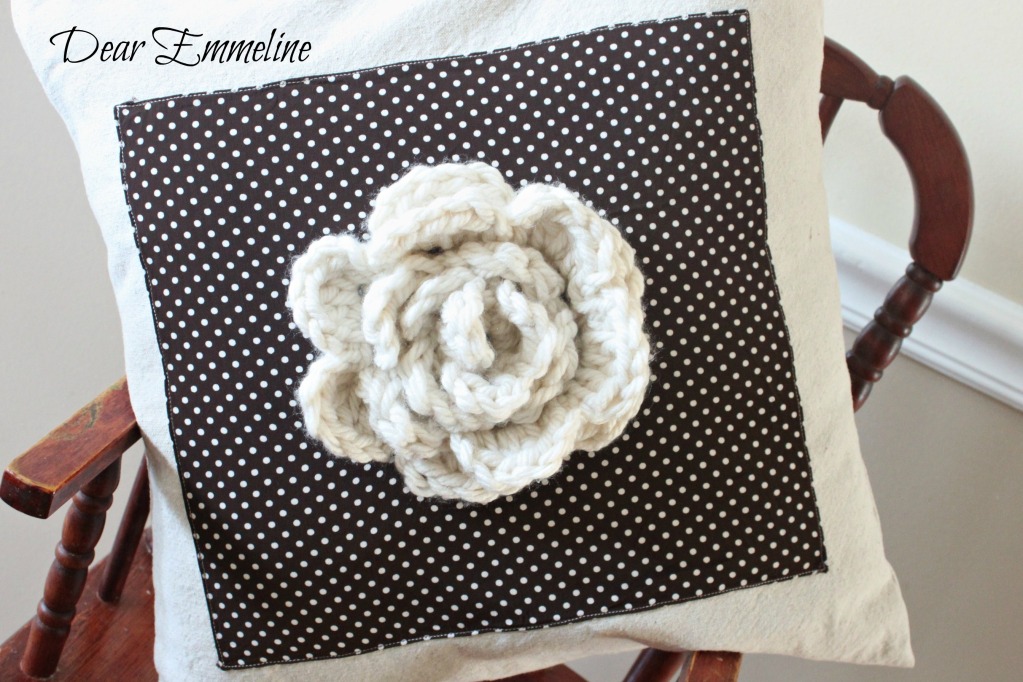
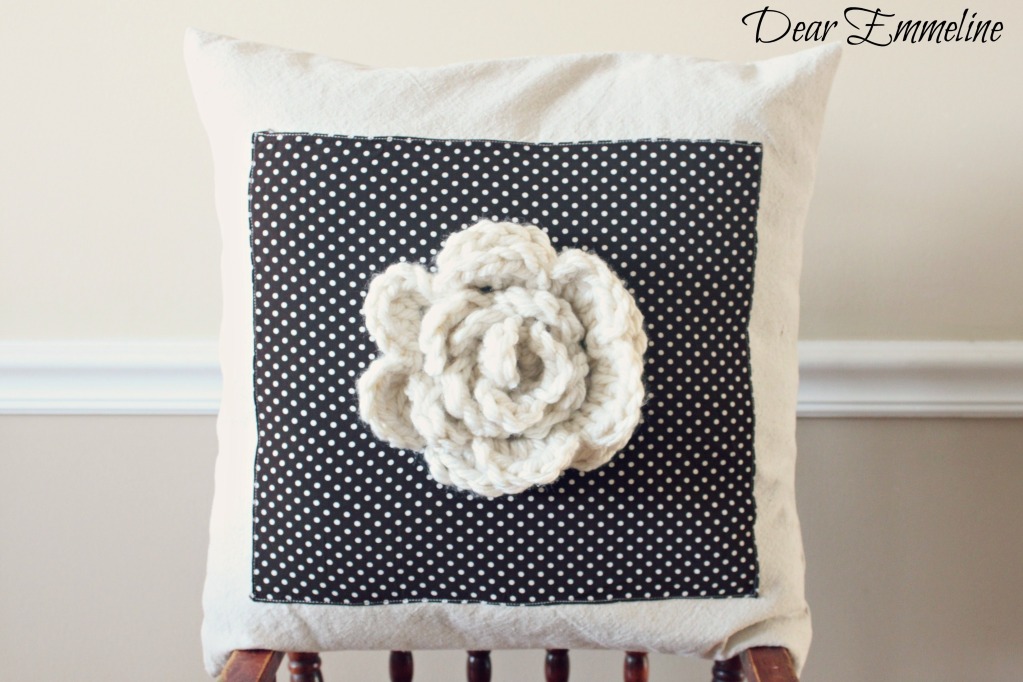
Hello all! Thanks for stopping in. Day three of Pillowpalooza brings a polka dot number perfect for fall. The chocolate brown handkerchief and bulky cream yarn just make me want to snuggle up under a cozy blanket with a cup of hot cocoa. Yum!
The start of this pillow is the same as the Tie Back Pillow I shared yesterday. I will include the written directions here but in the interest of space you’ll need to stop over at yesterday’s post if you want to see the accompanying pictures.
Materials Needed:
drop cloth
handkerchief
bulky yarn
11.5mm crochet hook
pins
sewing machine and thread
needle (with eye)
pillow form
1. Buy a pillow form or pull out an old throw pillow.
2. Measure the pillow to determine how wide to cut your piece of drop cloth. My pillow was 18″ long so I cut my drop cloth 20″ in width so that I had and inch to work with on both sides.
3. I wrapped the drop cloth around my pillow to give myself a good idea of how long to cut the drop cloth. I overlapped the drop cloth giving my self a good 3+ inch overlap and allowing an inch on each side to make nice seams.
4. The entire cut piece measured 20″ x 41.5″
5. I cut my fabric so one of the ends (20″) already had a finished seam!
6. To complete the unfinished edge first fold the fabric in 1/2 inch and pin the length of the fabric.
7. Next, fold the 1/2 inch of fabric again while removing pins and replacing the pins back through both folds.
8. When finished you should have made two 1/2 inch folds to create one 1/2 inch seam.
9. Sew, removing the pins as you sew. Now both ends (20″) of the fabric should be finished.
___________________________________________________________________________

Now we’ll start into where this pillow becomes different!
1. Lay your fabric out right side up and fold one end in 9″.
2. Mark the center spot along this line (10″ in from each side).
3. Center a handkerchief on this spot and pin.
4. Sew around edge of handkerchief trying to stay on top of the original hem stitches of the handkerchief.
5. This will be the center of your pillow front.
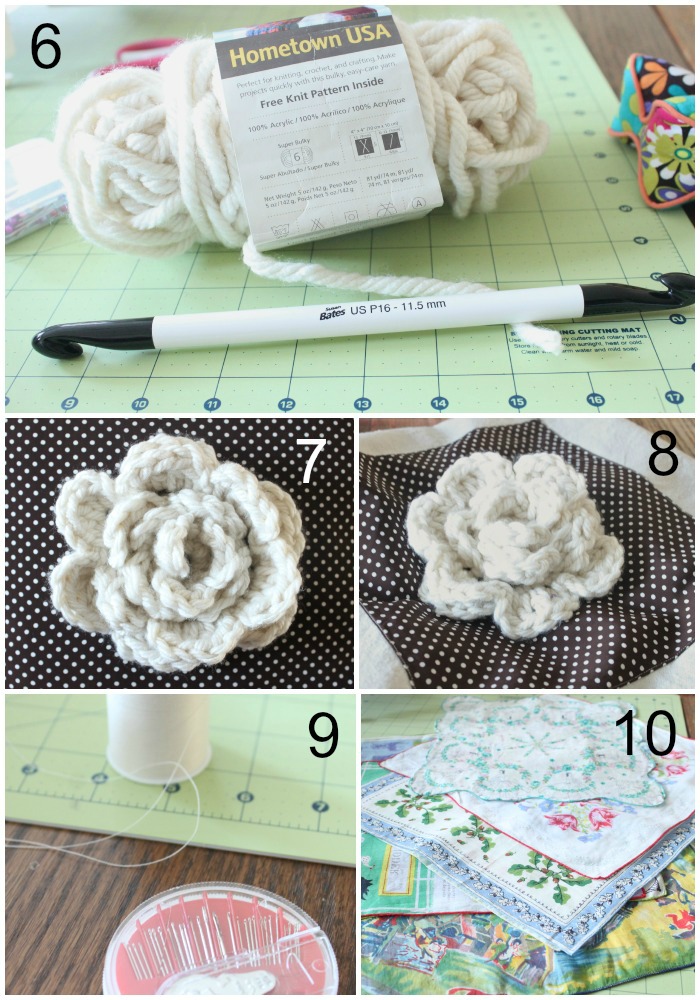
6. Gather supplies to create or buy a large crochet flower.
7. I used this crochet flower brooch pattern from Crochet Flower Patterns.
8. Center and pin the flower on top of the handkerchief.
9. Hand sew the flower into place (If you can tell from the picture I had already sewn my pillow up so this was difficult. Do as I say and not as I do and sew the flower on first!).
10. You could use any handkerchief for this pillow. In that case you may choose to forgo the flower but all the other steps would be the same.
To finish:
Fold the drop cloth back up as in step 1 and sew along the unfinished edges. Flip and pop in your pillow form.
So glad you were able to stop in today and I hope you can join in again tomorrow. Make sure to stop back in on Friday when I will be giving away one of the covers I have featured this week!!
If you missed any of Pillowpalooza feel free to catch up!
Pillowpalooza Day 1 {Origami Pillow}
Pillowpalooza Day 2 {Tie Back Pillow}
so cute! i could sew one if you crochet me the flower… 😉
This is beautiful!
Maybe I should make some and actually put something in my Etsy shop! 😉
Cute as a button! I'll have to look for the bulky yarn!
Love the flower! Learning to crochet is something I really need to do.
You should sell just the flowers also, I just ordered some from Etsy (burlap ones) for my burlap wreath because I just didn't have the patience to do it myself!
Great pillow!
Thanks Rebecca. I'm thinking after the fall market is over I might sit down and crank some out!
This is sooo pretty. I love the crocheted flower in the center!
this is beautiful! I love the black and white polka dots and the crocheted flower!!!
Thank you Laura!