It’s day two of Pillowpalooza! If you were here yesterday for pillow #1, welcome back. If you missed it, go check it out! If you are completely new to my blog, thanks for stopping by and I hope you will come back and visit again!
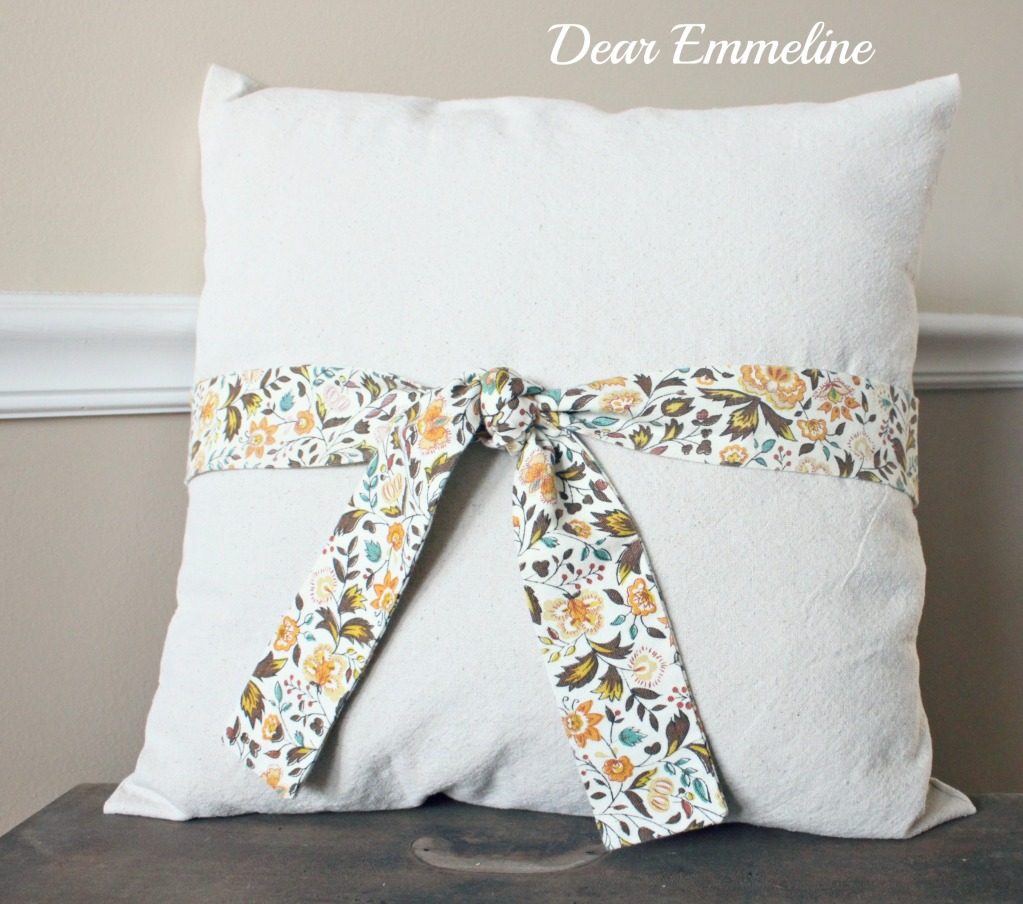
Pillow two was created with some cast off curtain tie backs and one cut of drop cloth!
Materials Needed:
drop cloth
3 curtain tie backs (at least 20″ long)
sewing machine
pins
coordinating thread
scissors
pillow form (or old throw pillows)
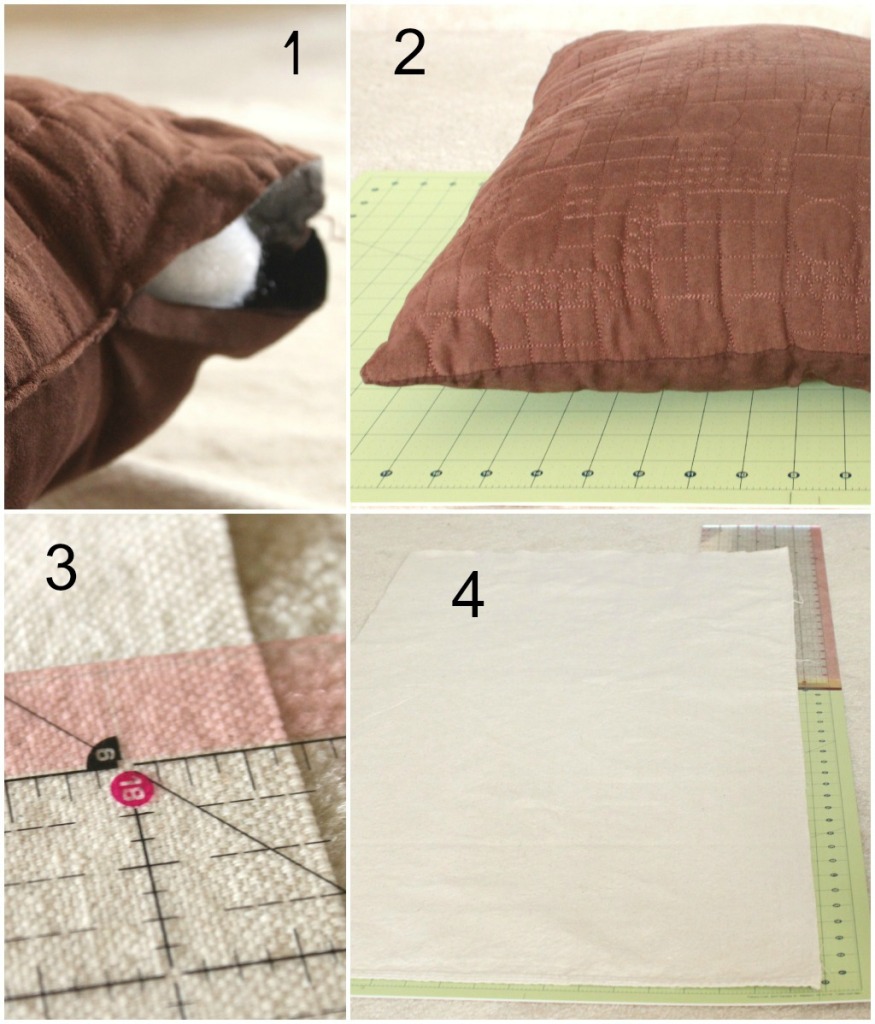
1. Buy a pillow form or pull out an old throw pillow.
2. Measure the pillow to determine how wide to cut your piece of drop cloth. My pillow was 18″ long so I cut my drop cloth 20″ in width so that I had and inch to work with on both sides.
3. I wrapped the drop cloth around my pillow to give myself a good idea of how long to cut the drop cloth. I overlapped the drop cloth giving my self a good 3+ inch overlap and allowing an inch on each side to make nice seams.
4. The entire cut piece measured 20″ x 41.5″
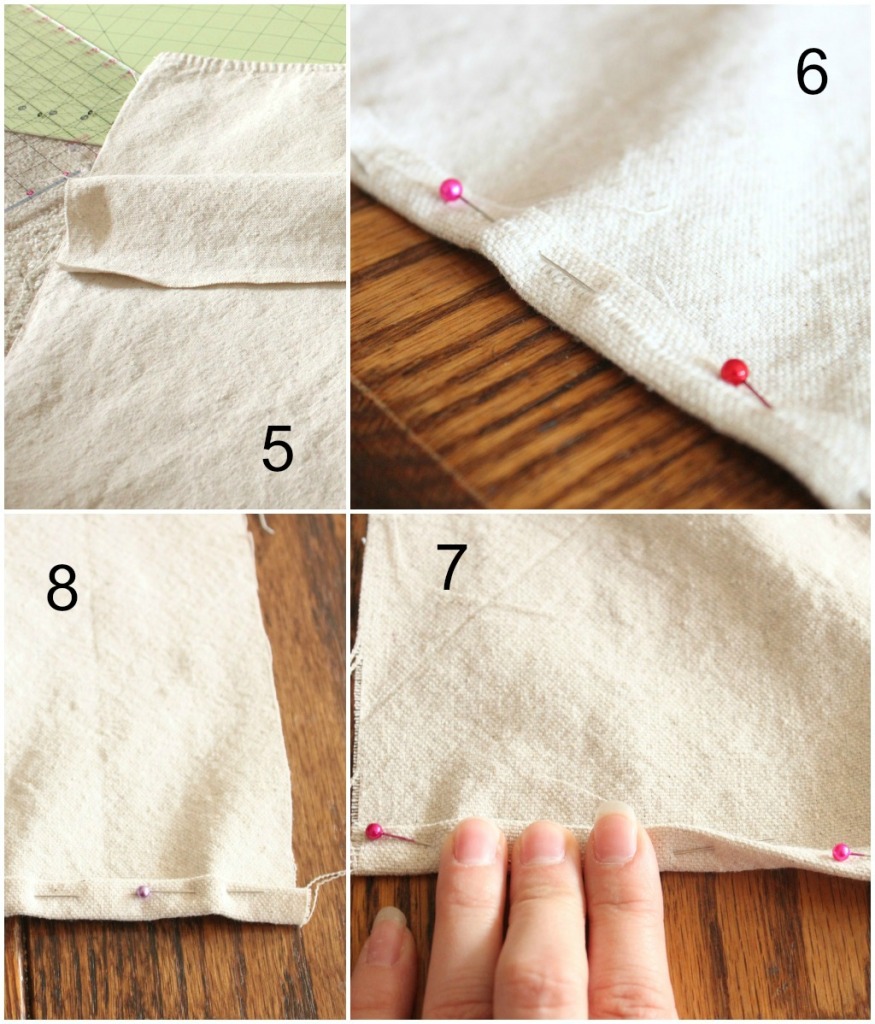
5. I cut my fabric so one of the ends (20″) already had a finished seam!
6. To complete the unfinished edge first fold the fabric in 1/2 inch and pin the length of the fabric.
7. Next, fold the 1/2 inch of again while removing pins and replacing through both folds.
8. When finished you should have made two 1/2 inch folds to create one 1/2 inch seam.
9. Sew, removing the pins as you sew. Now both ends (20″) of the fabric should be finished.
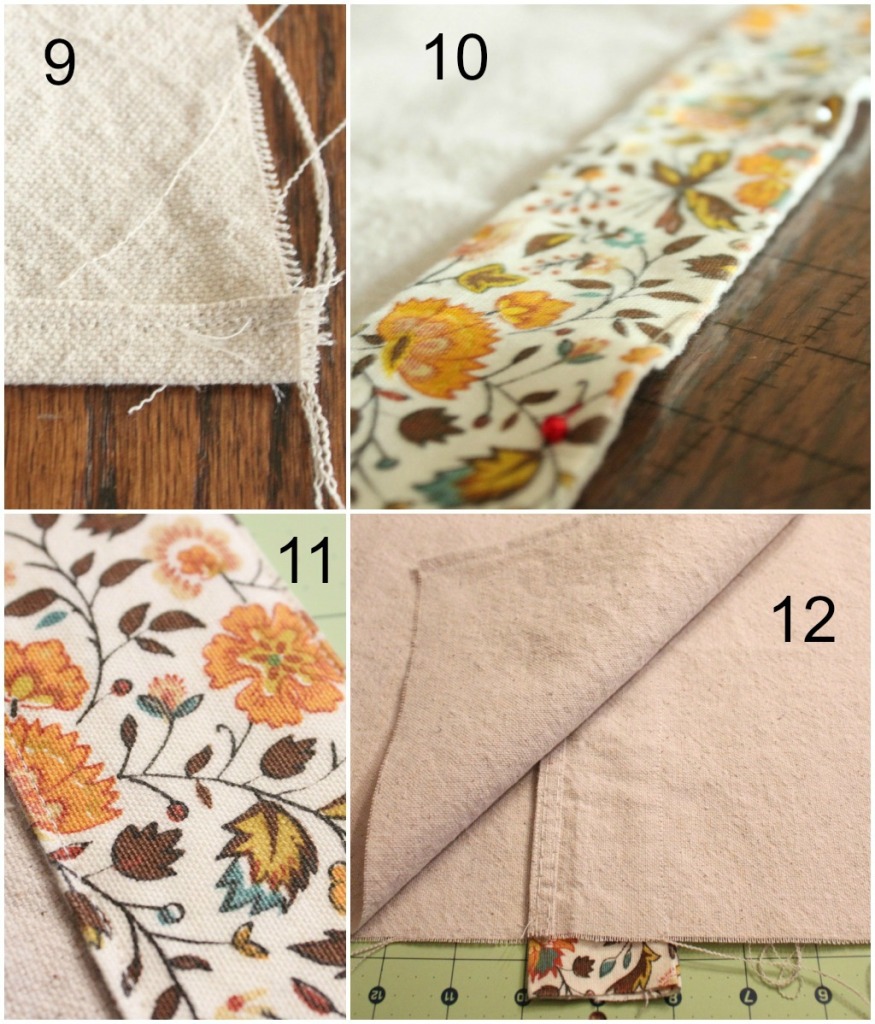
10. Line curtain tie back along the edge of one (20″) drop cloth seam and pin. It needs to be on the side that will be the outside of the pillow.
11. Sew the outer and inner edge of the curtain tieback to the drop cloth.
12. Fold the center of the tieback/drop cloth to the center of the pillow (right side facing in, wrong side out). Since my pillow is 18″ x 18″ I needed the middle of the tieback/drop cloth to rest on the 9″ (from the fold) mark. Since my tie back was roughly two inches wide 9″ from pillow center to the fold + 9″ to the center of the tie back plus 1″ from the center of the tie back to the edge means my center line should be 19″ from the tieback edge. Mark and ford to this point. Fold the other side over top to create a total length of 18″ (the other direction should still measure 20″ because they have not been seamed yet)!
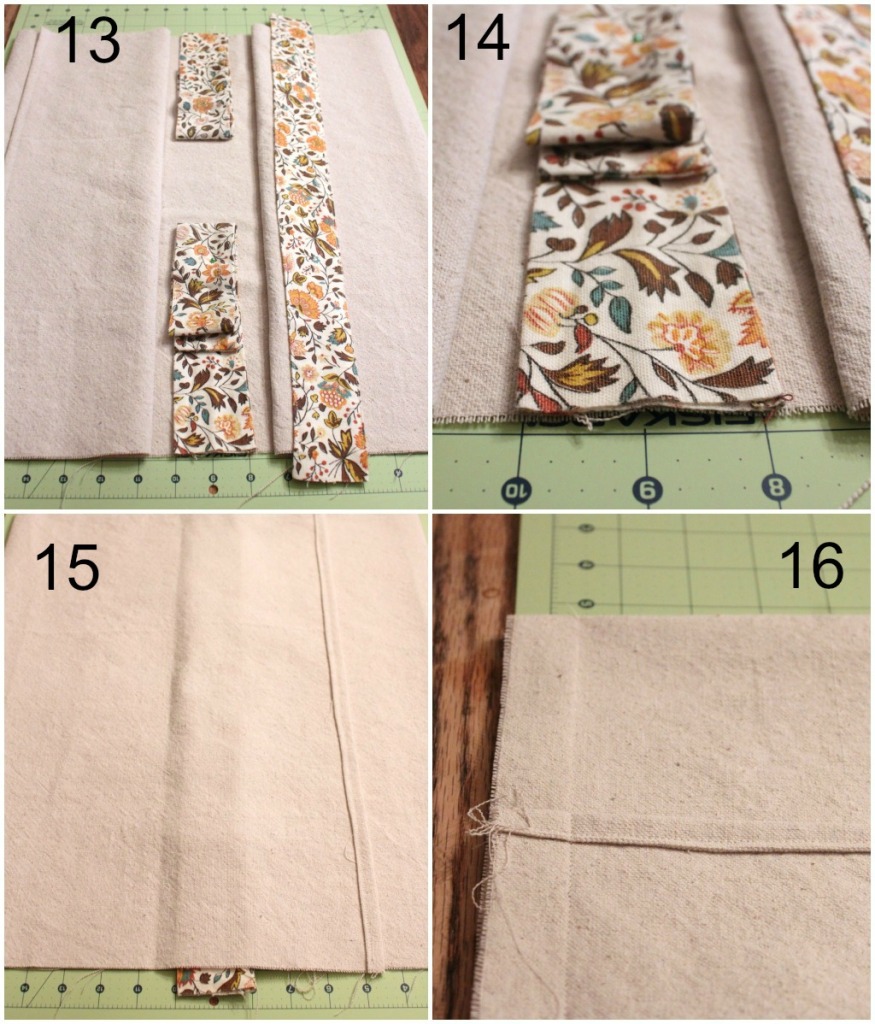
13. At the center line lay the remaining two tie backs along the edges to be seamed. Fold and pin the extra fabric so that the tails do not get in the way when sewing.
14. Closeup
15. Once the pillow is all folded up pin along the ends and trim off ant tie back excess that hangs past the end of the drop cloth.
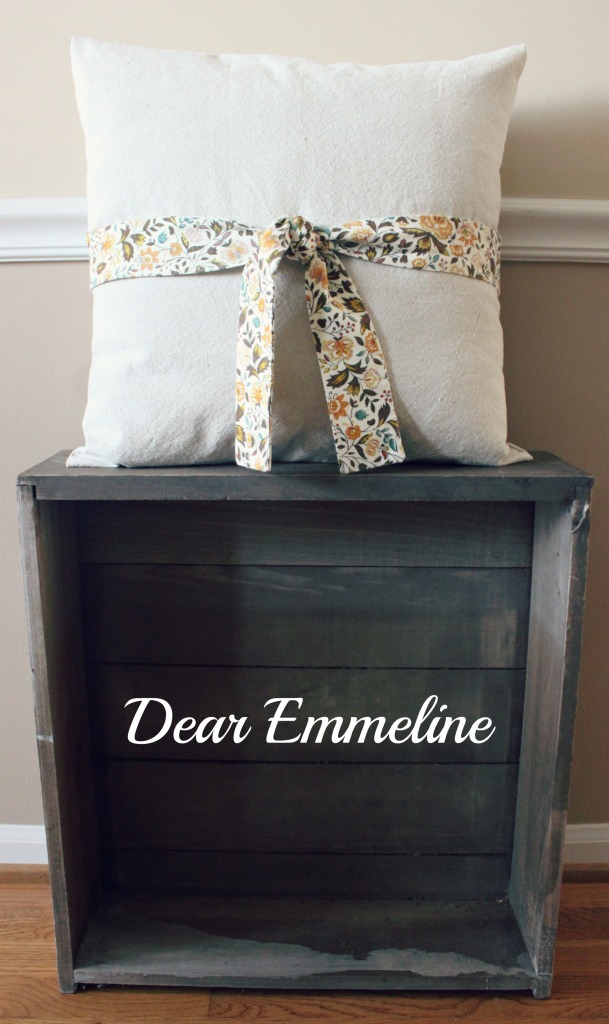
16. Sew the two seams and trim off half of the fabric on the outside of the seam (this will give you nice clean seams that lay flat and aren’t bulky). Flip the sham, stuff with a pillow form, tie, and set out to enjoy!
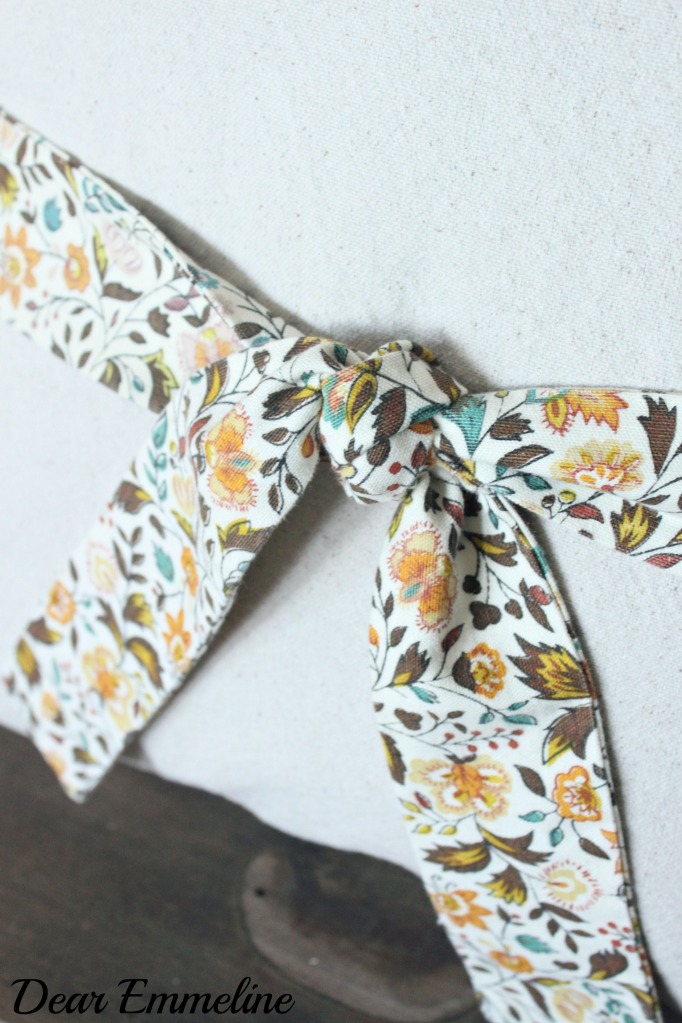

If you use cast off tie backs like I did they might not be exactly the same size therefore not lining up perfectly at the side seams. But, that’s okay with me! Just adds to the home made character. 🙂
Thanks for stopping by!
Make sure to stop back in on Friday when I will be giving away one of the covers I have featured this week!!
If you missed any of Pillowpalooza feel free to catch up!
Pillowpalooza Day 1 {Origami Pillow}
I love this pillow! I wish I had the math skills and patience you do, I'd just eye it and have it all messed up!!
I love how your pillow came out! x
This pillow is so cute. I have a link party on Wednesdays, and I would love it if you would link this and any other posts. It is called Wednesdays Adorned From Above Link Party. It runs from Wednesday to Sundays.
http://www.adornedfromabove.com/2012/09/natural-coconut-bubble-bath-and.html
I hope to see you there. I am your newest follower, and I would love for your to follow me also. Have a great Day.
Debi Bolocofsky
Adorned From Above
http://www.adornedfromabove.com
This one is super sweet! Love the drop cloth!
Pillowpalooza sounds like too much fun, I will have to check out pillow #1! LOVE this pillow! I love the drop cloth too, such pretty texture. And the tie is just too cute! I would be thrilled if you shared this at my Throwback Thursday party 🙂 I hope to see you there and thank you so much for sharing! http://www.hubbymademe.com/throwback-thursday-no-12/
That came out great!!!! I think I may have to spend some time at the machine here soon.
This is too cute, Jessica! I LOVE that tie!
Thanks Kristi!