Our.Bed.Is.Done!!! I’ll give you a full tutorial later this week but I am going to start with telling you about the process of choosing how to weather the raw wood we used to build the bed.
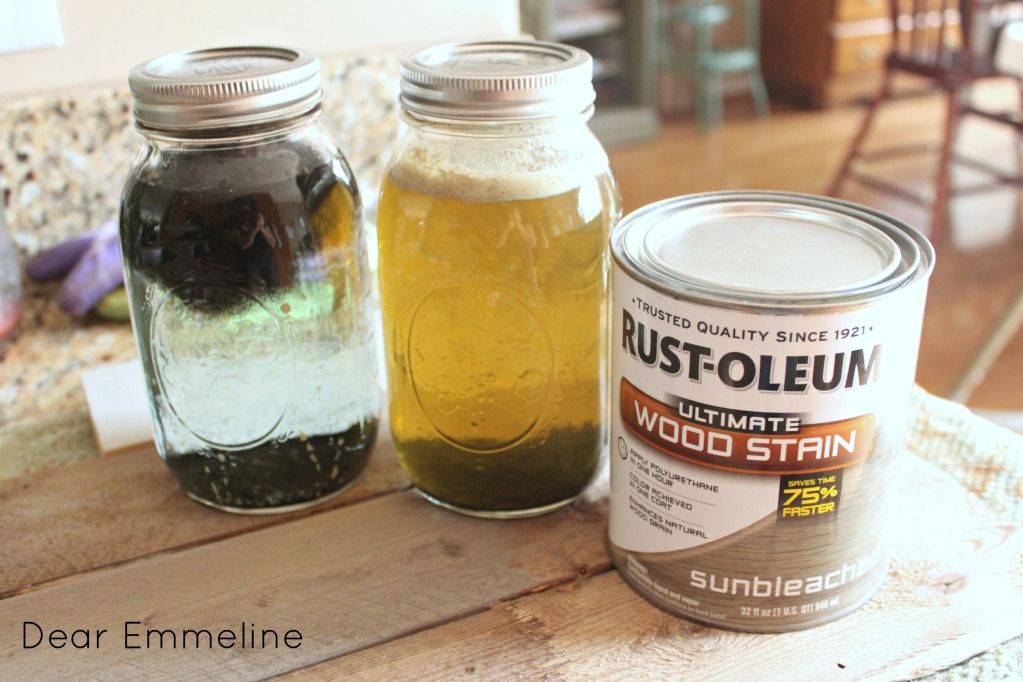
The experimentation process involved scraps of the bed wood, Rust-oleum sunbleached wood stain, steel wool and white/apple cider vinegar.
To make a batch of steel wool and vinegar oxidation stain we purchased large canning jars and simply put a chunk of steel wool in each jar then filled jar 1 with distilled white vinegar and jar 2 with apple cider vinegar. Make sure to leave room because the process releases gas and I was afraid our jars would explode because my husband filled them too close to the top and they were building up a lot of pressure. Let the jars sit for about a week before testing on your scraps of wood. We tried earlier (3 days) and while it did discolor the wood a little it was not very noticeable.
I have heard about using black tea on the wood to speed up and enhance the oxidation process and have tried it on a wood cheese box BUT the wood turned soooo dark and got this weird dusty, rusty smelling film over it as it dried so I decided to skip it this time and see what happened! My conclusion unless your wood does not change color at all is that it is a completely unnecessary step.
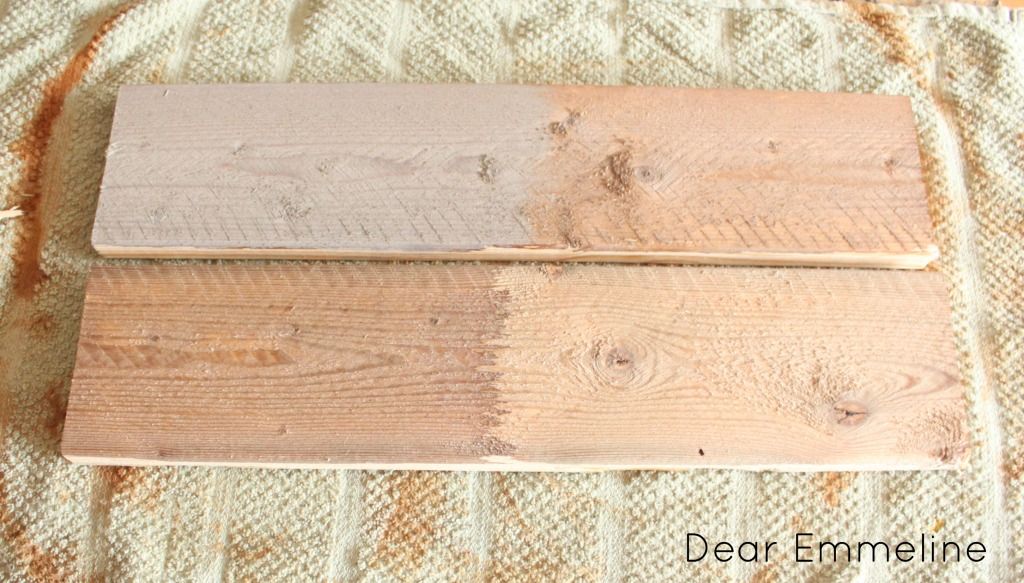
Top left: sunbleached stain over apple cider vinegar mix
Top right: apple cider vinegar mix after 3 days
Bottom left: apple cider vinegar mix after 1 week
Bottom right: distilled white vinegar mix after 3 days
In the picture below you can also see a raw board with the sunbleached stain (top) and a board that has the sunbleached stain over highly concentrated distilled white vinegar mix (2nd).
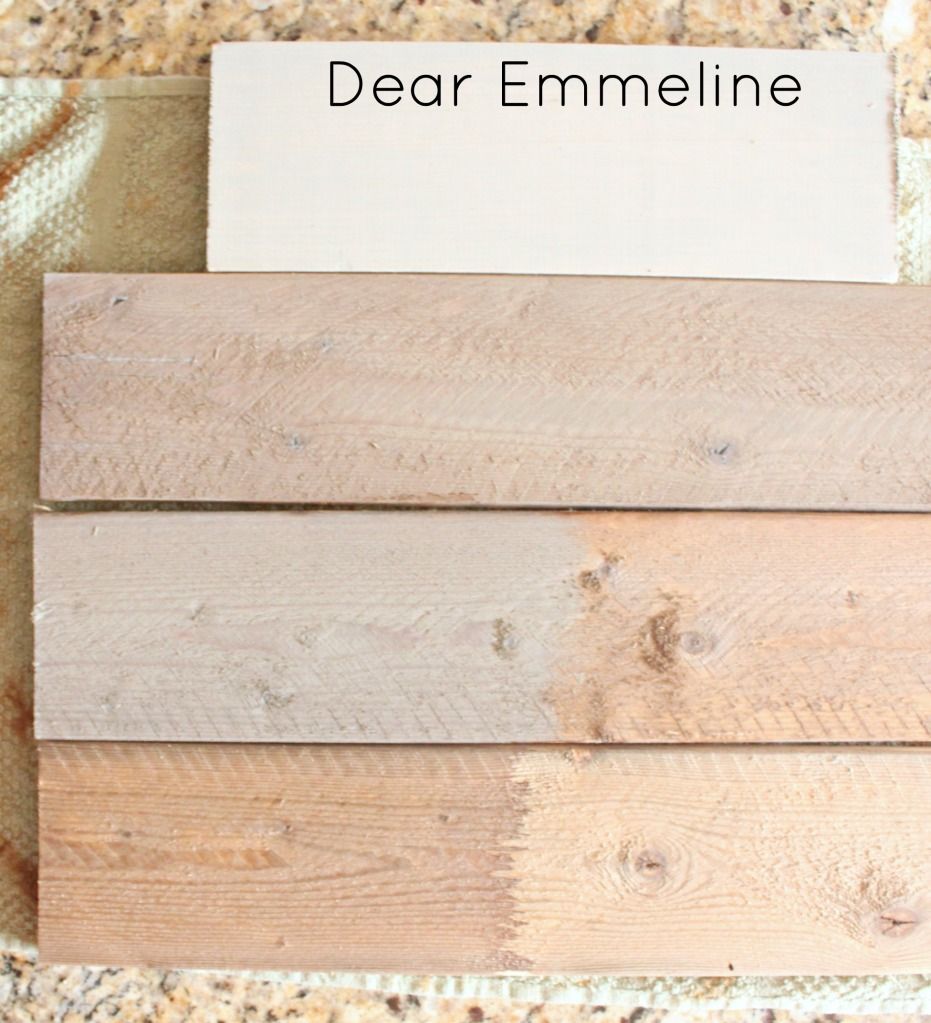
My favorite sample was the sunbleached stain over the highly concentrated vinegar stain but we had a hard time duplicating the results (as seen on the third board {left side} above).
So? Which staining process did we go with? Check back later this week for the final reveal!


Wow. This is fantastic. Can't wait to see which one you went with.
This is great! I want to give it a try. I can't wait to see your reveal 🙂
Love the experiment! I'm getting ready to age a mantel for my kitchen. Thanks for the tips!!
Thanksur project Michelle! Good luck on your mantel!
This is so helpful…pinning this..xo
Very interesting. I have used vinegar as an oxidizing agent before. It was interesting to see it applied to raw wood.
Distressed Donna Down Home
I have used the vinegar and steel wool technique before and it comes out beautifully!
I’d like to invite you to join us at the Clever Chicks Blog Hop this week! http://www.the-chicken-chick.com/2012/10/clever-chicks-blog-hop-5-happy-hen.html
I hope to see you there!
Cheers!
Kathy
The Chicken Chick
Very cool ideas…I had heard about the vinegar so I have to try that. I am busy with your chalk paint recipe for now :o)
Thanks for linking up!
Stacey of Embracing Change
Just stopping by to invite you to My Wednesday Linky party. http://diycraftyprojects.com/2012/10/whatcha-work-up-wednesday-linky-party-6.html
Awesome! Thanks for linking up at Feathered Nest Friday!
Thanks so much for sharing these techniques. Just in time as I am starting to add weathered signs to my business. Excellent tutorial, I can't wait to see the followup next week. Thanks again.
Thanks Jeannie! The bed reveal and plans are now up in two seperate posts.
http://www.dearemmeline.blogspot.com/2012/10/the-building-of-bed-queen-bed-frame.html
http://www.dearemmeline.blogspot.com/2012/10/and-finish-is.html
ooooo i can't wait to try this!
Thanks so much for linking up last week at the Humble Brag! Hope to see you back tomorrow to link up more great projects and see if you were featured and/or won the free ad space.
http://www.oneprojectcloser.com/the-humble-brag-link-party-5/
Such a great post! I pinned it…so useful!
Great post and it's interesting to see how each treatment turned out! Thanks for posting and I have this linked to my weathered wood post too today.
Hi! Just found your blog through Pinterest, I don't often find my name with my spelling used, what's the story behind 'Dear Emmeline'?
Also, love your craft work! I have my own brand, Emmeline Jane Designs where I create beautiful handmade designs, some of my work is on Pinterest!
Emmeline x