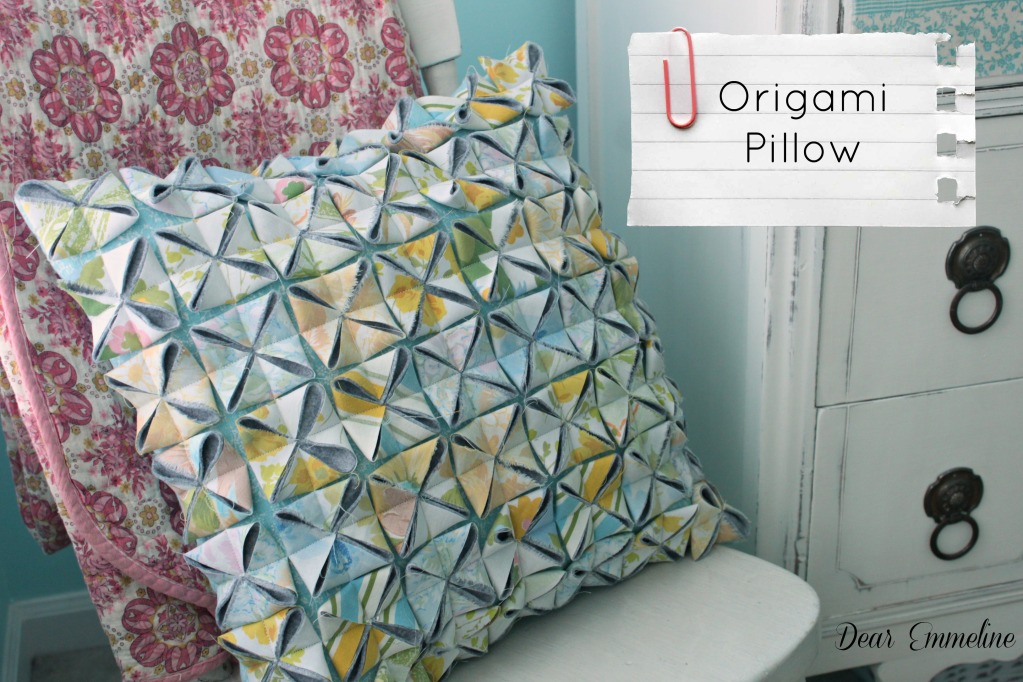
All the spring and Easter pins flying around Pinterest have me in the mood to break out my vintage sheet stash and start creating some more goodies for my daughter’s room. Back in September I had the opportunity to guest post over at Primitive and Proper and shared an origami pillow I made for my daughter from felt and vintage sheets. In case you missed it I’m bringing it back to share today.
I was inspired by this felt pillow.
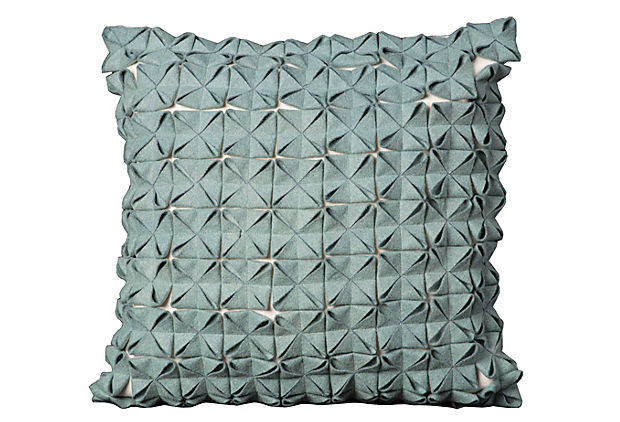 |
| via One King’s Lane |
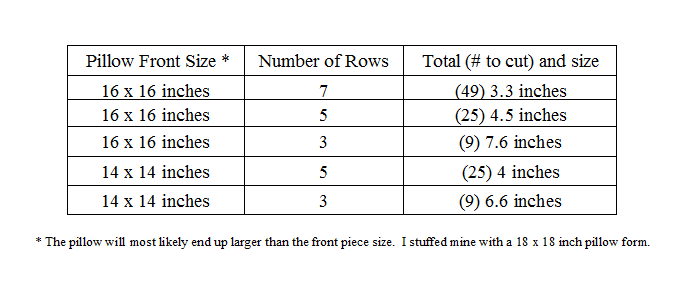
I thought the origami style folds wold look great made to look like a mini quilt. So I set to work coming up with a pattern (ie math equation) to find out the size of squares I needed to replicate this look. Long story short I ended up using the Pythagorean theorem and have made a chart to make the process of determining your square sizes as easy as possible.
I chose to make my pillow 7 squares x 7 squares totaling 16 inches x 16 inches.
To determine the size of each finished square I divided 16 inches/7 squares= 2.3 inches.
I’ll spare you the details of why the formula actually works but to determine the size square to cut you need to divide (your final square size) by the square root of 2 (1.4) and then multiply by 2.
In this case:
2.3 inches/1.4=1.64 x 2=3.3 inches
So for my 16×16 front with 7 rows of 7 squares I need to cut 49 3.3″ squares.
All that math would probably make most people throw in the towel so I’ve made it easy for you and have given you the cuts you need for several different pillow options.
Now that we know what size pieces we need to cut let’s get started!
Materials:
fabric (I used vintage sheets)
wool felt
scissors
LOTS of straight pins
cutting mat and ruler
sewing machine
pillow form
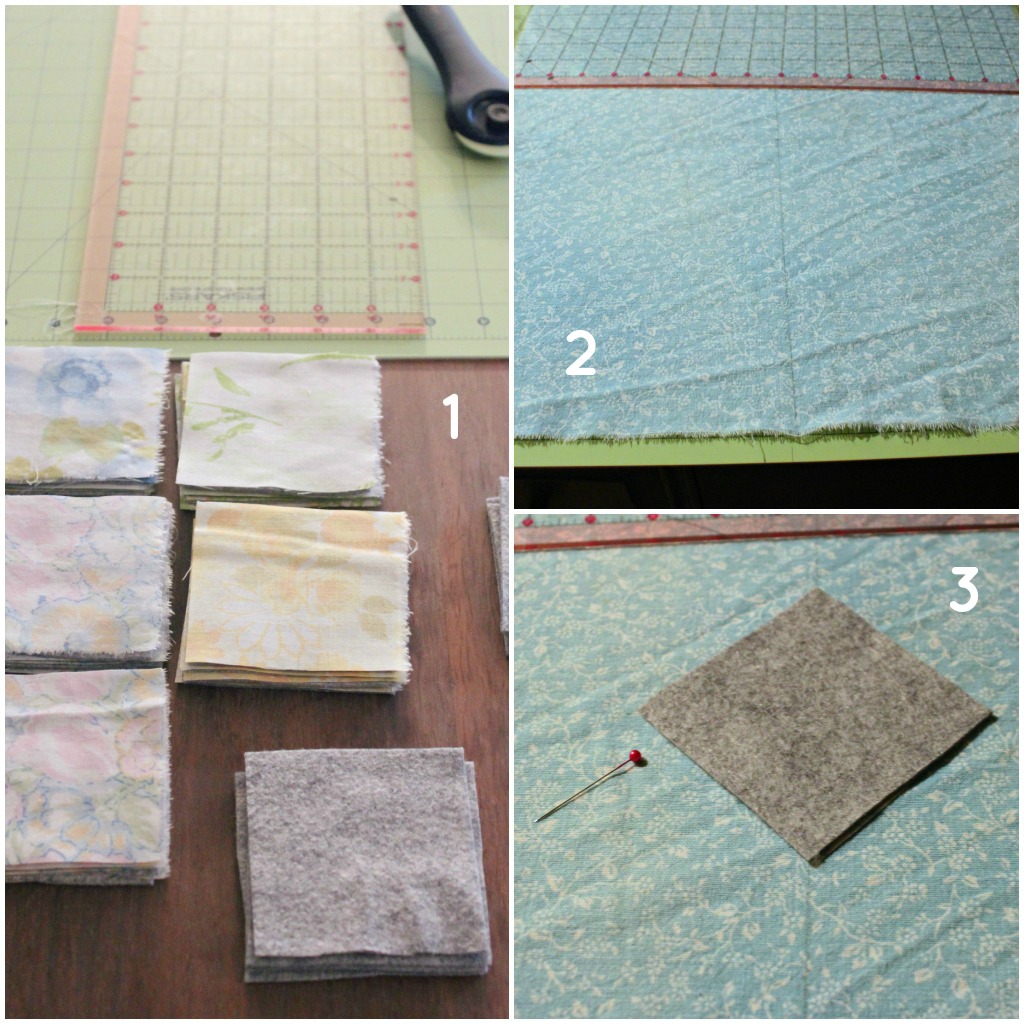
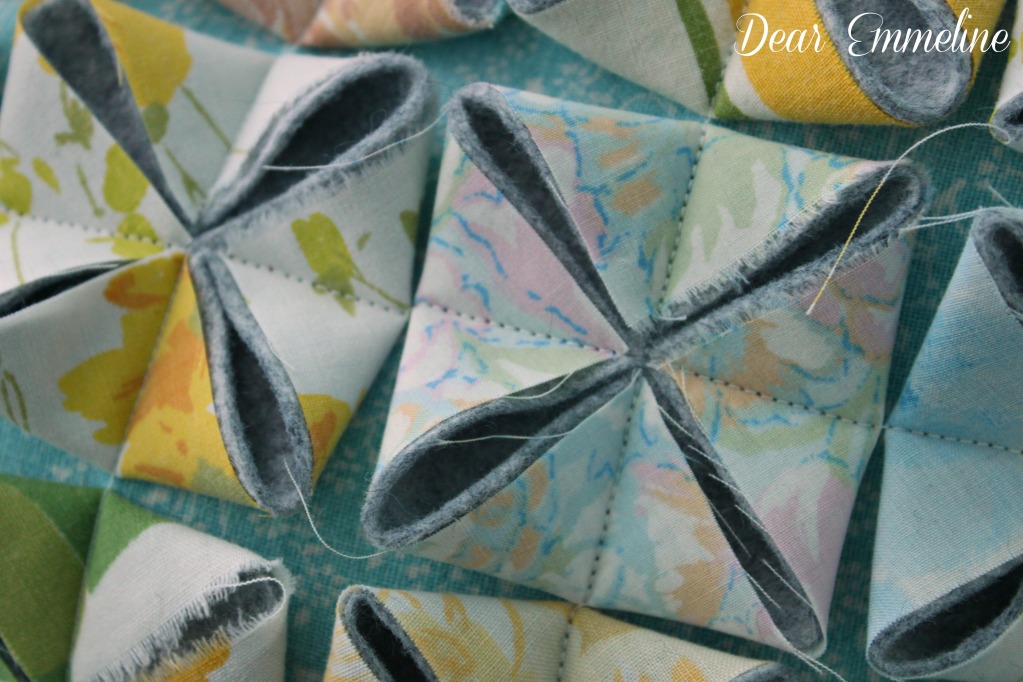
1. Cut the predetermined size and number of squares in BOTH felt and fabric. Layer one piece of felt with one piece of fabric (bright side out).
2. Cut a front piece 2 inches larger than your desired front size. Measure and mark the center horizontal and vertical lines.
3. Lay first square set in center with points lining up to the center lines.

4. Fold points in to center and pin down vertically and horizontally. You should now see the front of your vintage fabric square.
5. Pin squares down along the vertical and horizontal lines.
6. When finished you should have 7 rows each with seven squares. (Don’t make the mistake that I did and cut your front piece too small! :0 I had to cut a second front and repin all of the squares.)
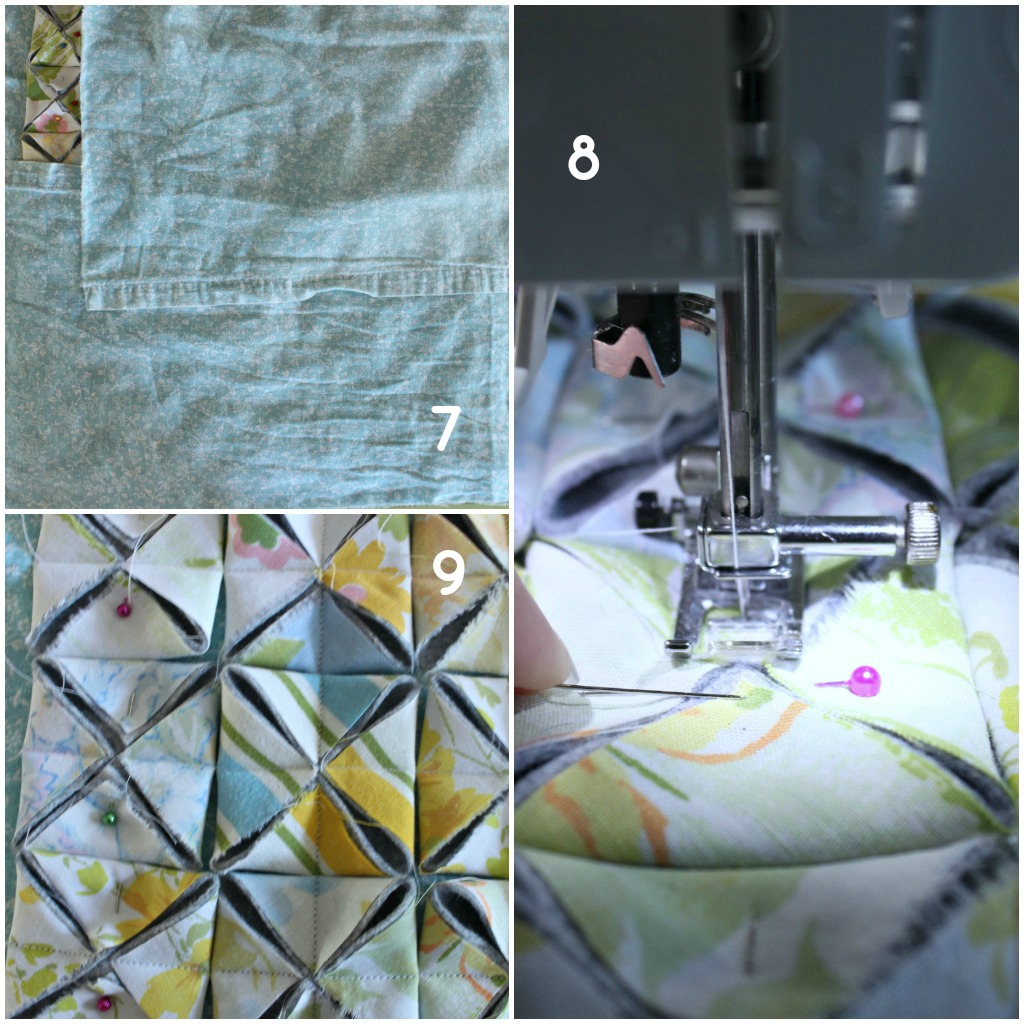
7. Cut 2 pieces to create your envelope pillow back. I used the sheet hem so I wouldn’t have to sew my own hem for each half. Make sure each piece is the same width as the pillow front and that the two pieces overlap by several inches. My pieces were approximately 18 inches wide x 11 inches tall.
8. Starting at the top right corner sew straight down the first column of 7 squares. Remove the vertical pins as you go. I used the pin head to hold down the top of the bottom fold to keep the fabric from buckling (see image).
9. Sew each column vertically from top to bottom moving from the right to the left. When finished with the vertical stitches rotate your pillow so the horizontal pins are now vertical and repeat the same process.
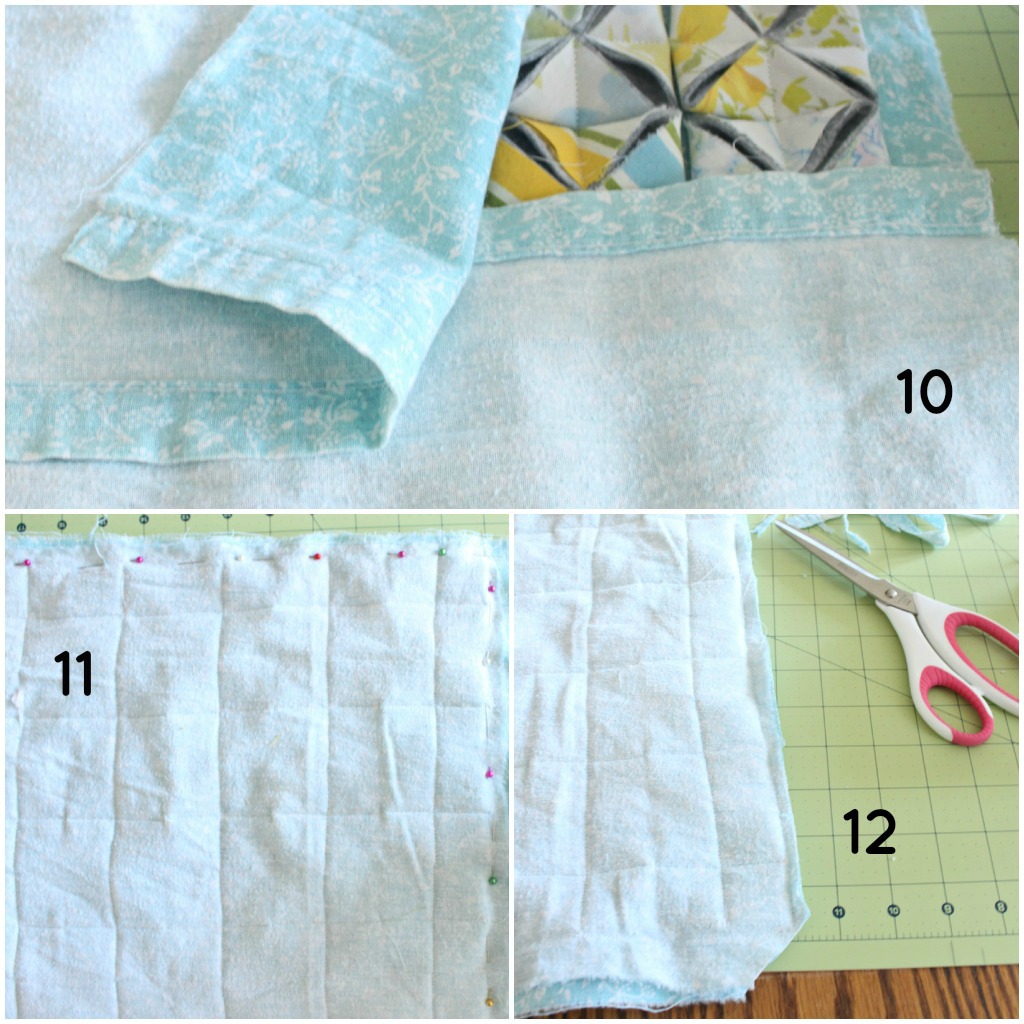
10. Layer your finished pillow front face up and back pieces face down.
11. Pin all the way around right along the edge of the felt and fabric squares.
12. Sew just outside of the felt and fabric squares. Trim off any excess fabric including the fabric at the corners so the case opens easily and the corners lay flat.
Flip, stuff, and you’re ready to display!
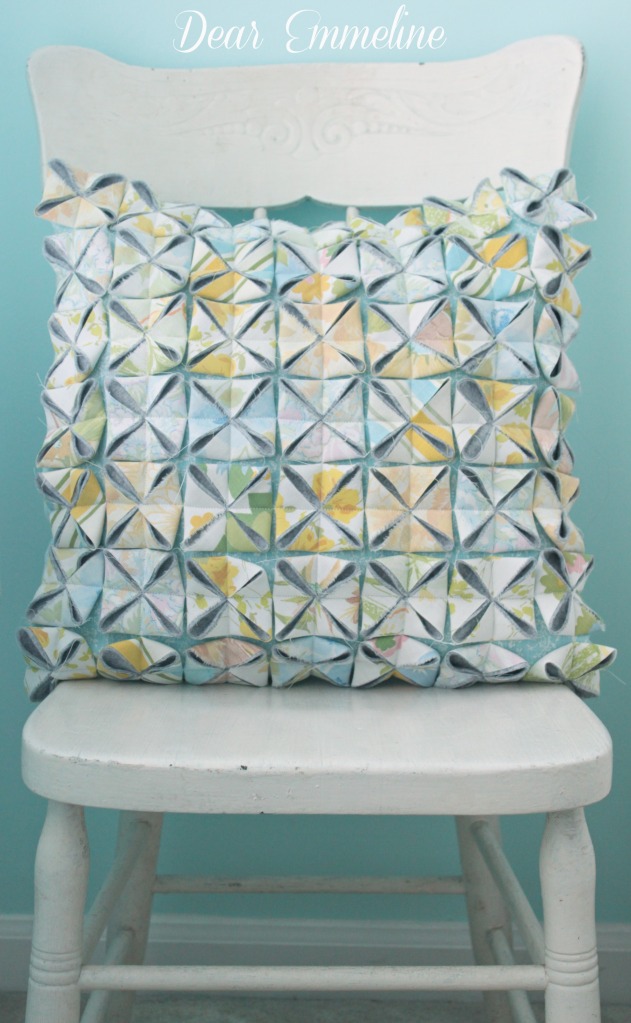

I love this pillow! x
I pinned this back in the fall. I think I may get around to making it this weekend! I'll share the results!
I came here to tell you how cute I thought your cross-stitch dresser is, but this caught my attention before I could get over to that post! Love it too.
Your newest follower,
-Phoebe
glimpsesofthemoon.blogspot.com
This is so cool! I hope you make it into Sew-vivor.
Looks great. Yes, thank you for the math. And, bizarrely enough, we have an identical crocheted blanket to the one in the final shot. Maybe our Oma has been scoping you out! 🙂
Really cute, I was just drawn to visit after seeing the picture in the Sew-vivor post!
It's beautiful! Definitely need to give this one a try!
Saw this on the Sew-vivor link up and had to stop by and check it out. I love it, thanks for sharing the math and how-to's! Good luck!!
Such a cute pillow! I love the colors you chose.
I saw that you made it as a contestant for the sew-vivor competition ~ I can't wait to see what you sew!
Thanks Rachel! A quick peek at your blog and I saw what an awesome seamstress you are! I'm so excited to make the top 10 but a bit nervous because I'm not very experienced! I have some ideas but we'll see if I can pull them off!
Congrats on your top ten entry!! It's beautiful! Good luck to you!
Congratulations on your top ten! I love this Origami pattern & will have to try it soon. Good luck in the competition!
Congratulations! Your pillow is lovely and I can see why you were chosen.
Have a Wonderful Week
Suzanne
Pieced Pastimes
yep yep I thought about how cute this would be to make when I saw it. Great job.
muy bonitos estos trabajos me encanta el cojín.
Gracias!