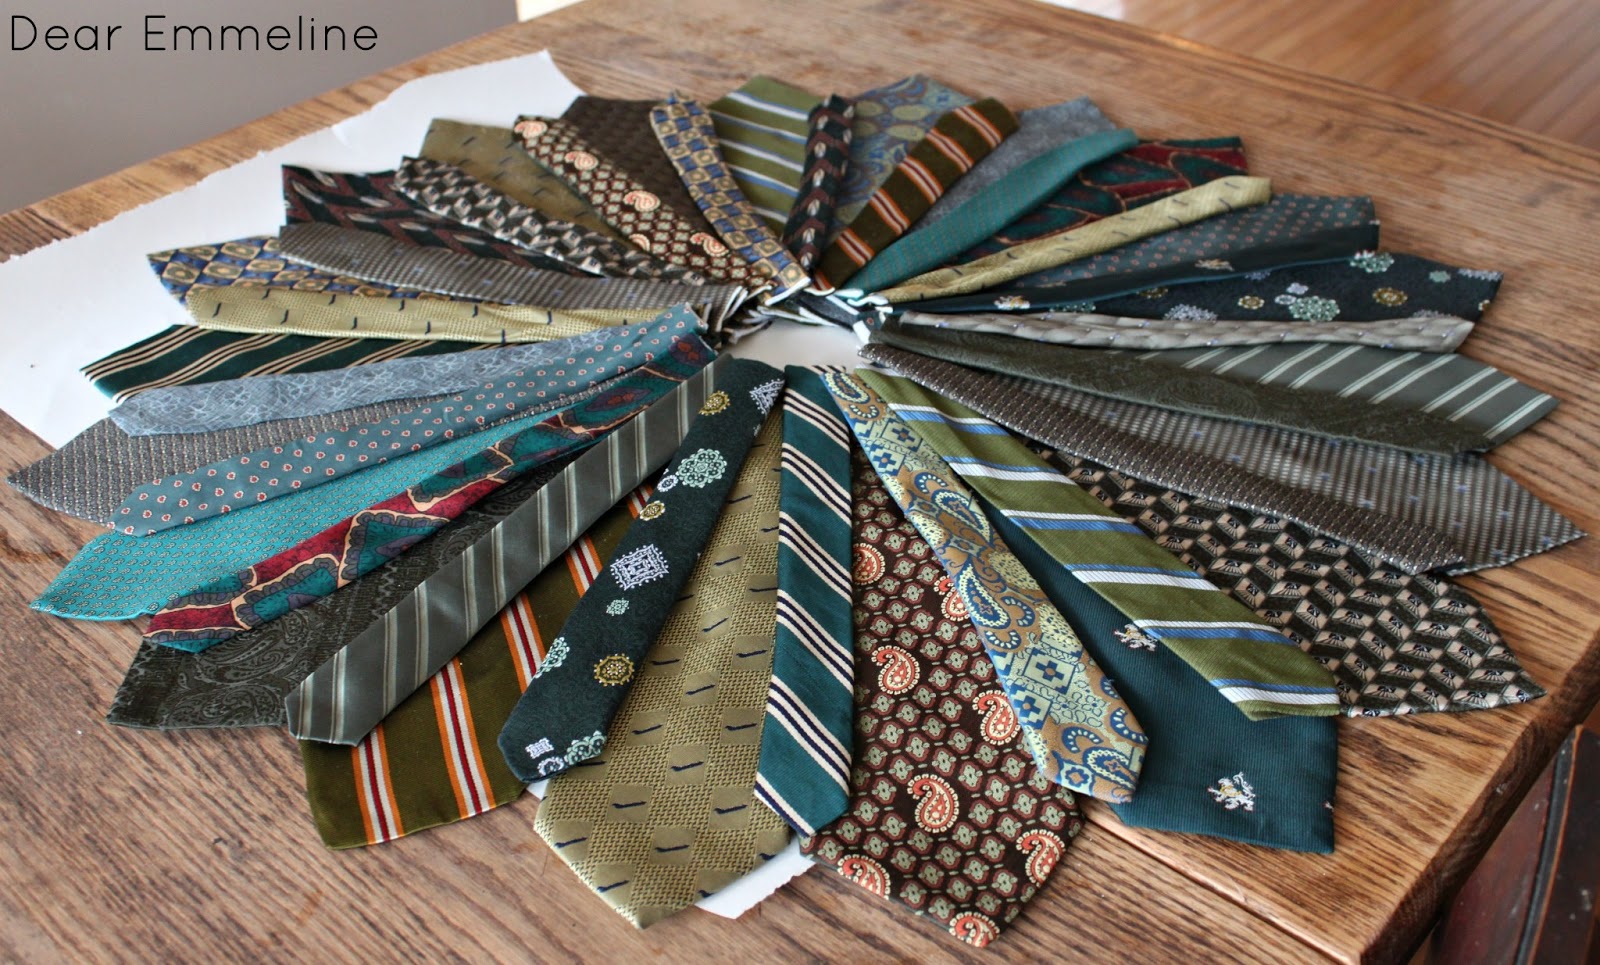

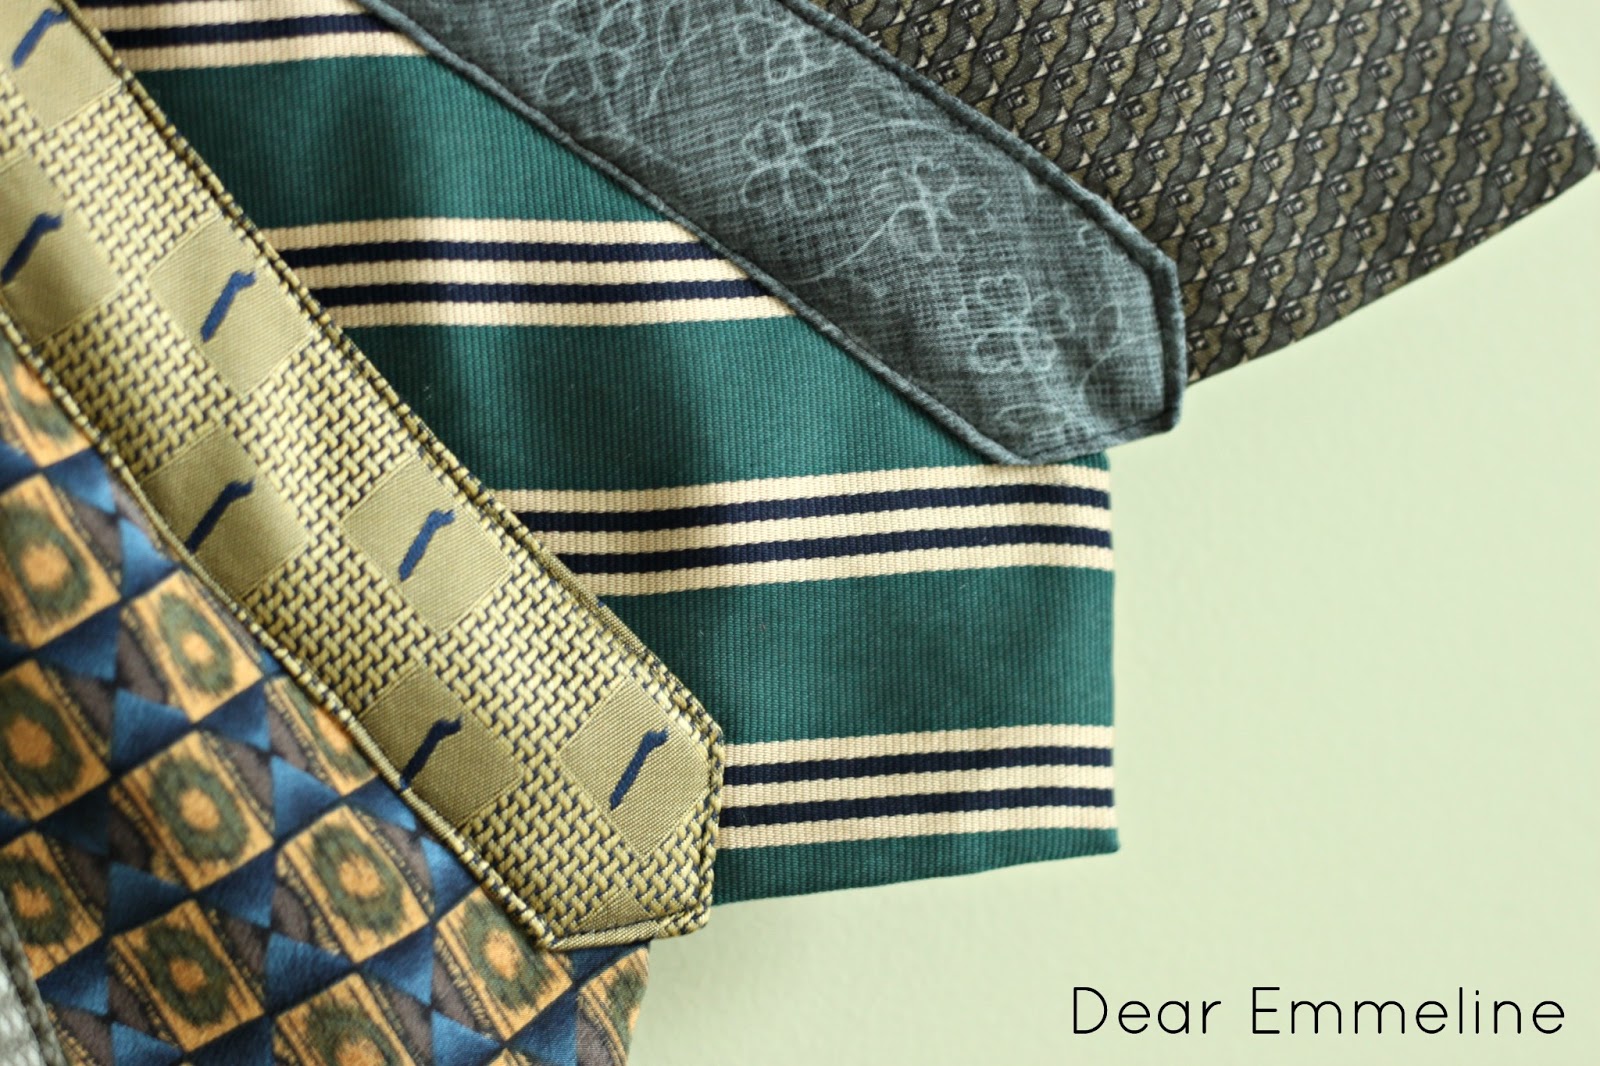
5. Pin each small tie up one side and down the other so you can sew the entire sunburst together continuously.

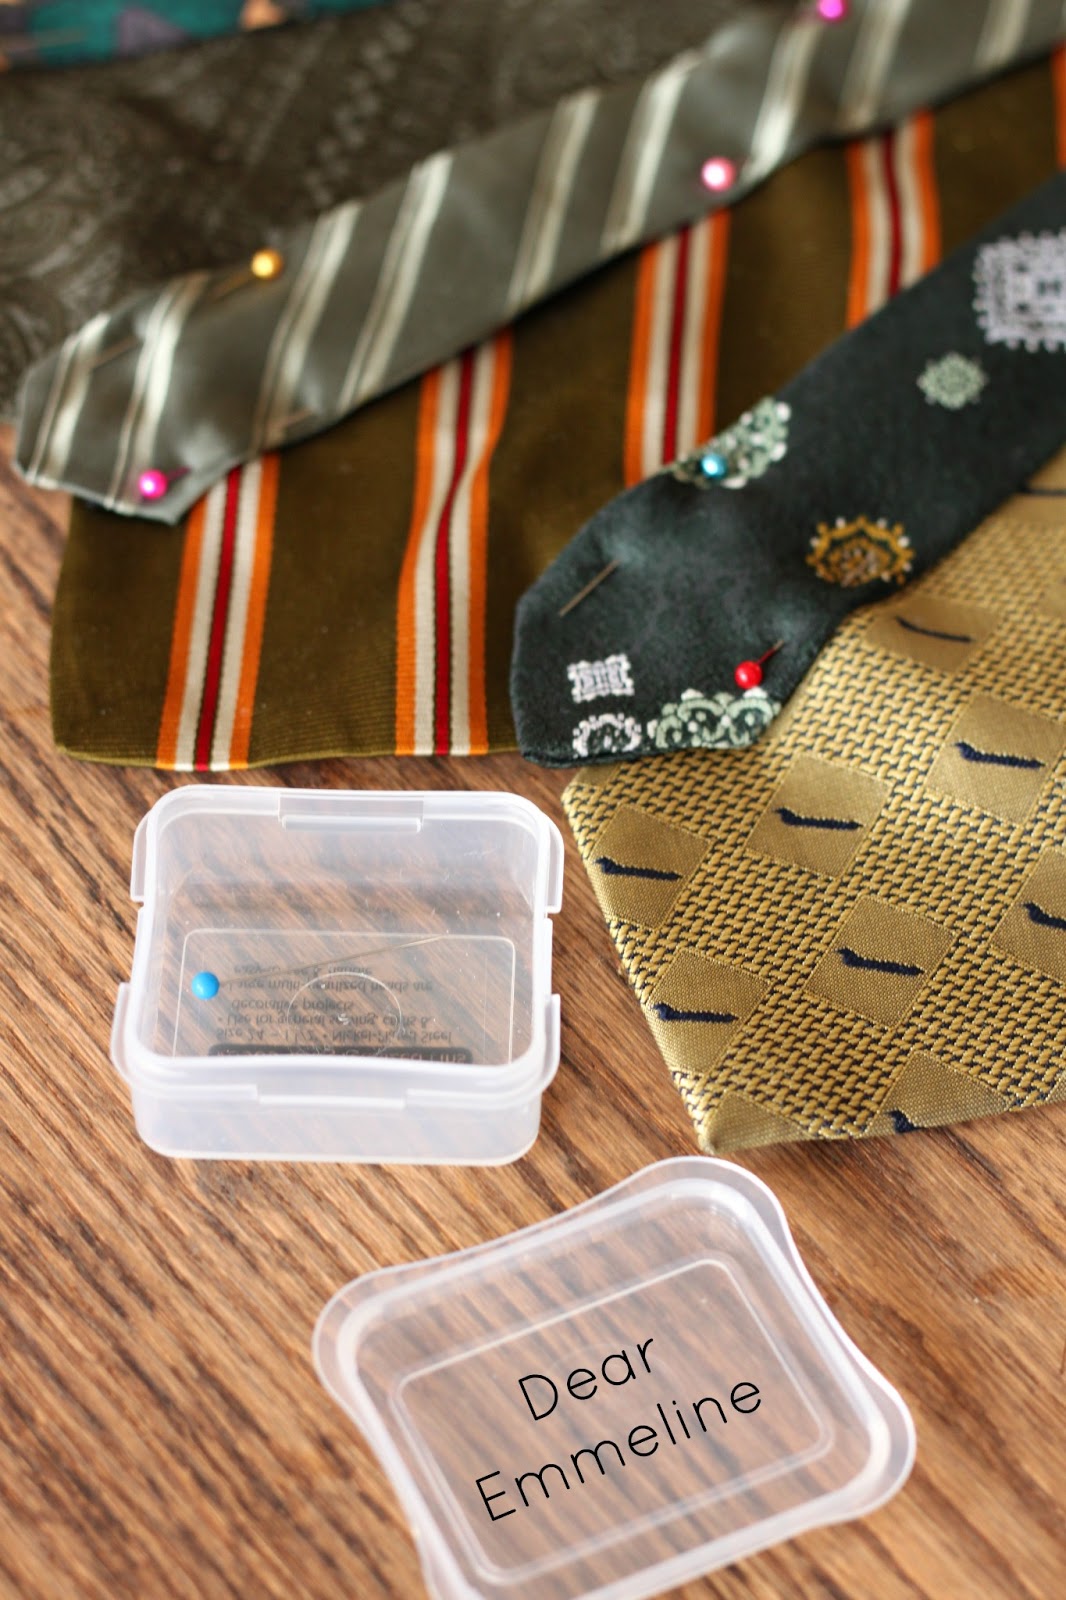 |
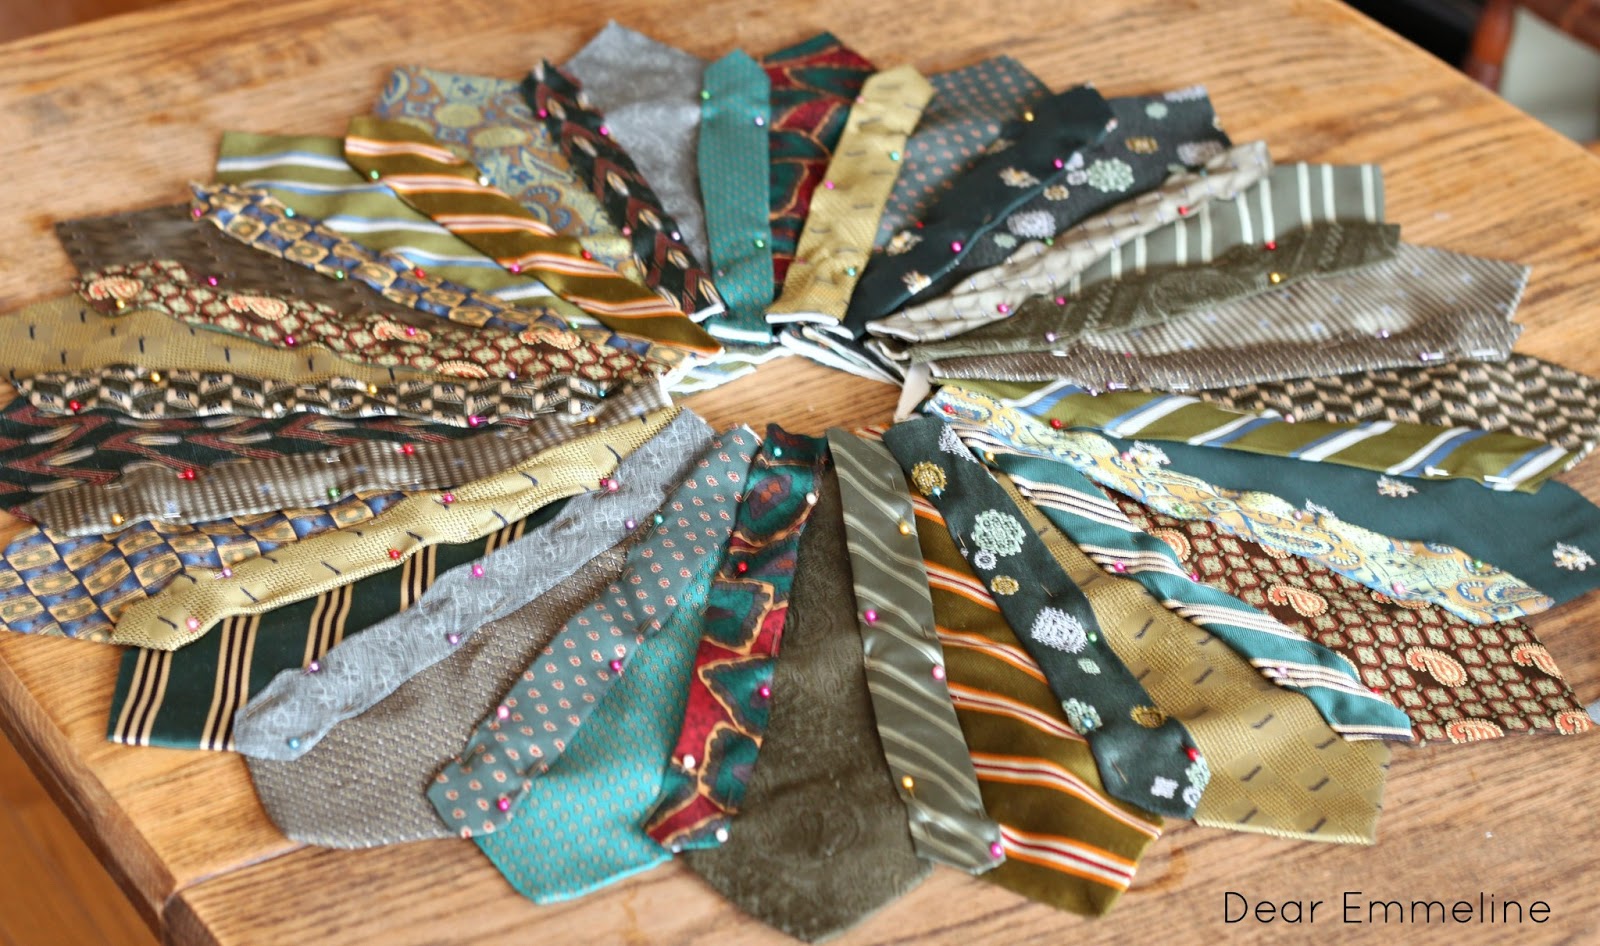
| Make sure you have enough pins! I had one container and once again had just enough. Only 1 pin left!! |
6. Start at the top tip of a skinny tie (don’t forget to back stitch a few stitches in to secure the thread) and sew along the edge of the skinny tie. I had my needle set to the left side and lined the edge of the tie up along the middle of the presser foot.
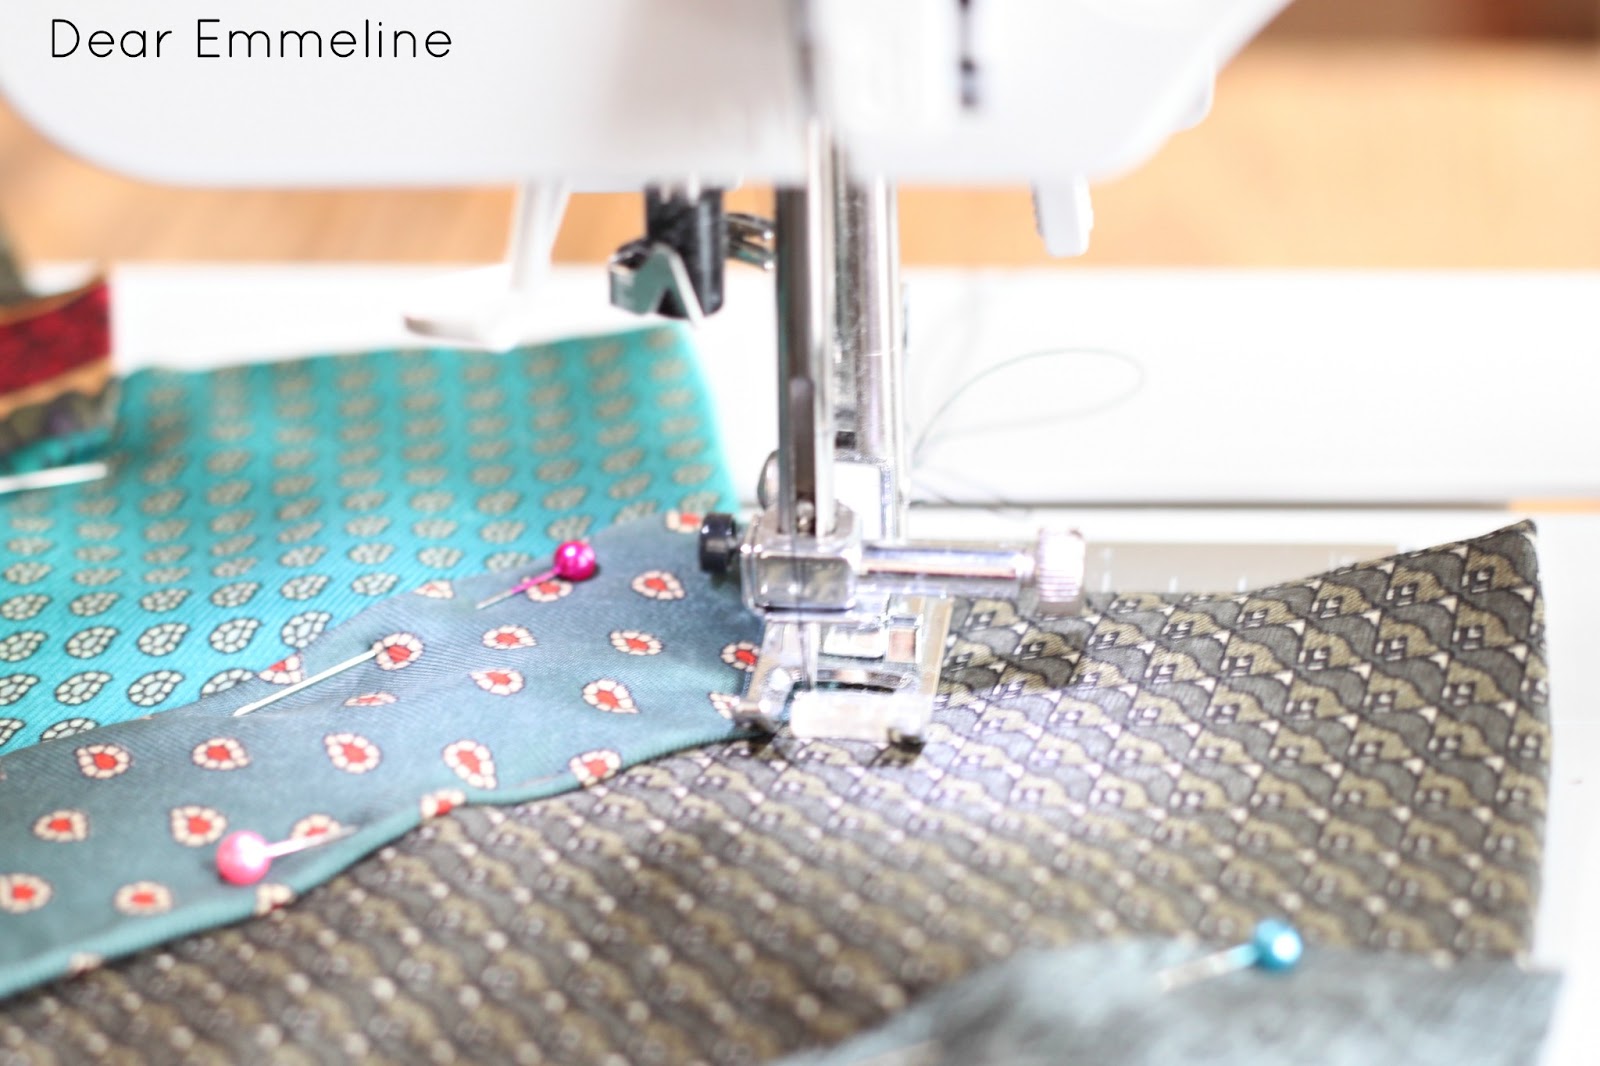
7. When you reach a turn leave the needle in the fabric, lift the presser foot, turn the fabric so it’s lined up in the direction you need to sew, lower the presser foot, and resume sewing.
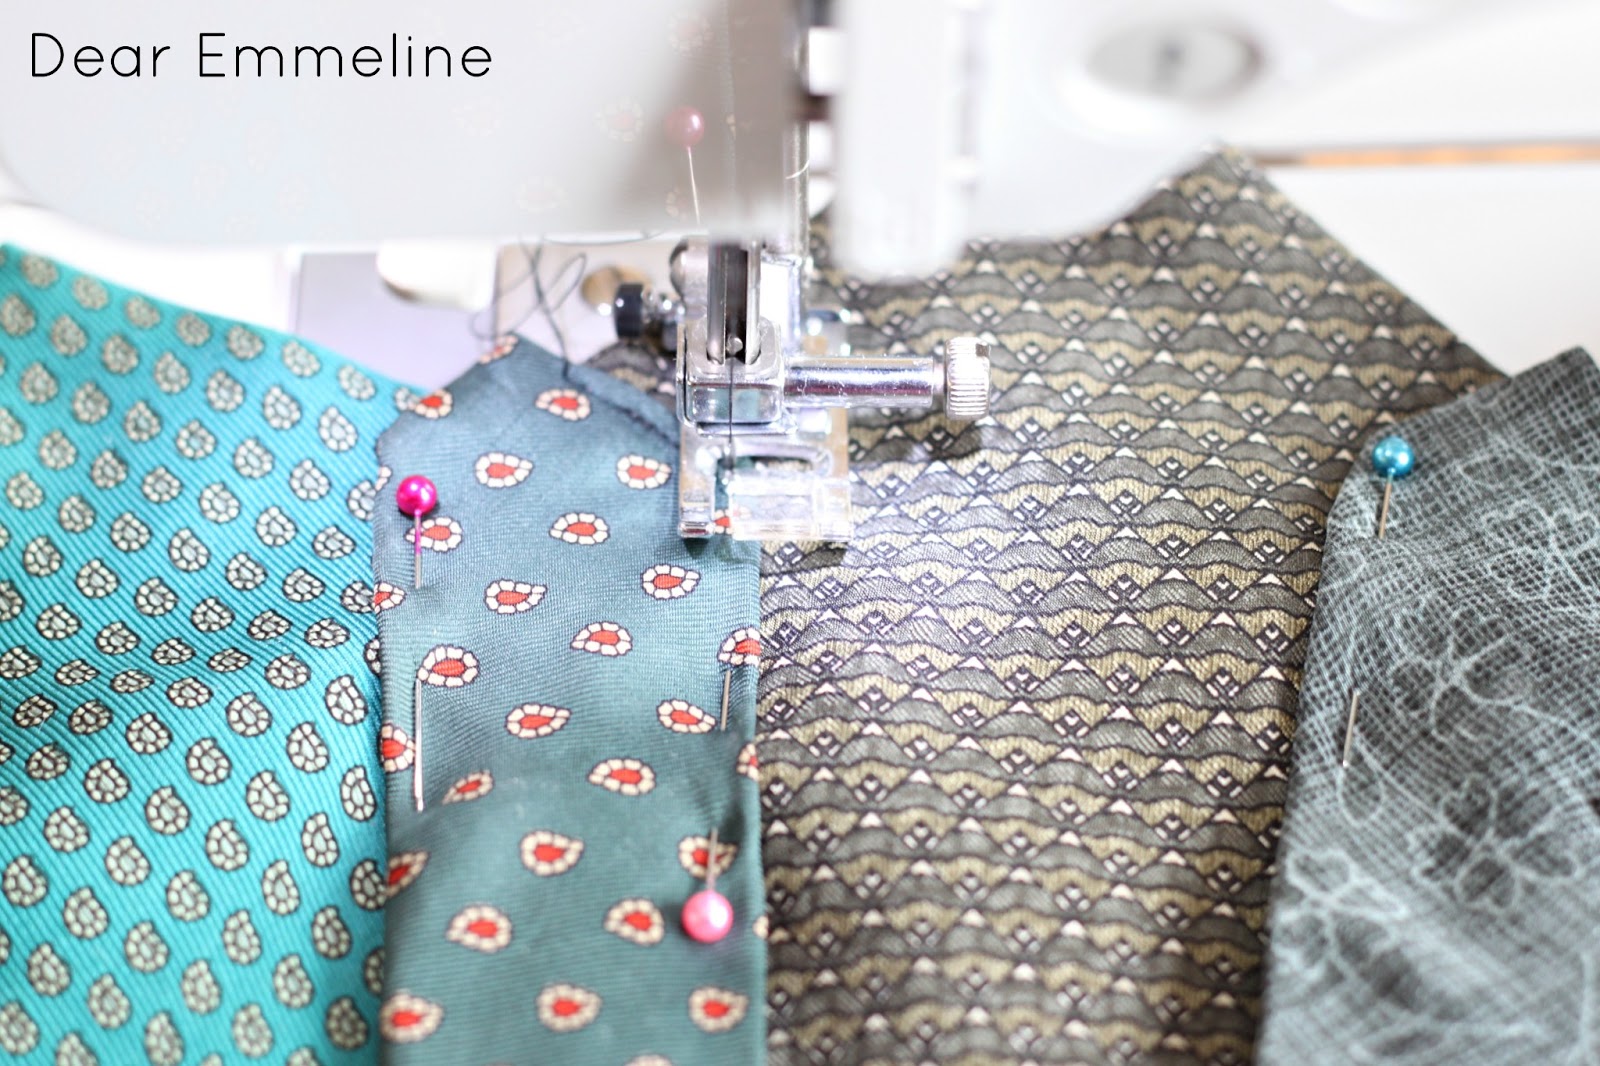
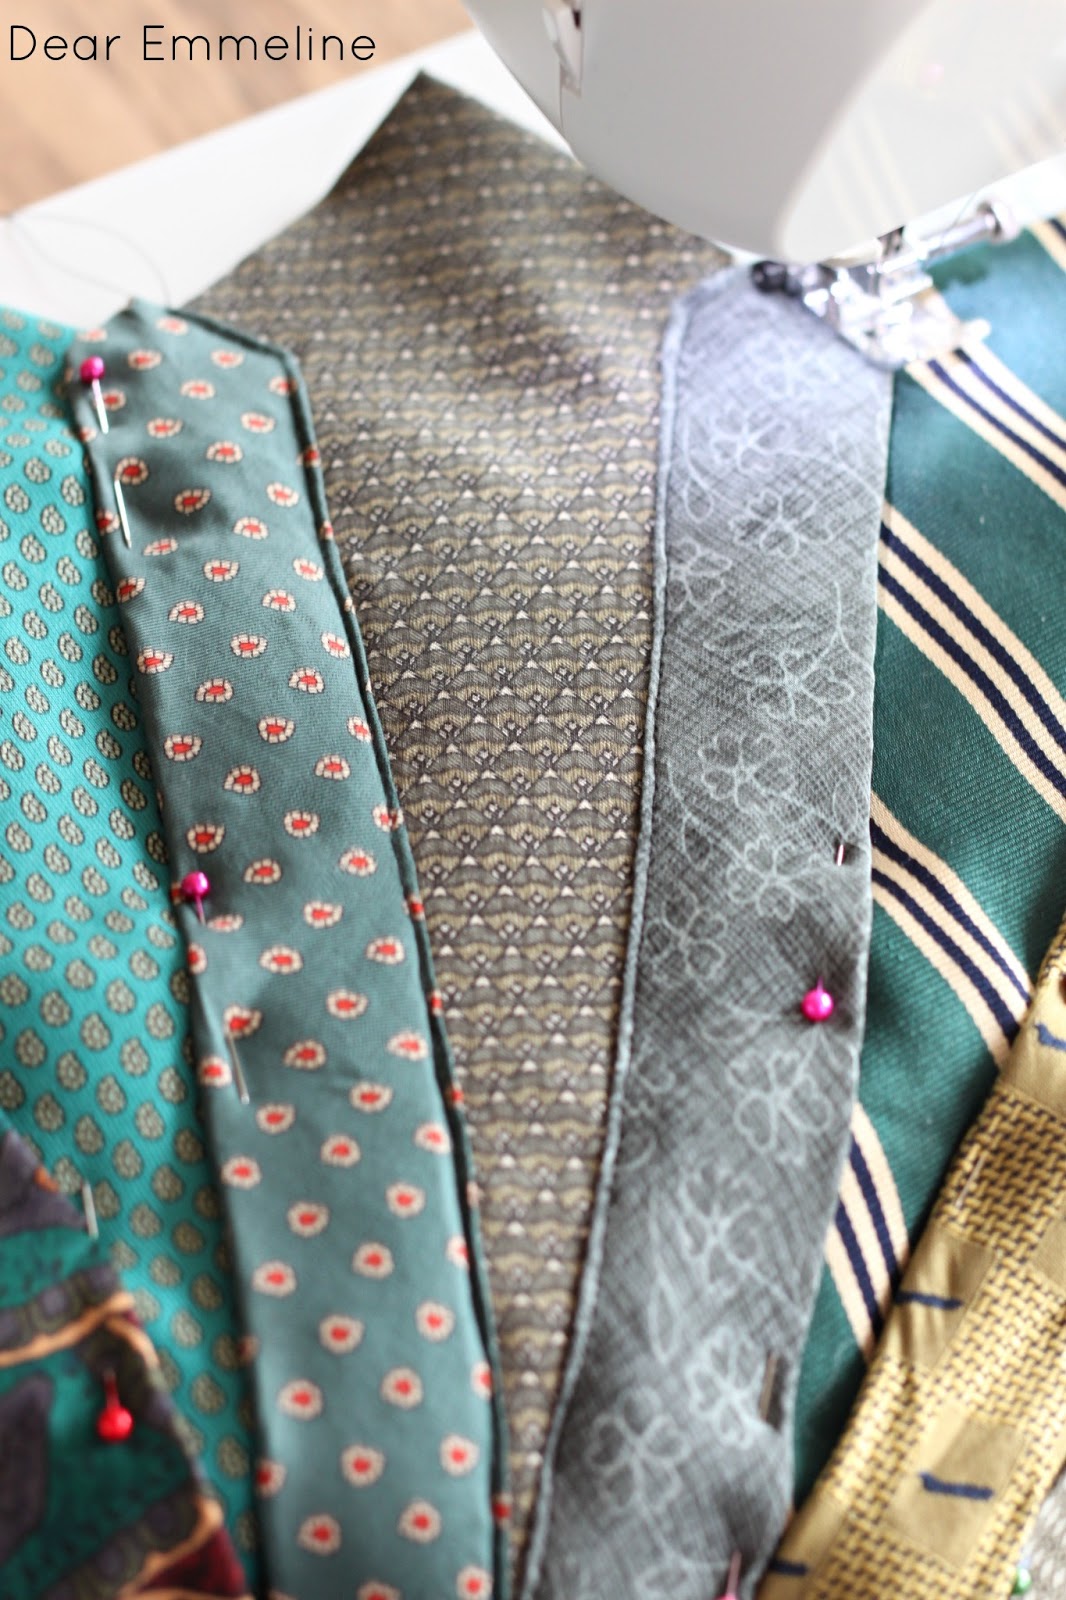
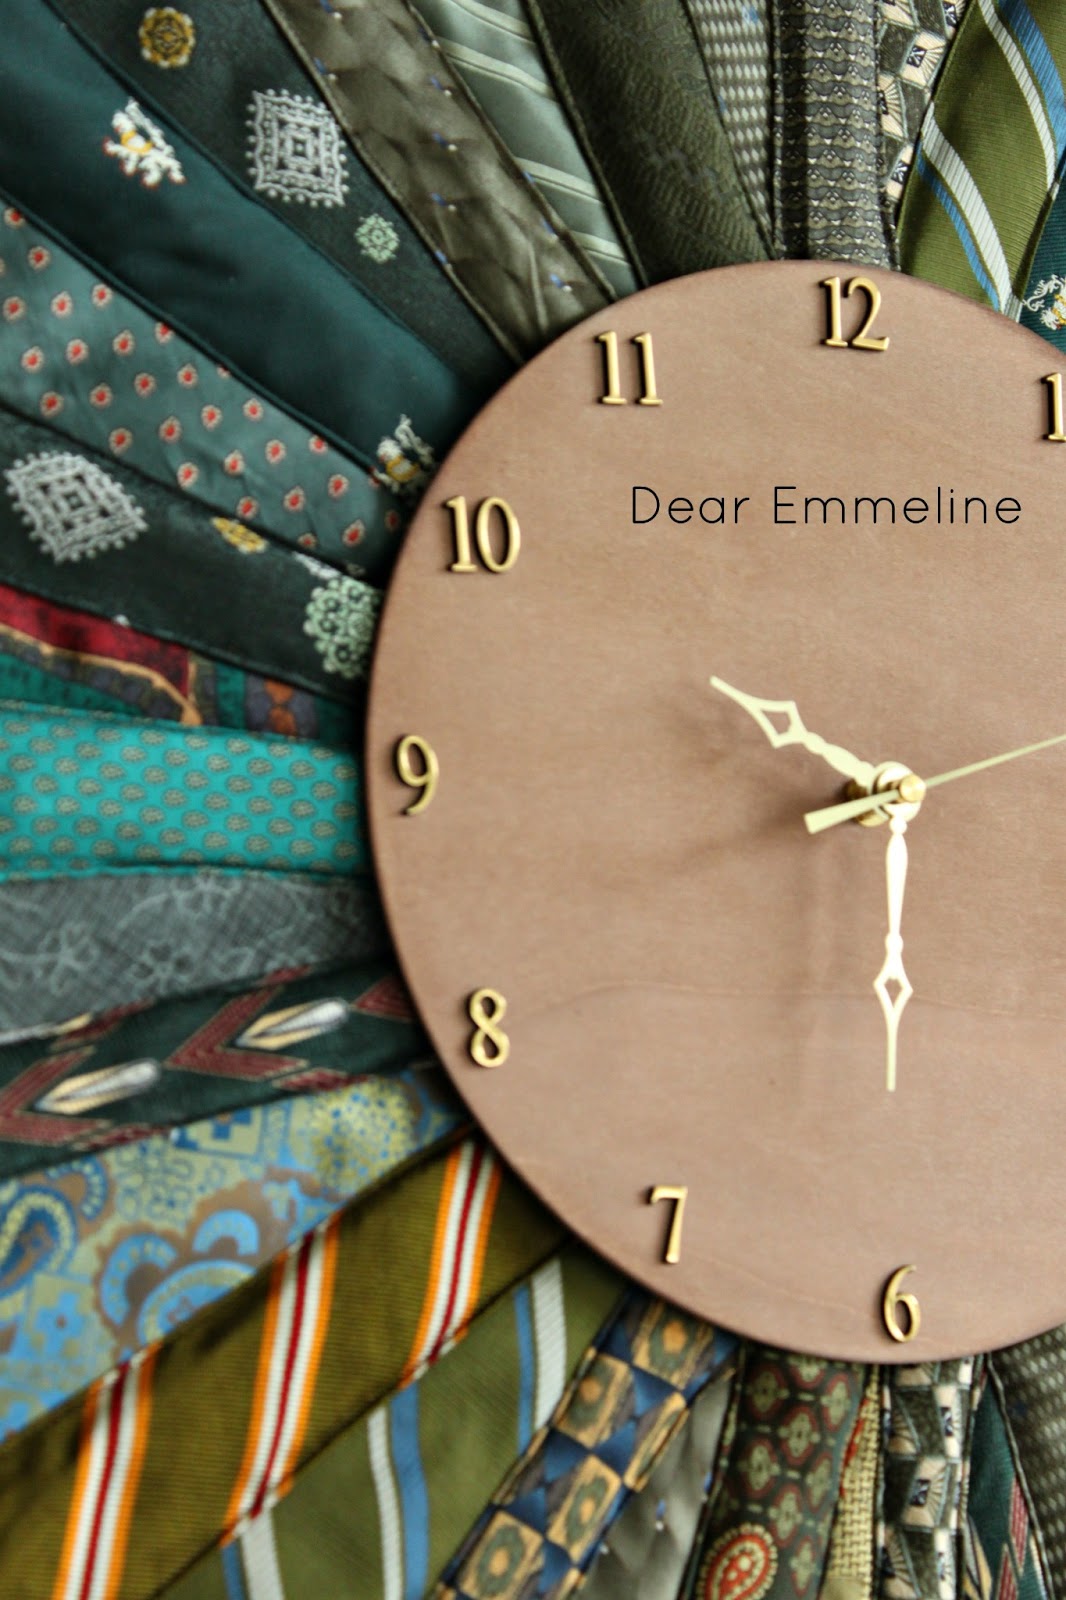
8. Stitch down until you get to where the 2 skinny ties meet. Leave the needle in the fabric, raise presser foot, turn the fabric so you are sewing up the next tie, lower you presser foot, and resume sewing. Continue up and down each tie until you make it back to the start. SEWING DONE!!
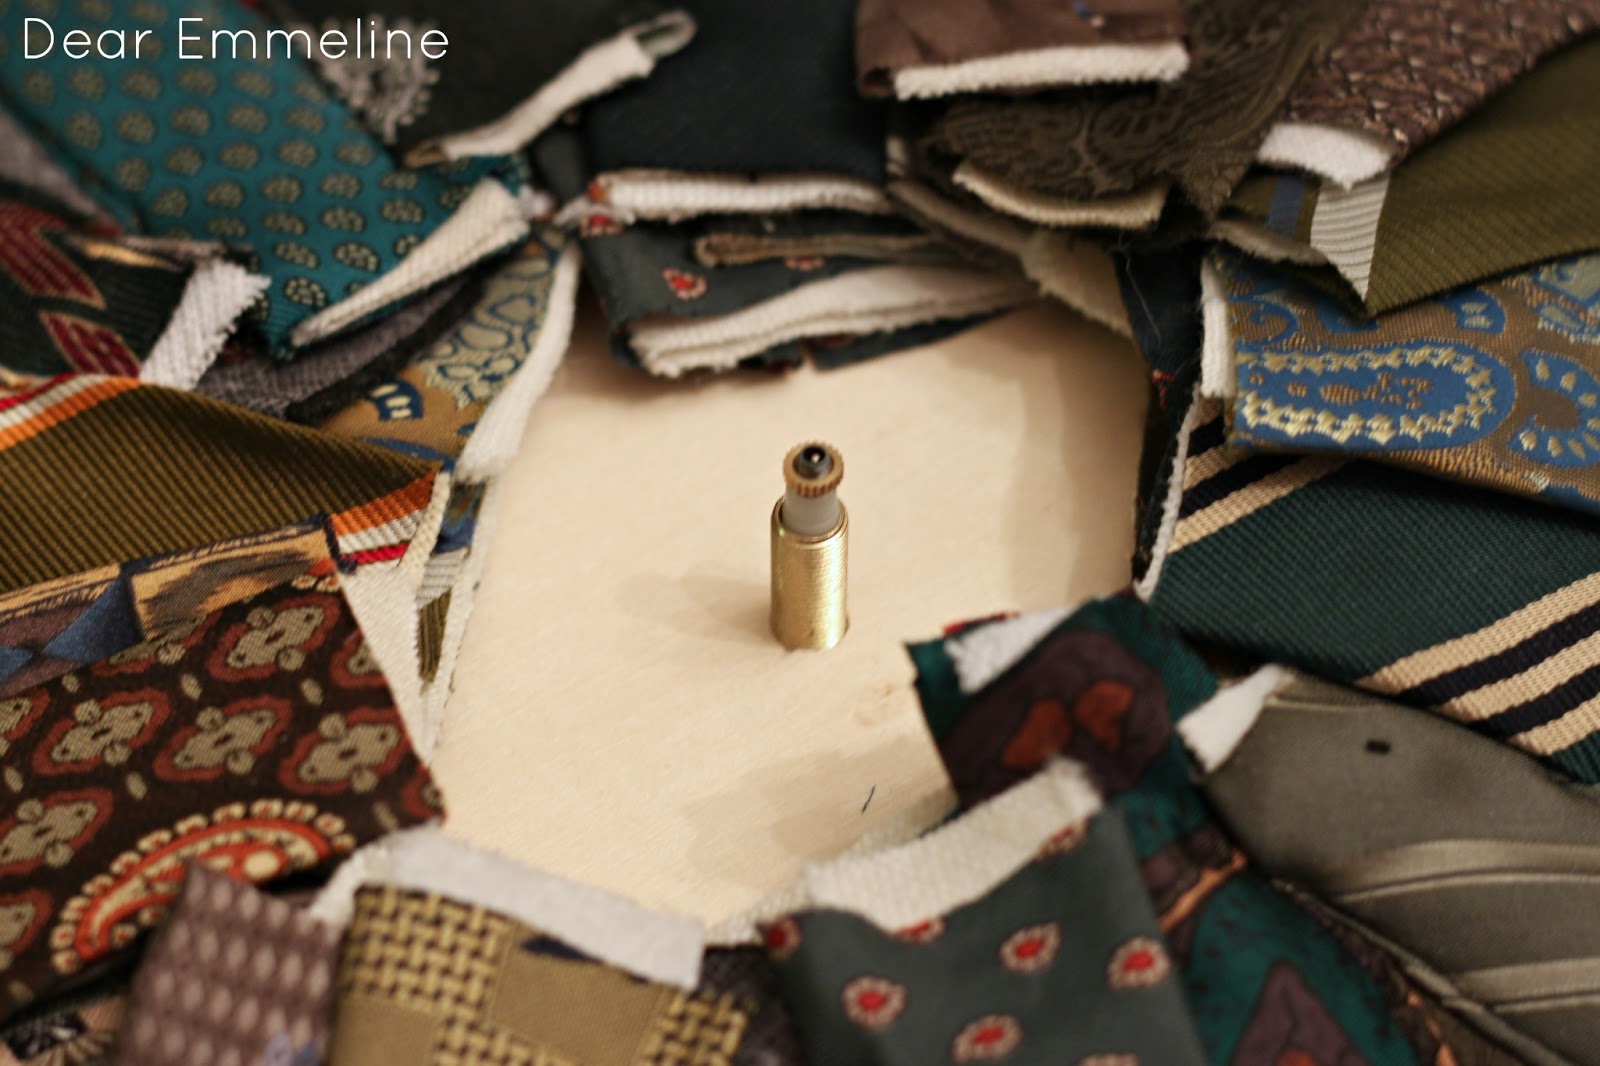
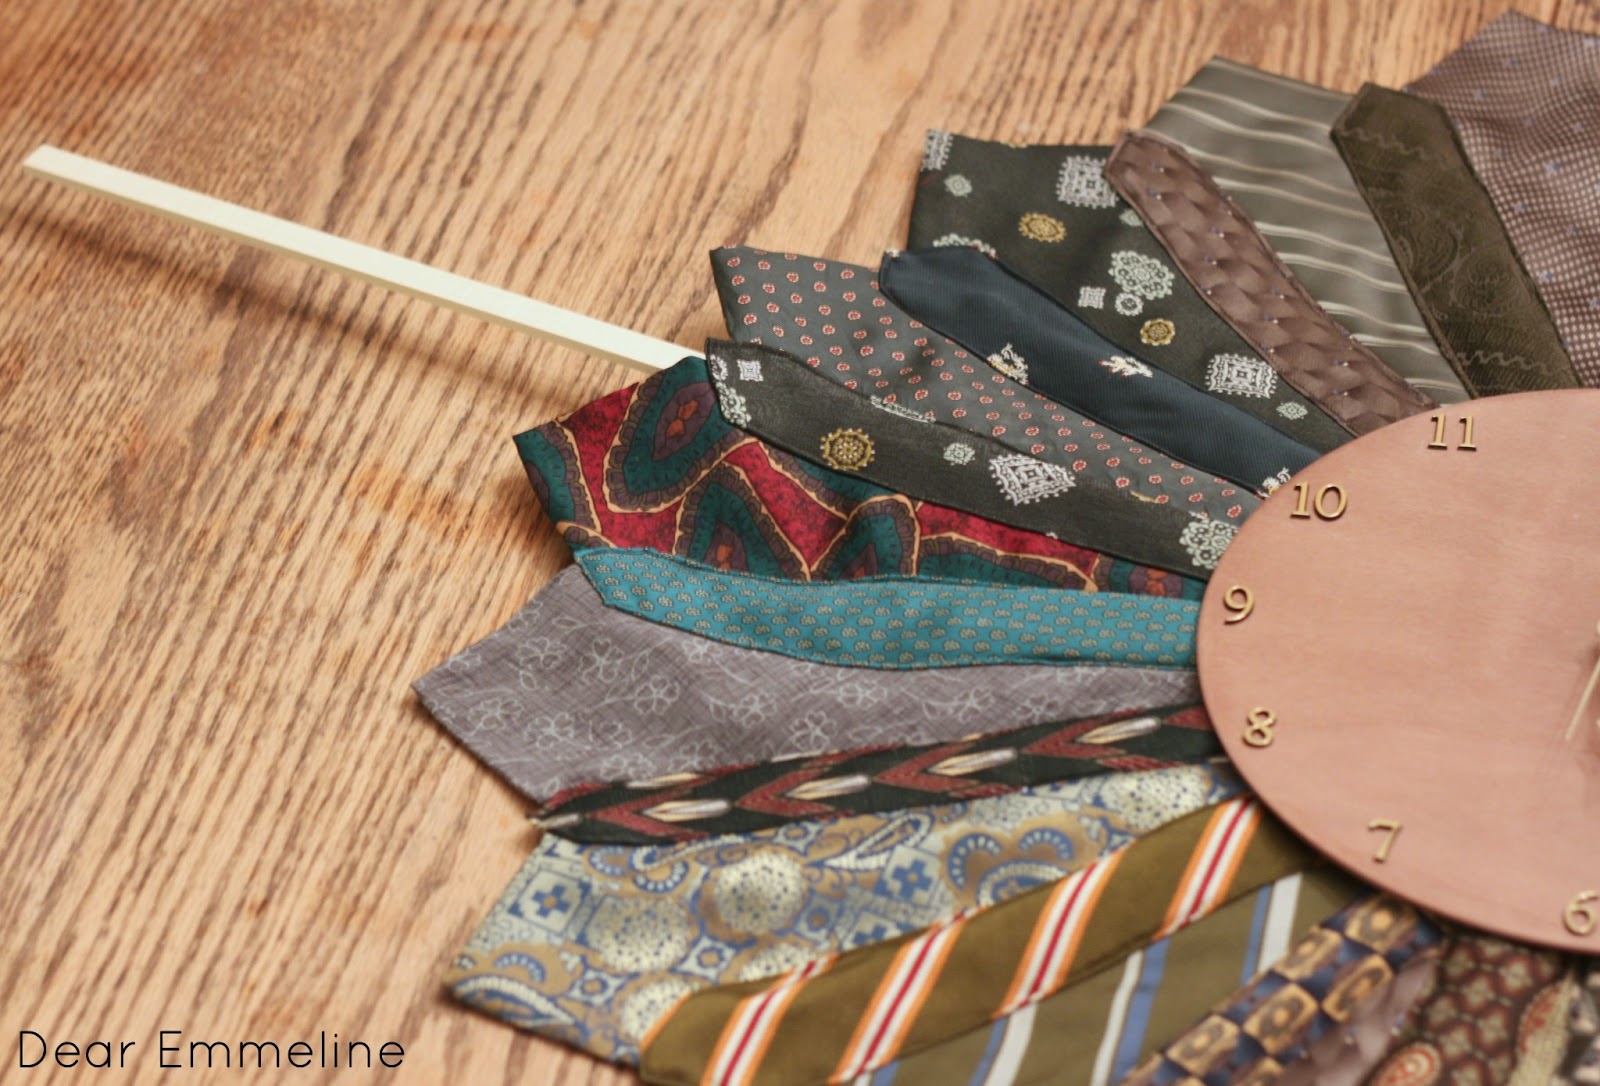
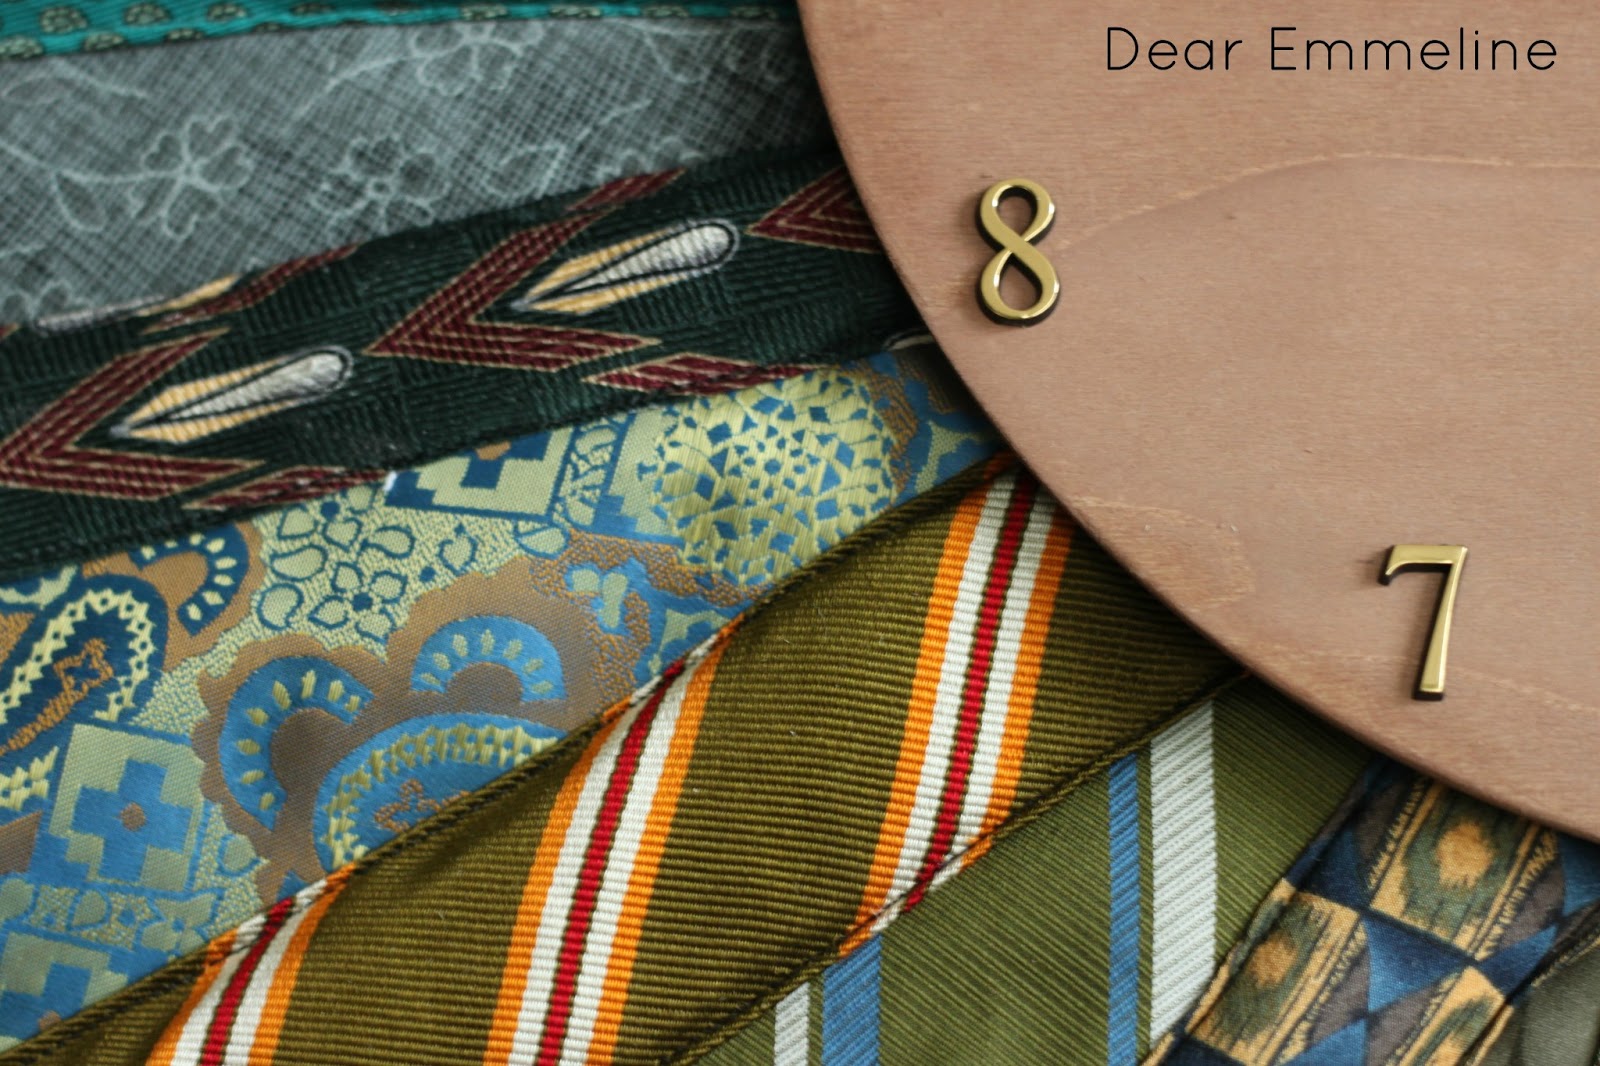
9. Place a clock kit base under a thin wood clock face (Clock Kit: Joanns $7.99, Wood Clock Faces: AC Moore $1.19)
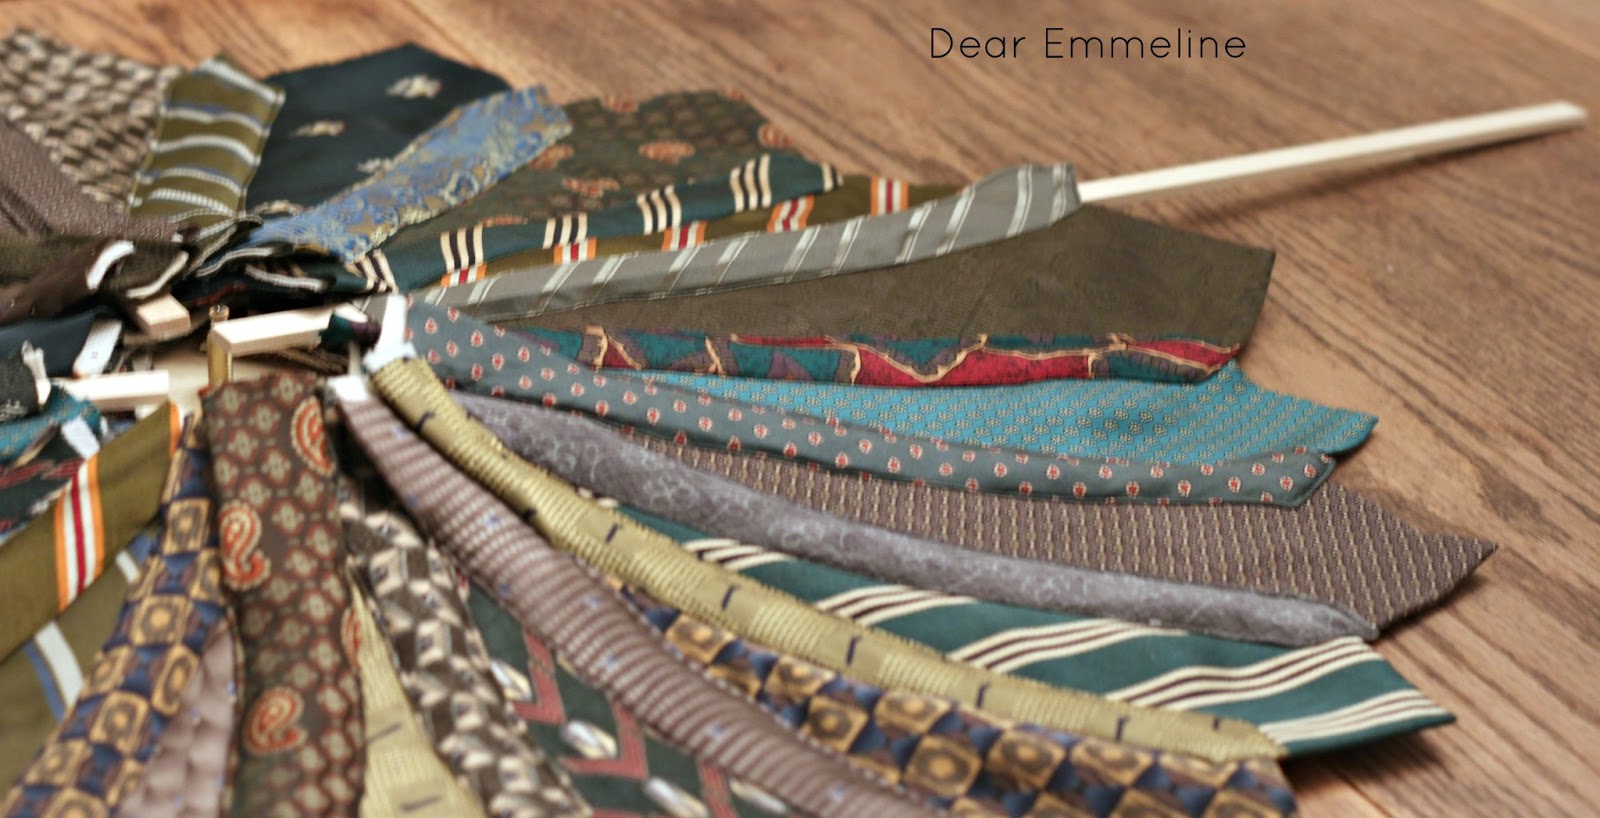
11. Sandwich the dowels between the bottom clock face and a 2nd finished clock face. When you tighten down the clock parts the dowels will be secured.
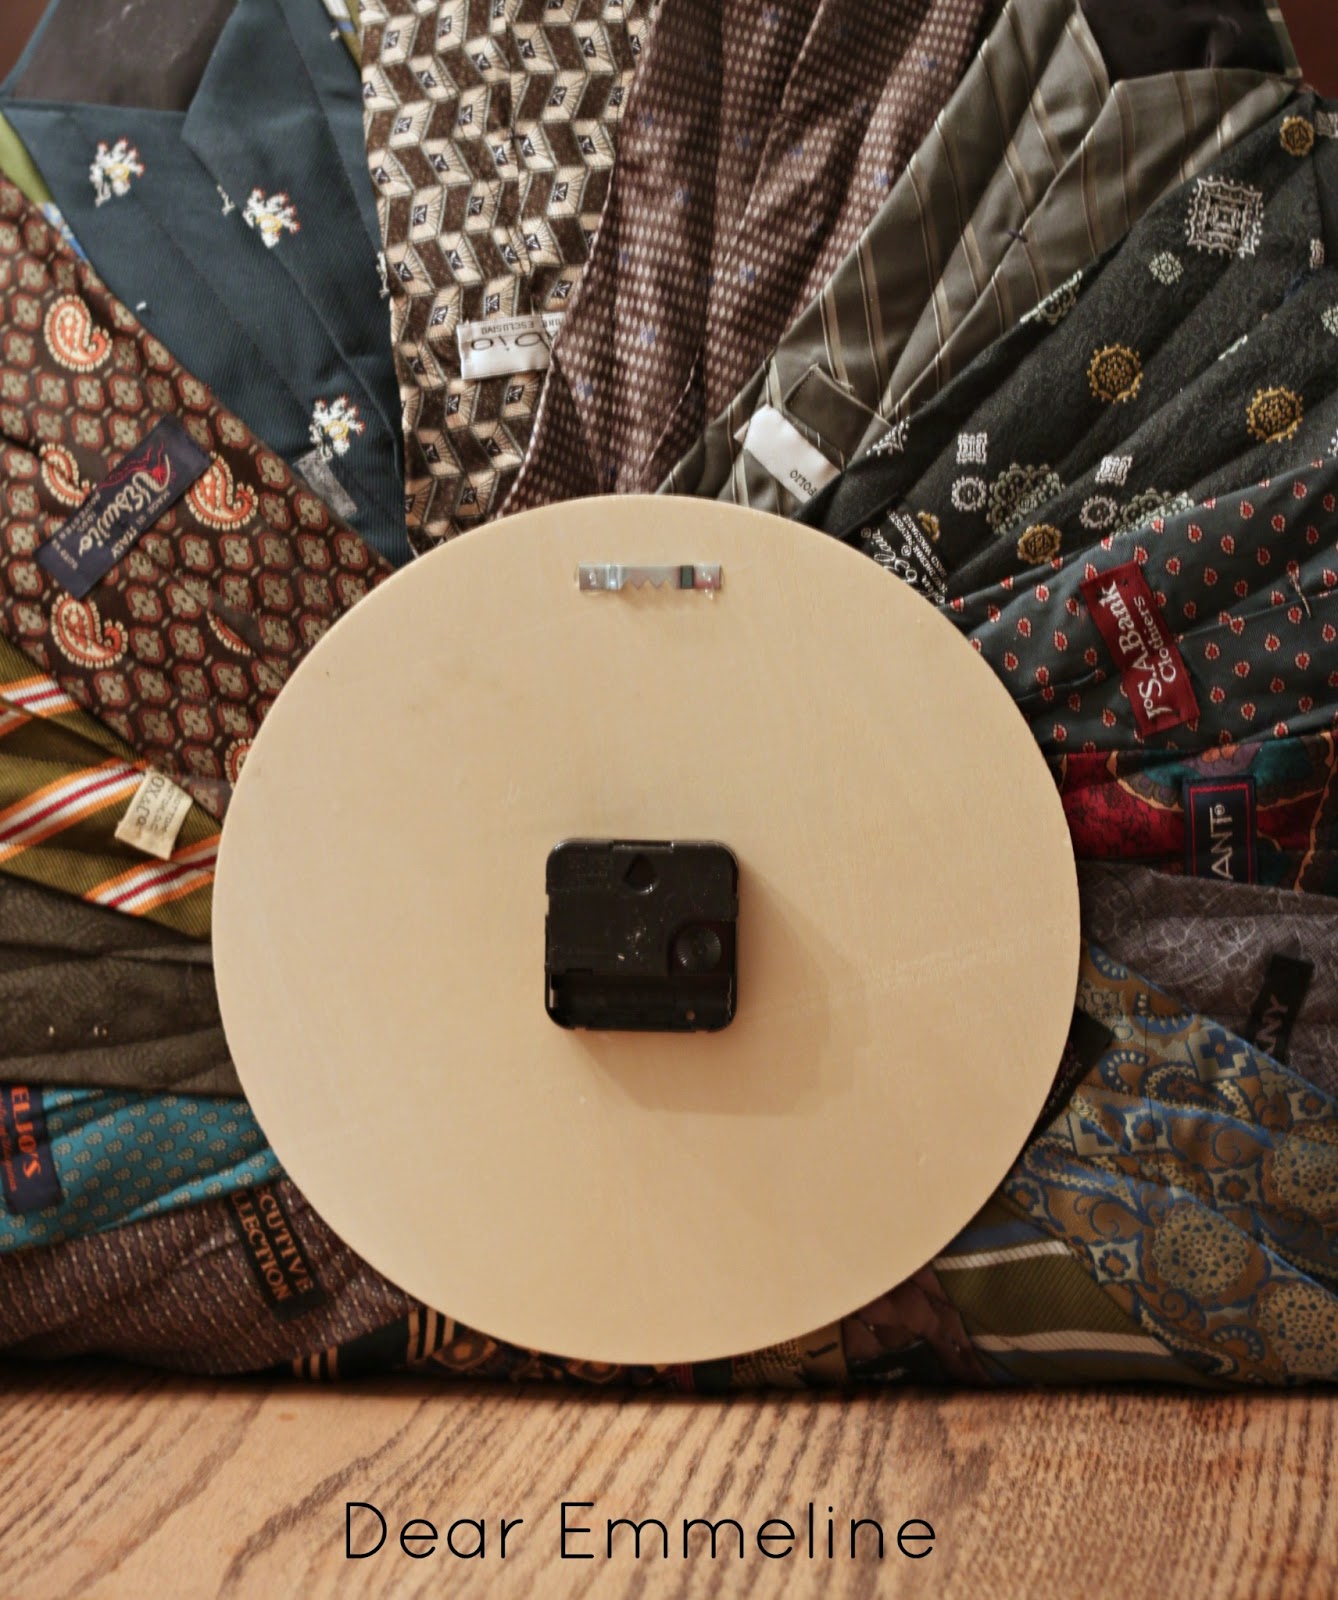
12. Use industrial strength craft glue to glue on a saw tooth picture hanger.
 |
| back side of clock |
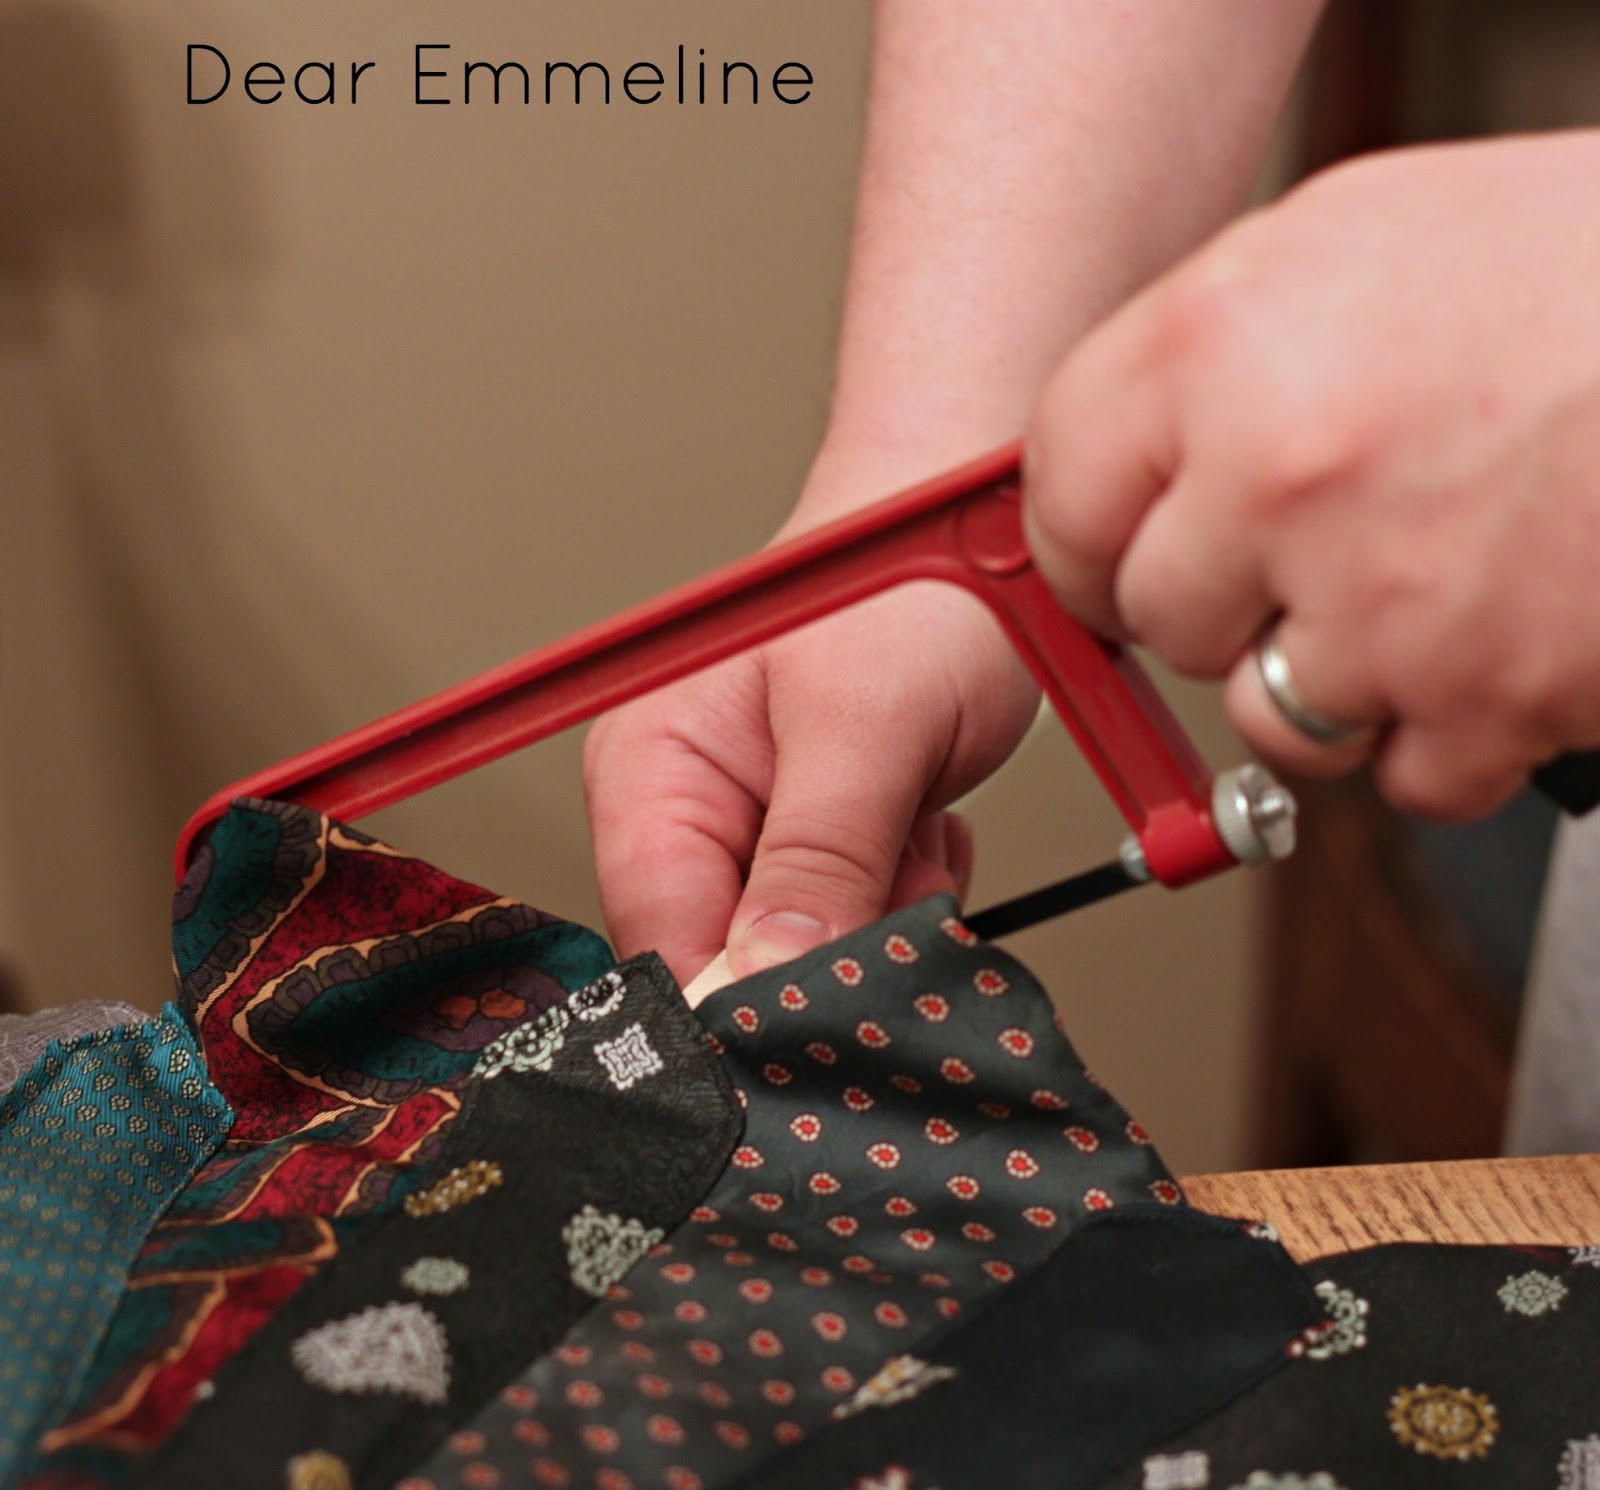
13. Push the ties out of the way and trim the excess on each dowel.
Voting is open Wednesday 7:00am EST until Friday at midnight PST.
Thrifty Decor Chick-Before and After Party (First Monday Every Month)
Primp– Primp Your Stuff Wednesday
Savvy Southern Style– Wow Us Wednesdays
Lil’ Luna– Linking up with Lil’ Luna
Southern Lovely– Show & Share
Ginger Snap Crafts– Wow Me Wednesday
Snap!– Show and Tell
Stone Gable– Tutorials Tips and Tidbits
Embracing Change– Inspired Creations Linky Party
live laugh rowe– live laugh linky
House of Hepworths– Hookin’ Up with HOH
The Shabby Creek Cottage– Transformation Thursday
52 Mantels– Thursdays Are Your Days
The 36th Avenue– Party Time
Beyond The Picket Fence
so clever ~ great repurposing project !
what a neat project! well done!
My father recently passed away and I have been turning all of his shirts in quilts for my sisters, mom and I. I guess now I have a project for his ties, too!
OMGoodness!!! LOVE LOVE LOVE this 🙂 You did a fantastic job and now I want one 😉
So fun to be competing with you.
Great use of fabric.
xo
Angelina
Most creative thing I have seen all week, that is actually creative and cute besides!
Bliss
Oh how fabulous! That is super creative! I never would have thought to put ties on the wall in such a fashion. Good for you for thinking out of the box!
I love it!
hugs x
Crystelle
Crystelle Boutique
This is so unique! Great job!
This is great! Very creative! Wish I knew how to sew!! LOL!!
Wow! I am so completely impressed by this. What a very fun way to use ties! Great job Emmeline!
What an amazing project my friend! I LOVE it! So cute so clever and so original! I am in love! I so so so hope you win this round!!!! :o)
jaime
This is brilliant, and so very creative. It would make a great father's day gift for my dad, who has a huge tie collection, but is now retired. Thanks for sharing this super tutorial.
~Emily
A Tossed Salad Life
Adorable. I just ran over and cast my vote for you. Good luck!!!
Love this project! I love working with old neckties and this is so clever. The colors are my favorite. This would look wonderful in my home!
Thank you Emily. It would make an great father's day gift!
Thanks. I love the little red stripe and purple roses dresses on your site. My daughter would love them. She's almost 4 and only wants to wear dresses!
If you have a sewing machine or know someone who does I only used forward straight line sewing! Besides watching out for pins the actual sewing was very basic.
Love this!! GOOD LUCK. xo
Thanks Kelly!
Saw your link at HoH – this is fabulous! I love anything with neckties, and this is so unique and SO well put together! Your stitching looks beautiful! Great job!
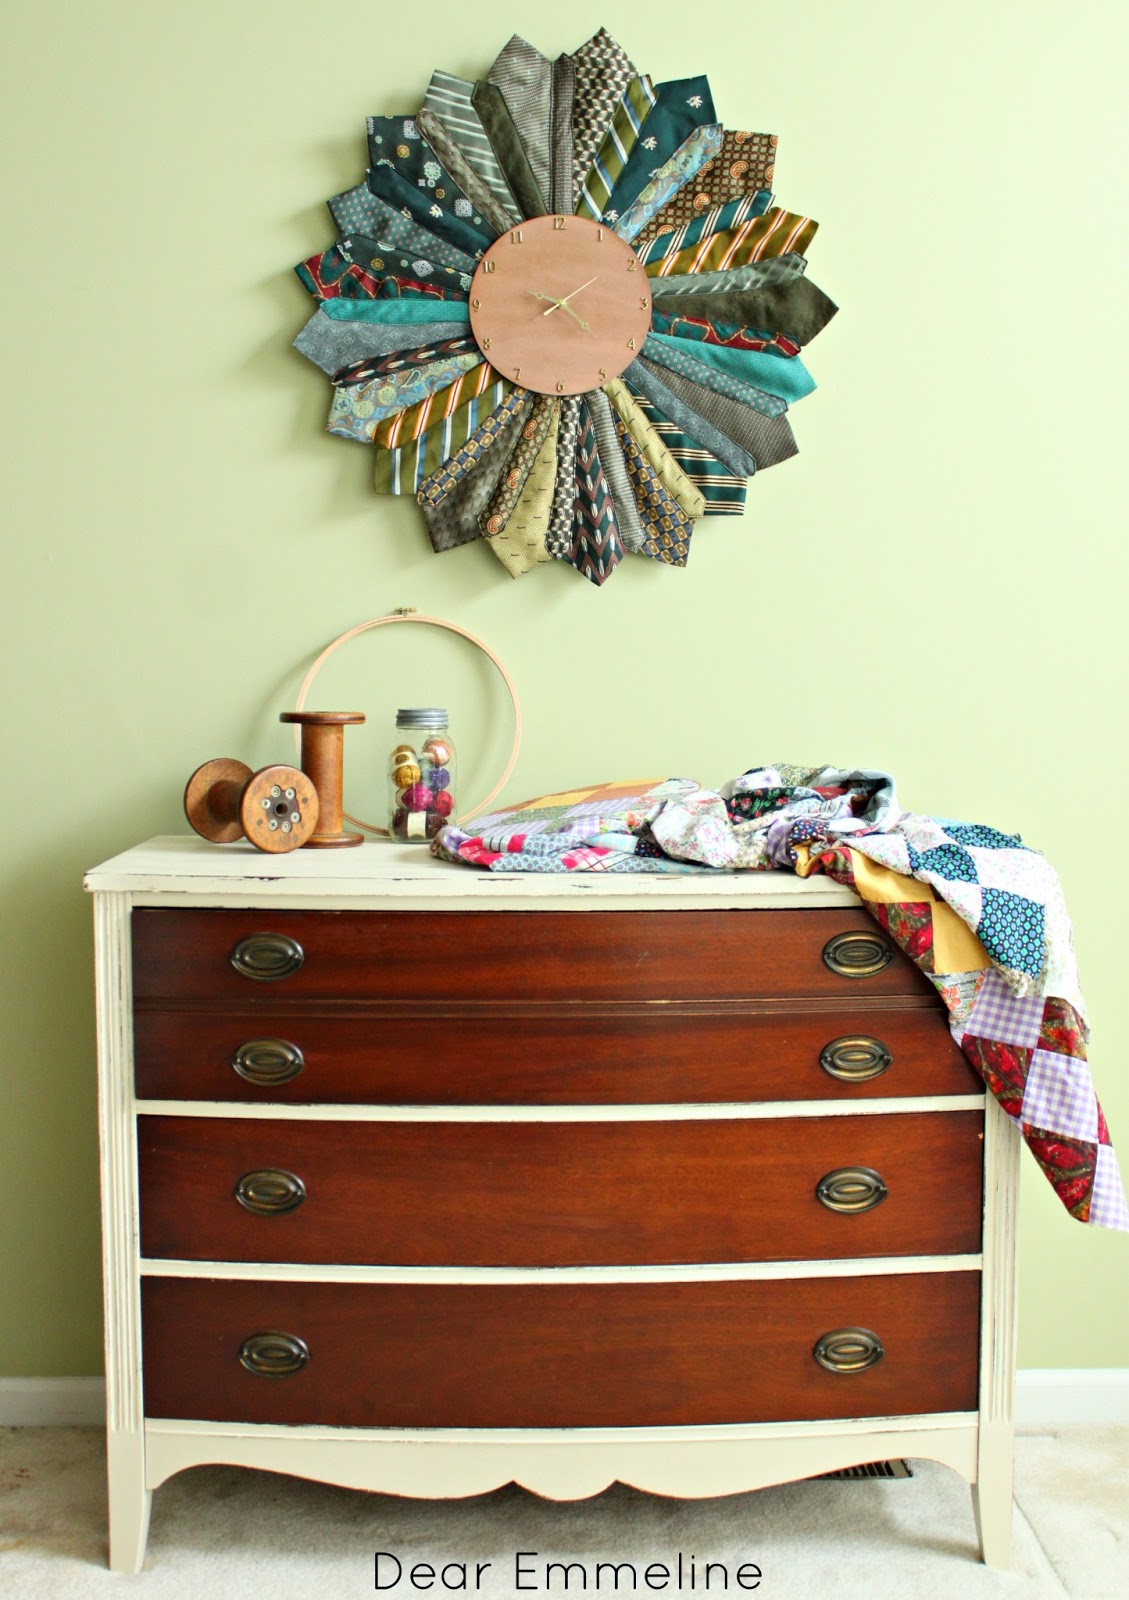
Awesome! What a great project. I was searching for a way to add a "masculine" touch to the bedroom for the dh and "his" side of the room, and this is perfect for above his dresser! The fact that it is a clock is just a bonus. Thank you so much for posting this tutorial. I am off to goodwill to shop ties. I am also thinking to buy extras and making one for my bachelor son as well. I don't know if I can match your perfect stitching but I am willing to give it a whirl(not a sewer but I did just buy myself a new singer for some crafty type projects and to do some mending!)
Thanks again!
dennise
Thanks Denise. My stitching is far from perfect but what helped was trying to keep the edge of my fabric in line with the center of the presser foot. That way the stitches theoretically should all be the same distance from the edge!
What an insanely smart idea, Jessica! You are so creative! You did an amazing job and your tutorial is great! Way to go!
Well how fun is that??!!! Very clever girl!
I still love everything about this! So approachable and so useful. Great idea!
Great project!
What a cool reuse of old ties! I just voted for you.
what a neat idea! I have some ties from my dad I was going to use to make a wreath, but he may really like a clock! Thanks for sharing!
Featuring your awesome idea tonight!
Stacey :O)
This is so clever. I sent your post on to a friend that wants to make a clock for her son who is in Fashion Design. I think this would be perfect for her to make him for his office. Thanks for sharing this.
Kris
What a unique clock! I love the re-purposing of the ties! I pinned this to my Gift Idea board…I think it would be a great man-gift. I would love to have you share it at my party too…the Rock N Share.
So super cute! I found ties for 10 cents at my thrift store a couple of weeks back. I didn't know what I was going to do with them? I may have found my answer! Thanks for sharing! Life to the full, Melissa @ DaisyMaeBelle
Wow! That is so clever and CUTE. I love it!
So cute! I love all the colors. This would be great for a guys office.
I'm visiting you today from The 36th Avenue. I hope you get a chance to stop by my blog and leave a comment and Link Up, too!
~ Megin of VMG206
Medicine Cabinet Makeover
What a creative project! Very well done! I love how vintage/mod it looks too. Perfect!
Wow, that is brilliant! It would make a fantastic Father's day gift! You are so clever.
Best wishes,
Natasha in Oz
PS My weekly Say G'day Linky Party is on now-if you have a minute to spare I'd be thrilled if you could link up this great idea!
That is one cute and manly clock!