Happy August! I don’t know about you but I’m a bit in denial that it is August already! School starts here in 19 days. Can you believe it?!
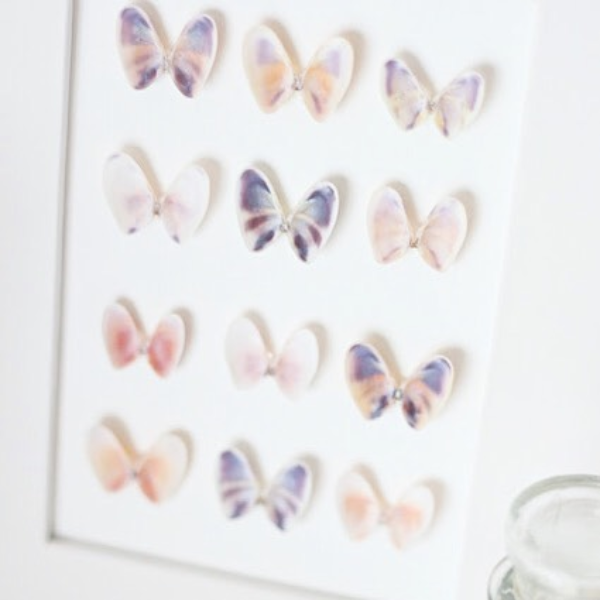
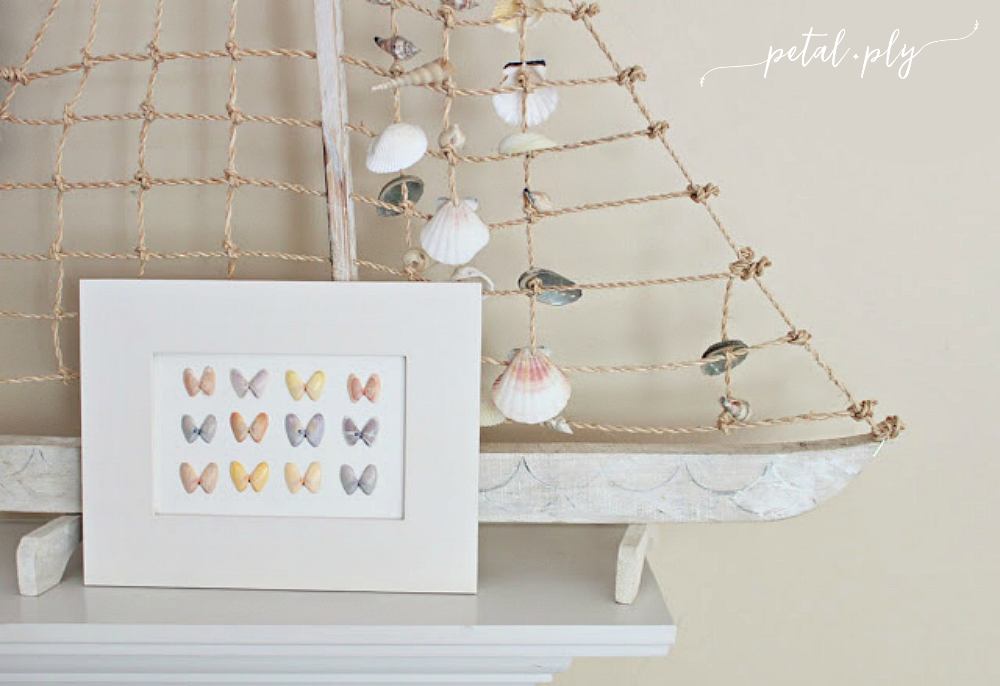
I’m not ready for our summer to be over so I decided to preserve some of our vacation memories by making some artwork. On our beach vacation this summer my daughter was thrilled that our beach had an abundance of pretty “butterfly” Coquina shells. We spent several mornings walking down the beach searching for the most colorful ones we could find!
After the initial shell collecting this project is very simple and quick!
What you’ll need:
-butterfly seashells (as many as you need to fill your frame + extras because some are sure to break apart)
-hot glue gun
-toothpick
-scrapbook or watercolor paper
-picture frame
How to make:
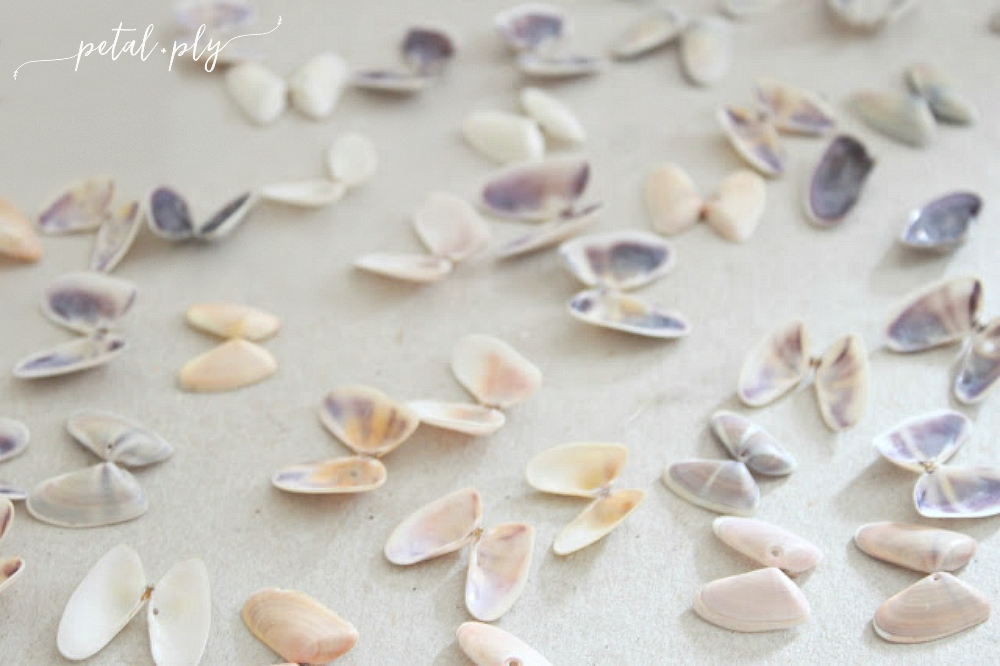
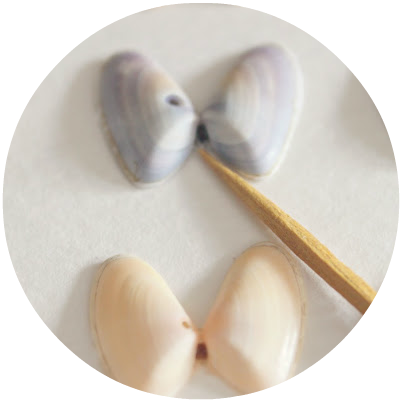
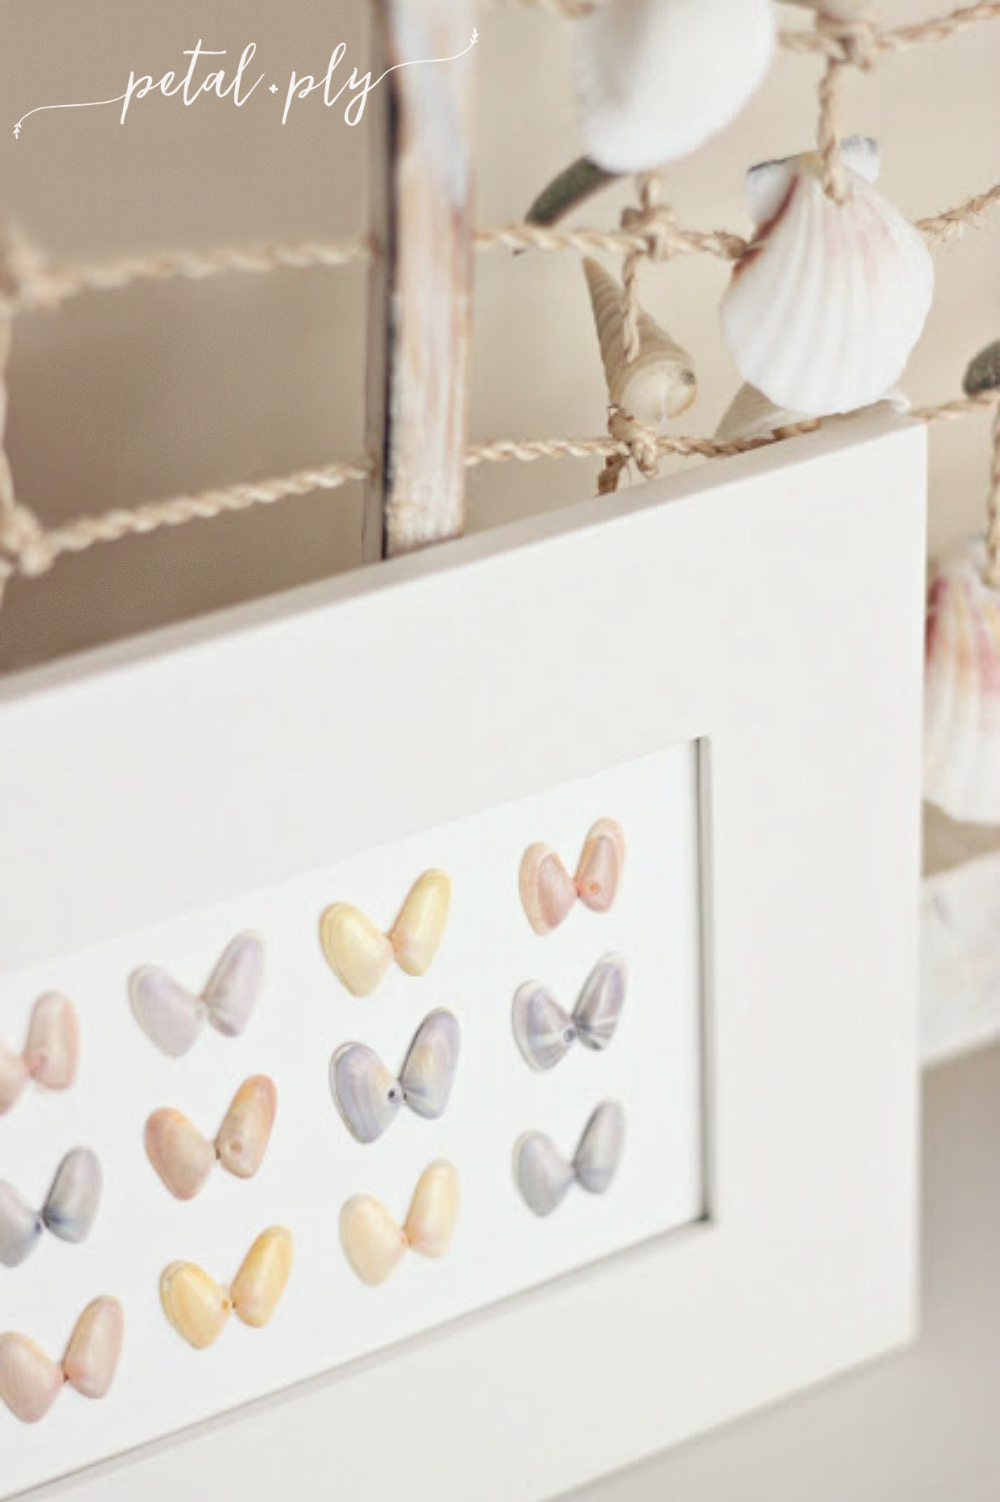
1. Lay out your collection of seashells. Look at both sides of the shells. Some shells are more colorful and patterned on the inside and some on the outside of the shell. Decide which direction you want your shells facing. Way 1: Inside of shells facing down or Way 2: Inside of shells facing out. I think way 2 looks more like butterflies but the coloring of the shells may really determine which direction they will face!
2. Use the cardboard in the frame as a stencil to cut out your scrapbook or watercolor paper. A paper with a slight texture, pattern, or color will work perfectly.
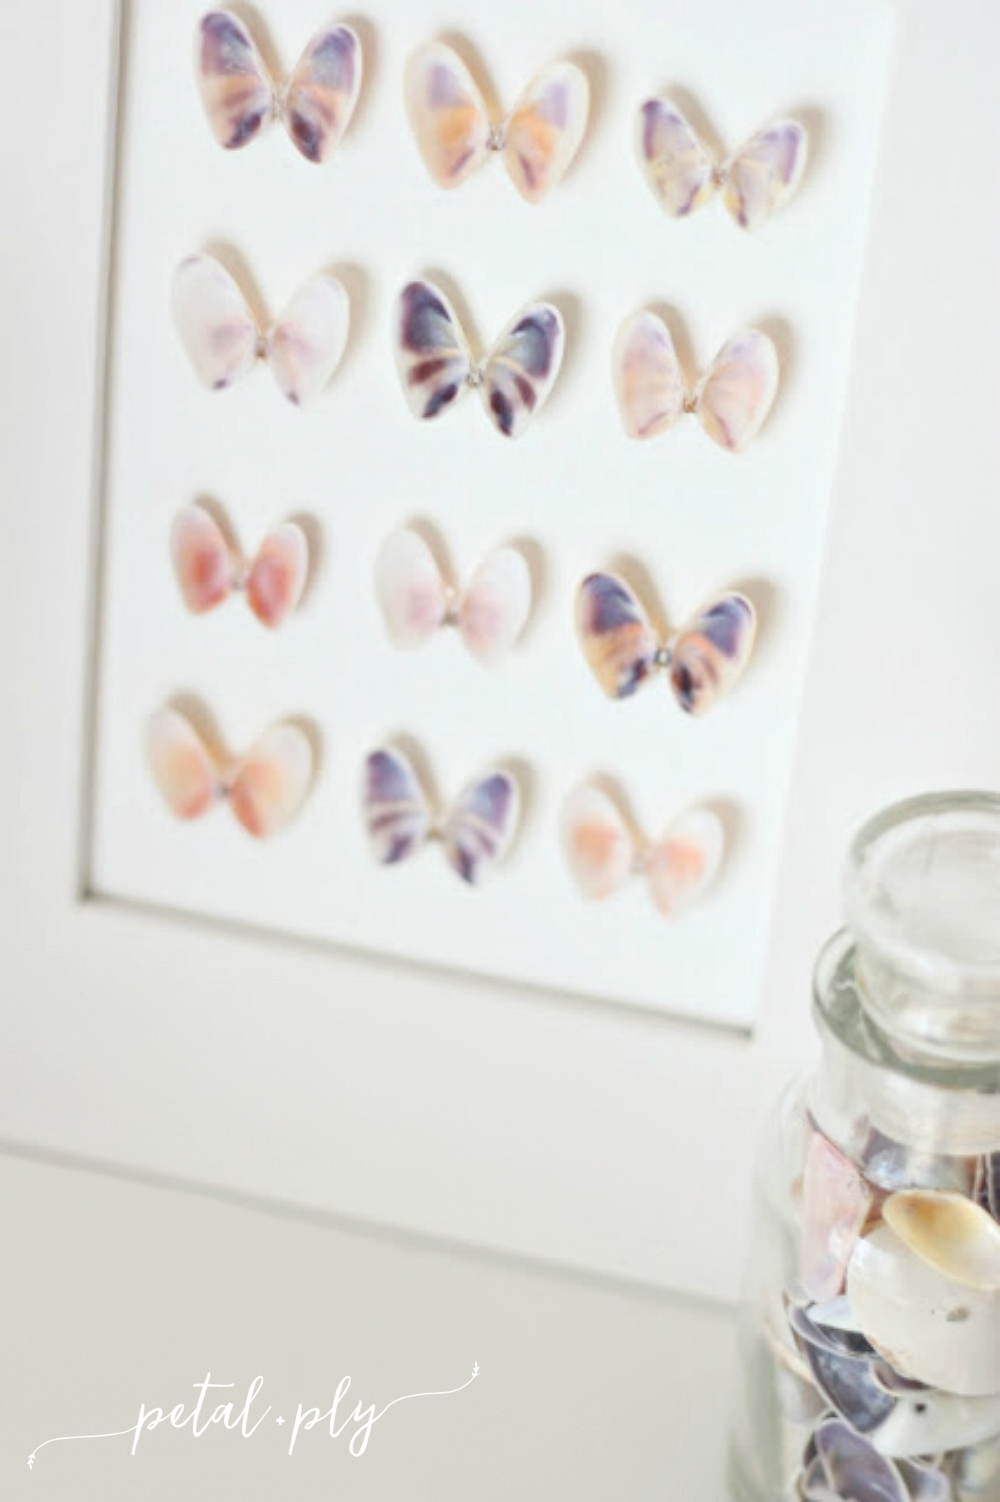
3. To keep from marking up the paper I placed it back into my frame and flipped it onto the table face up to determine shell placement. Simply lay out the shells directly on the paper and rearrange until you get the spacing and color placement you desire.
4. Regardless of which direction your shells are facing (up or down) simply add a dot of hot glue over the joint of each shell and place it back in it’s spot on the paper. If the shell joint breaks you can still use it just be sure to dot each piece with glue and line up the joining spot carefully. Gently press the shell into the paper to secure.
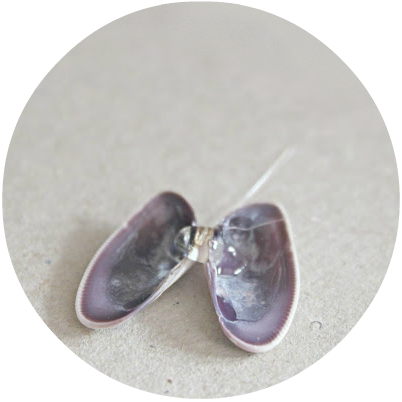
5. While glue is still hot use a toothpick to lift out any excess that seeps out from under the shell.
Enjoy your beautiful vacation memories! Year round if you’d like!

beautiful display!
This is fantastic! I have a bunch of those little shells, and I love butterflies! I can't wait to make this!
ADORABLE!!! Pining this now! 🙂
Oh, my! I LOVE this!
Thank you Bethany!
Thanks Sarah!
Wow. This is really cool. So creative. I would love it if you would share this over at my link party that is going on now.
http://www.ifitsnotbaroquedesignblog.blogspot.com/
I must do this, it would be perfect for our coastal home! Thank you, thank you!
This is such a sweet idea! Love that you were able to preserve your beach memories this way.
Thanks for the inspiration,
Suzanne
Pieced Pastimes
PS-Would love to have you link this up to Saturday Sparks. Links are open till Friday.
Simply beautiful and ingenious!
Could you tell me where I need to be vacationing to find such beautiful little shells? We haven't got any here on the coast of Virginia. bummer.
I would love to try it!
This is gorgeous! You always have the best stuff!!
Jamie @ somuchbetterwithage.com
You're very welcome Jeanne. 🙂
These were found in N. Myrtle Beach South Carolina but it looks like they are available to buy online too!
Seriously… jaw drop… this is so beautiful and completely unexpected. And I have to say, your photography is simply outstanding. Featured this one as well on I Love That Junk this week!
This comment has been removed by the author.
How beautiful! I live in Florida and love seashells and fun ways to display them. I linked up right after you and I have a tray of….seashells! heehee! Sweet hugs!
Oh my goodness, these are lovely! I need to collect mores seashells apparently. 🙂
🙂 Thanks. We always collect some shells but this was the first year I noticed all of the butterflies. Whether they've been there before or not I don't know but this year they had me inspired!
This is so beautiful! I've never even thought about turning shells into butterflies before. Pinning 🙂 I'd be thrilled if you'd come on over to Pink Recipe Box and link up at Creative Wednesdays: http://pinkrecipebox.com/creative-wednesdays-with-pink-recipe-box-4/
This is a wonderful project! I love using "animal" decor but not actual animals, so this is a great rendition of those butterfly specimens. Thanks for sharing!
Absolutely adorable!! LOVE THIS. Pinned and stumbled. xo
Thank you Kelly!
I was worried that since they came from live animals that they might stink (like other shells do) but they had no odor!! Maybe they're too small. Either way I'm not complaining!