Time for our One Room Challenge™ Week 4 check-in!
As a recap we’re redoing our boys’ shared bedroom with an Adventuring Entomologist vibe. Last week I shared a This End Up end table redo (with a not-to-miss milk paint tip) as well as how the design plans have changed a bit during the first 3 weeks of the challenge.
This week brings another furniture redo.
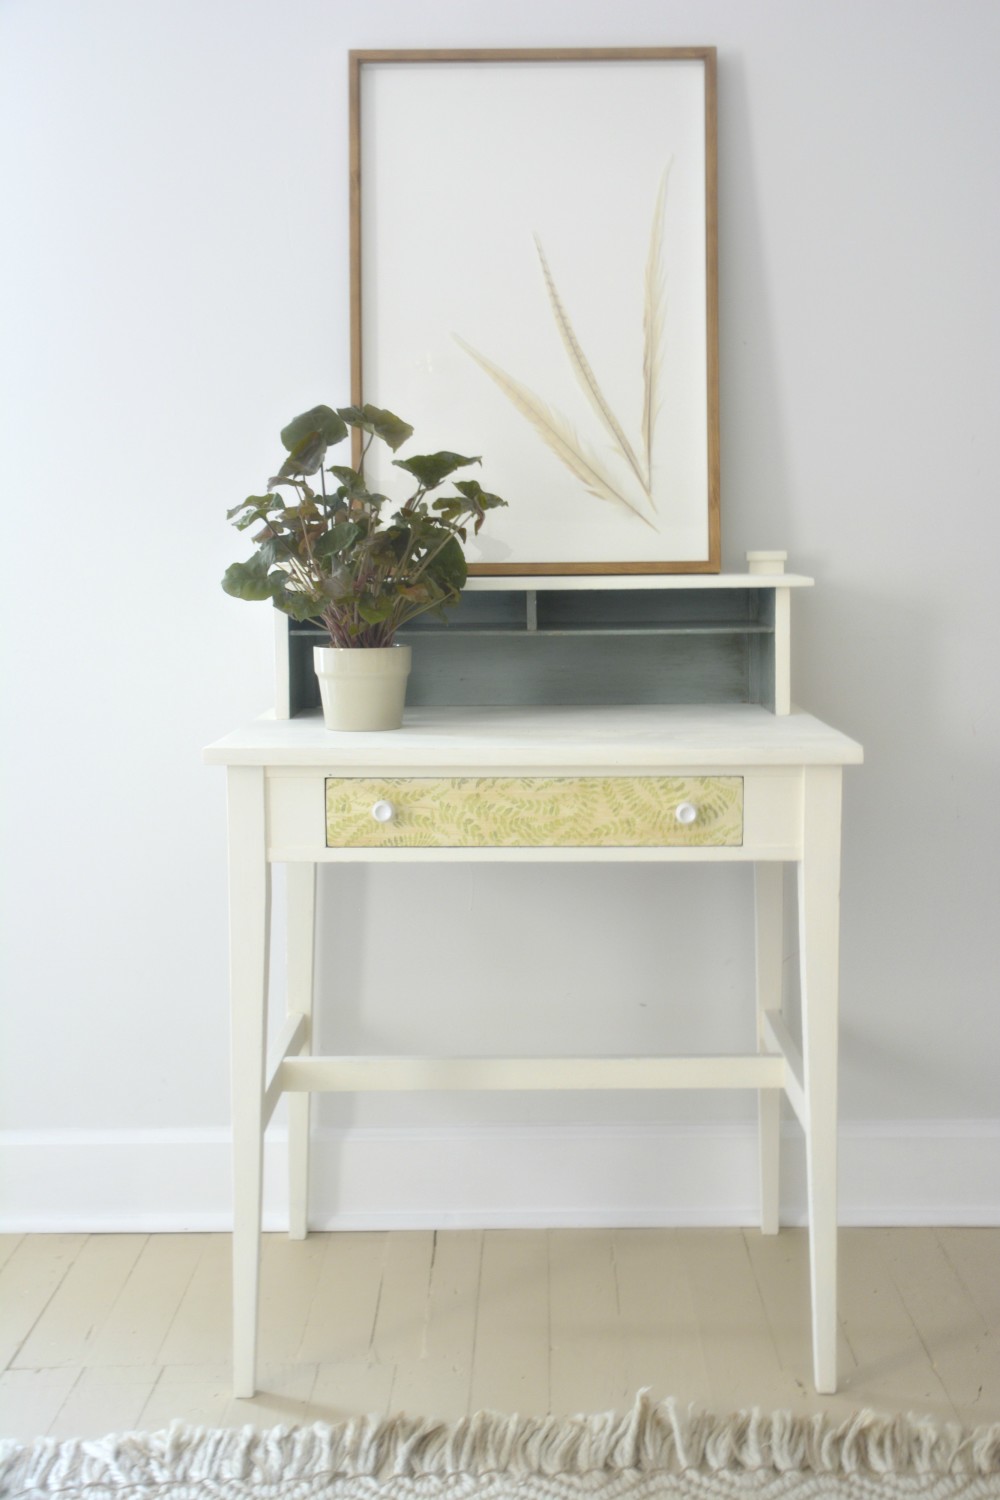
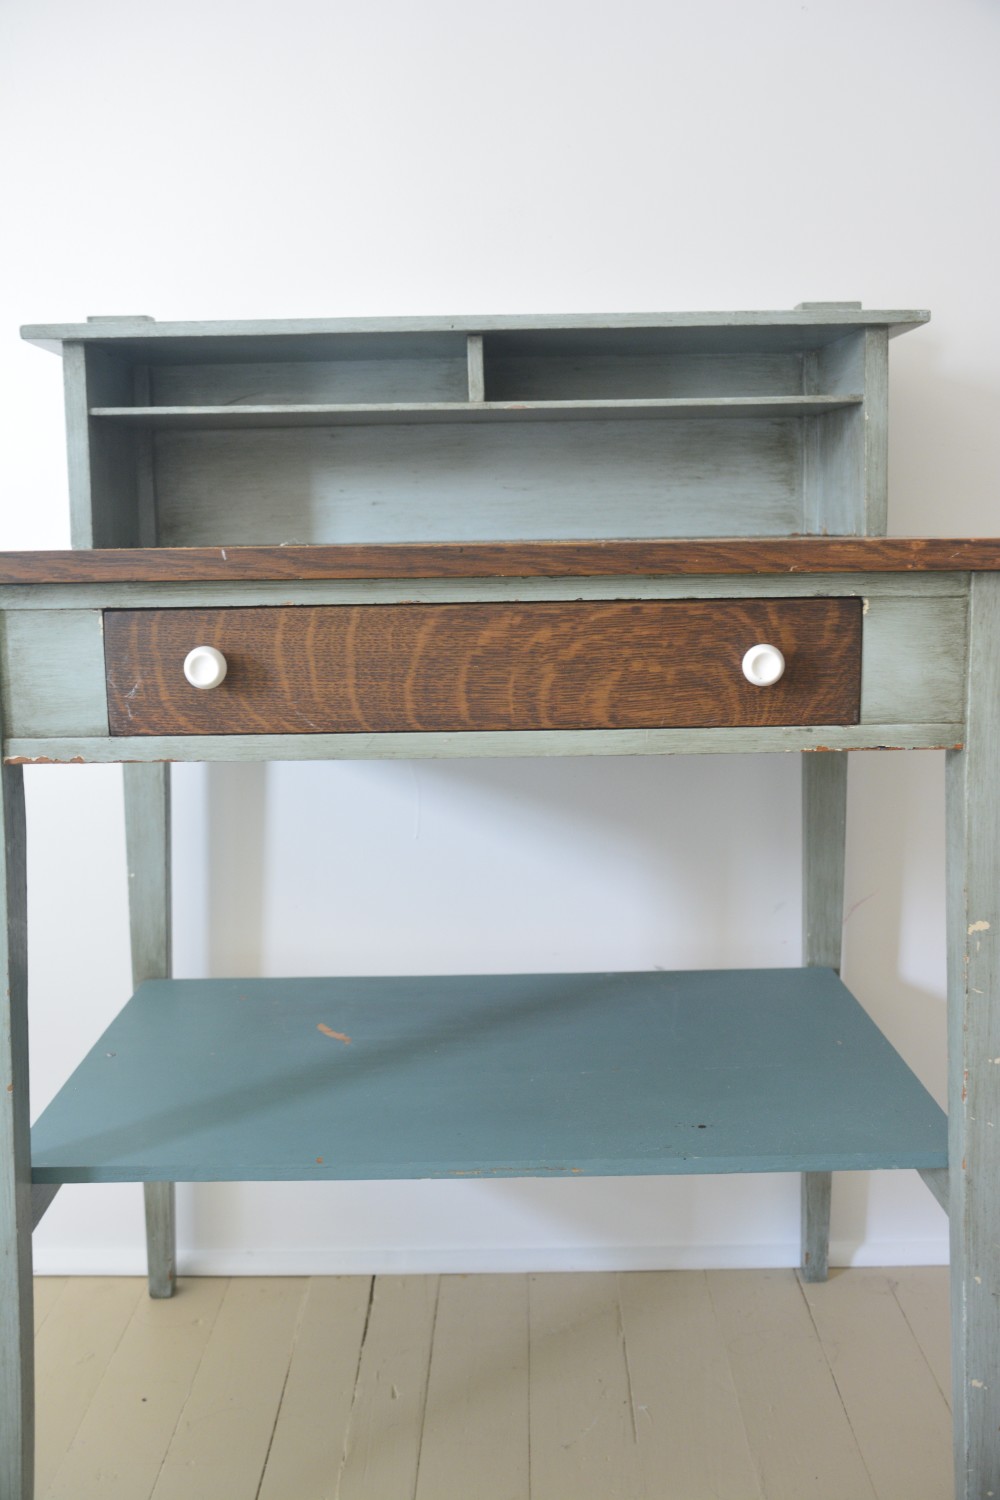
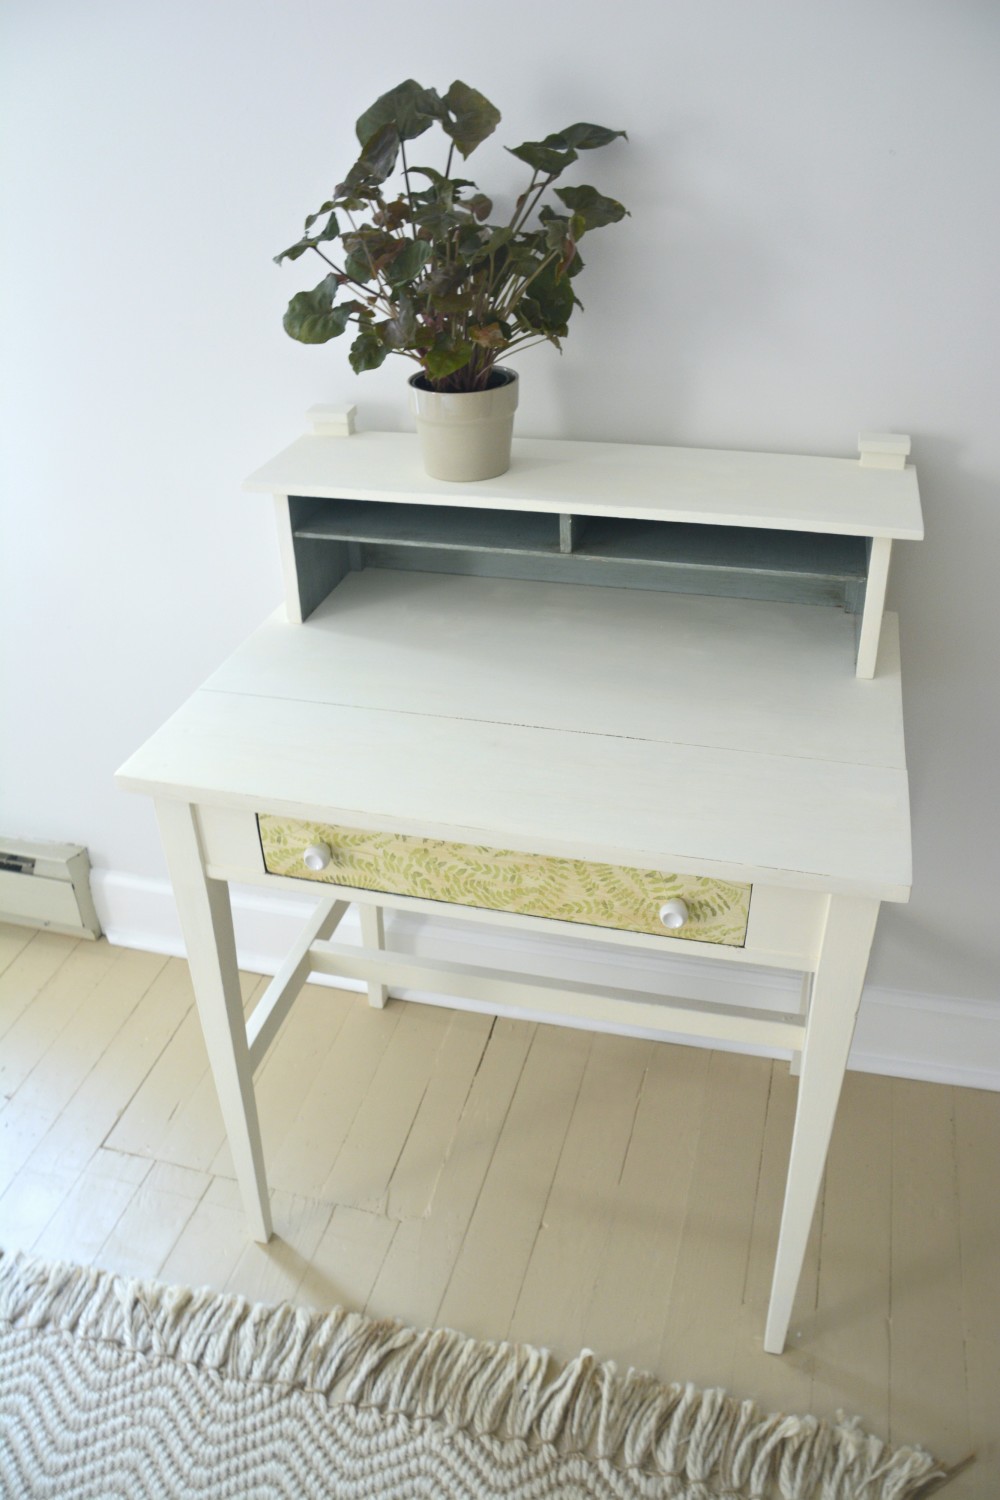
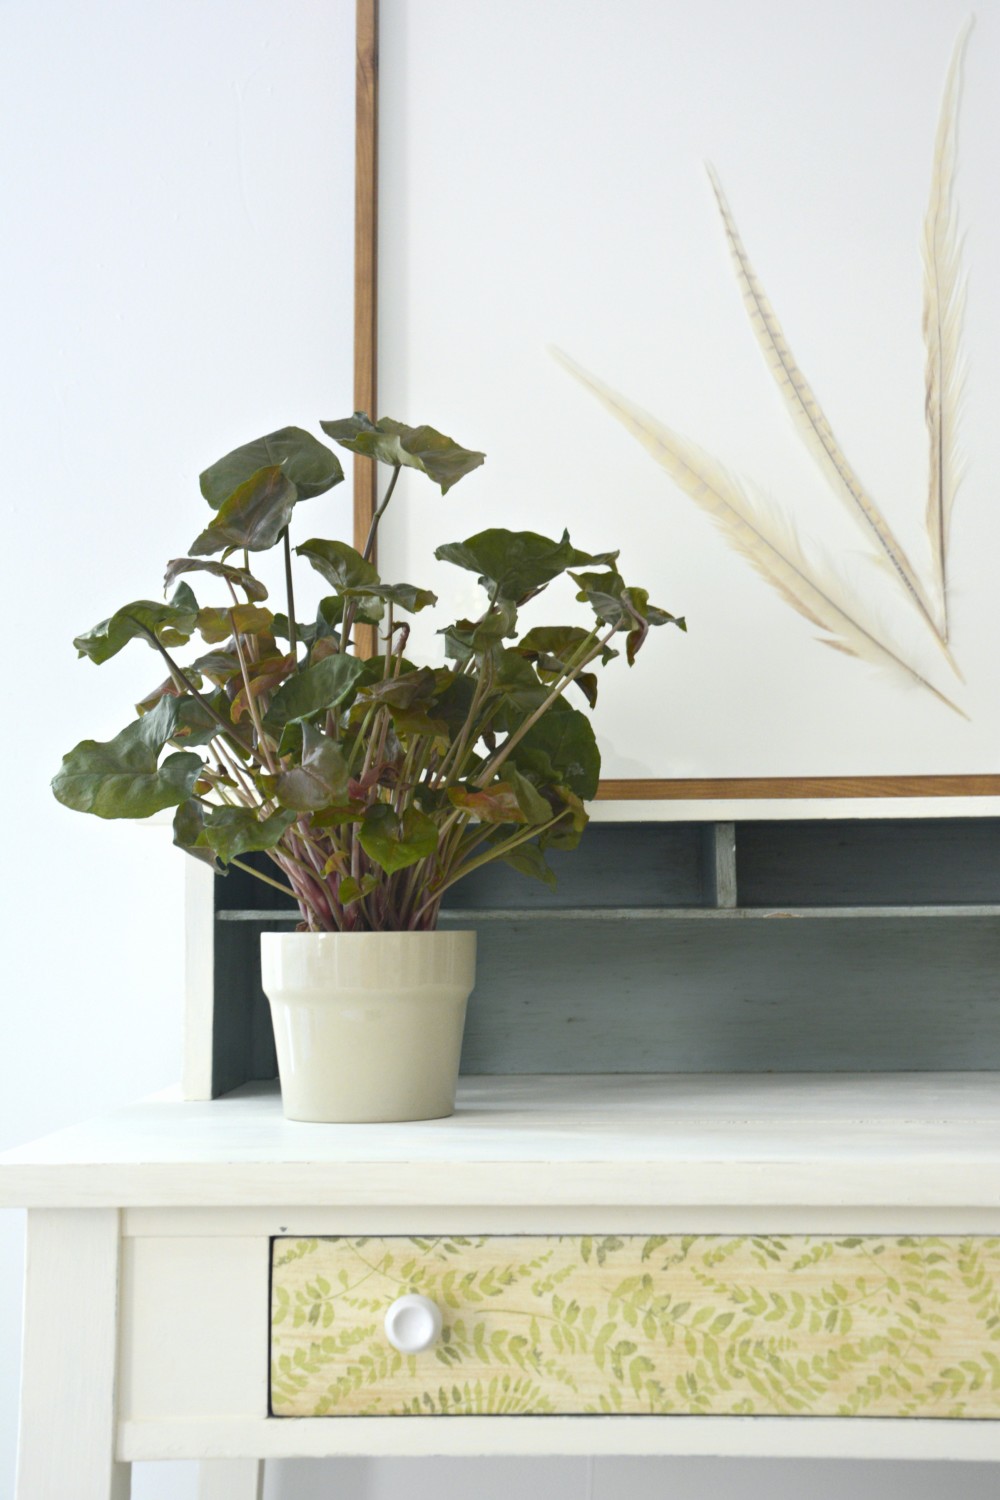
How cute is this little wood desk I scooped up for only $8.00 a local community yard sale!? The paint was chipped up and grubby looking and someone had screwed down a makeshift shelf but all the “problems” were easy fixes.
*Affiliate links provided for your convenience. Thank you for supporting this blog.*
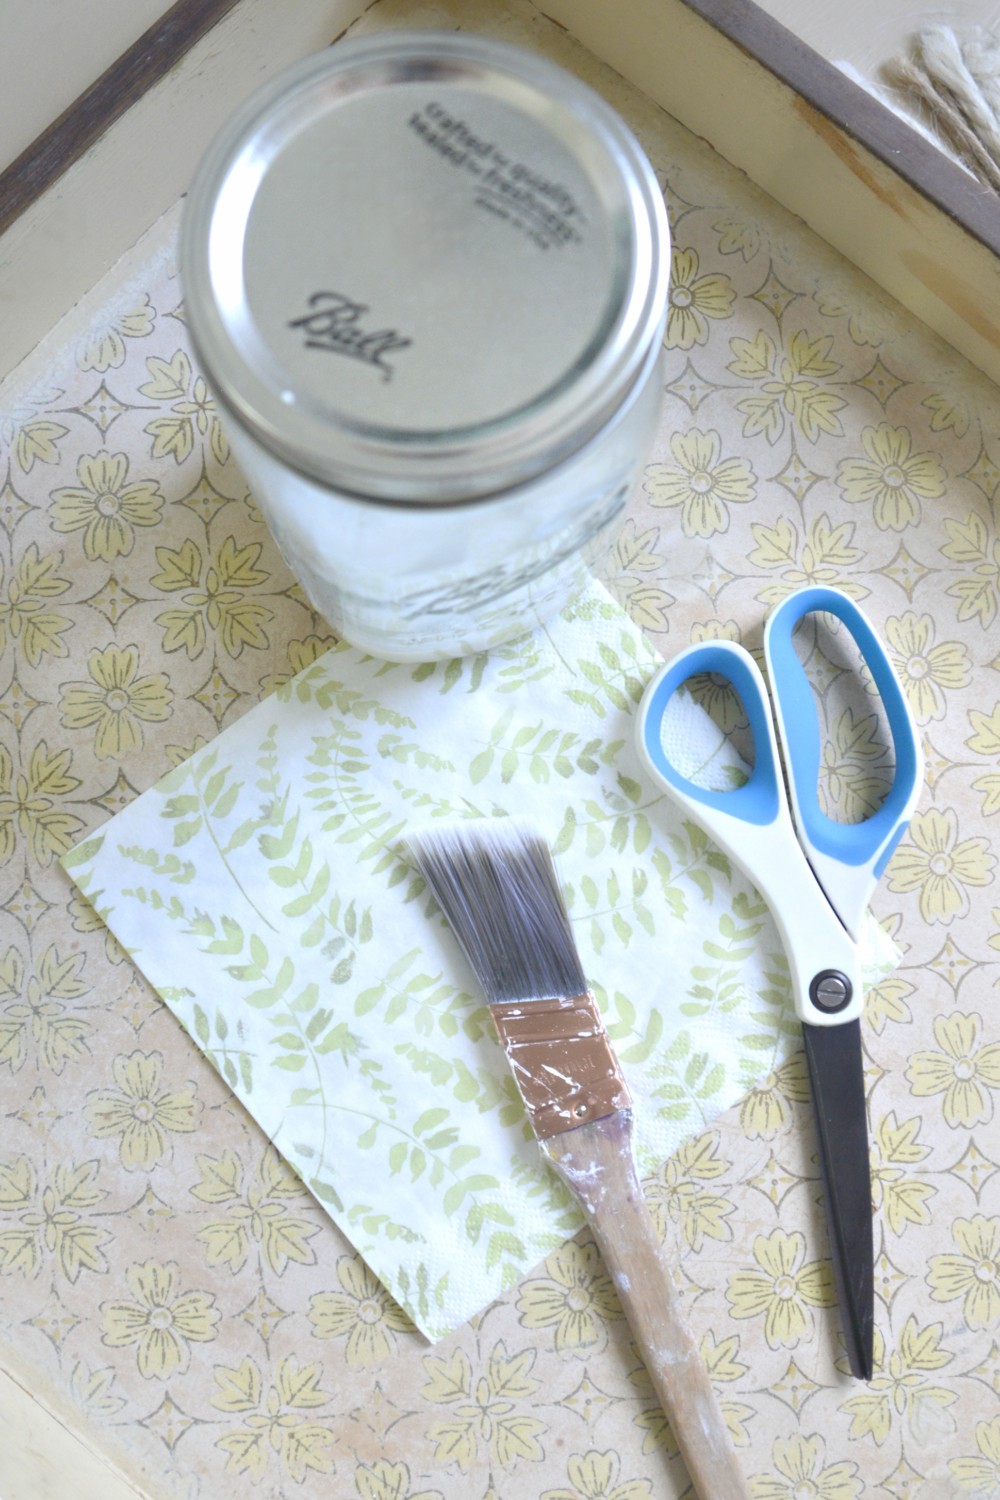
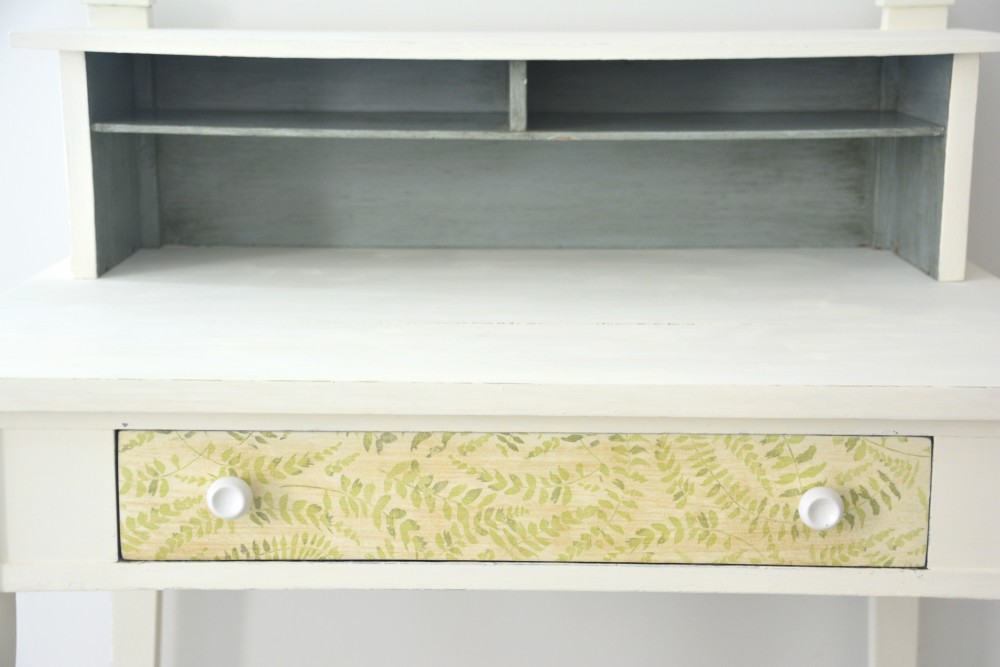
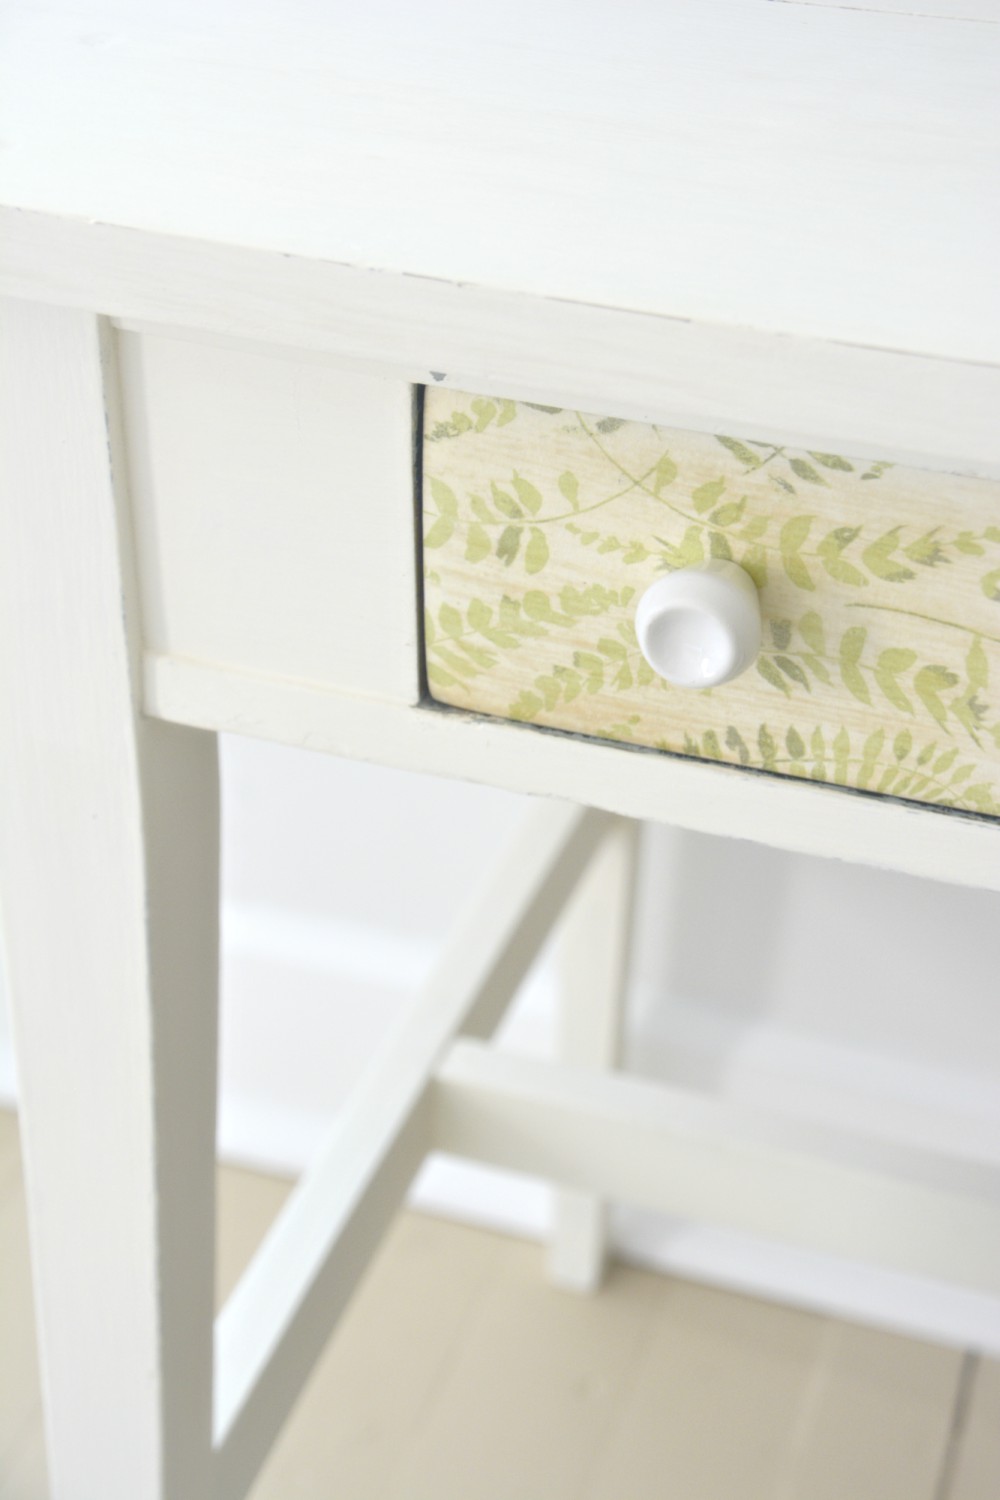
My plan for this piece was to paint it in a light color and use the drawer as a little accent. I decided on an ivory paint and a fern print napkin for the accent drawer.
Napkins are my favorite for adding accents to drawers on furniture. Most people use Mod Podge for decoupage BUT for napkin decoupage I prefer to use Minwax Polycrylic.
Polycrylic Napkin Decoupage
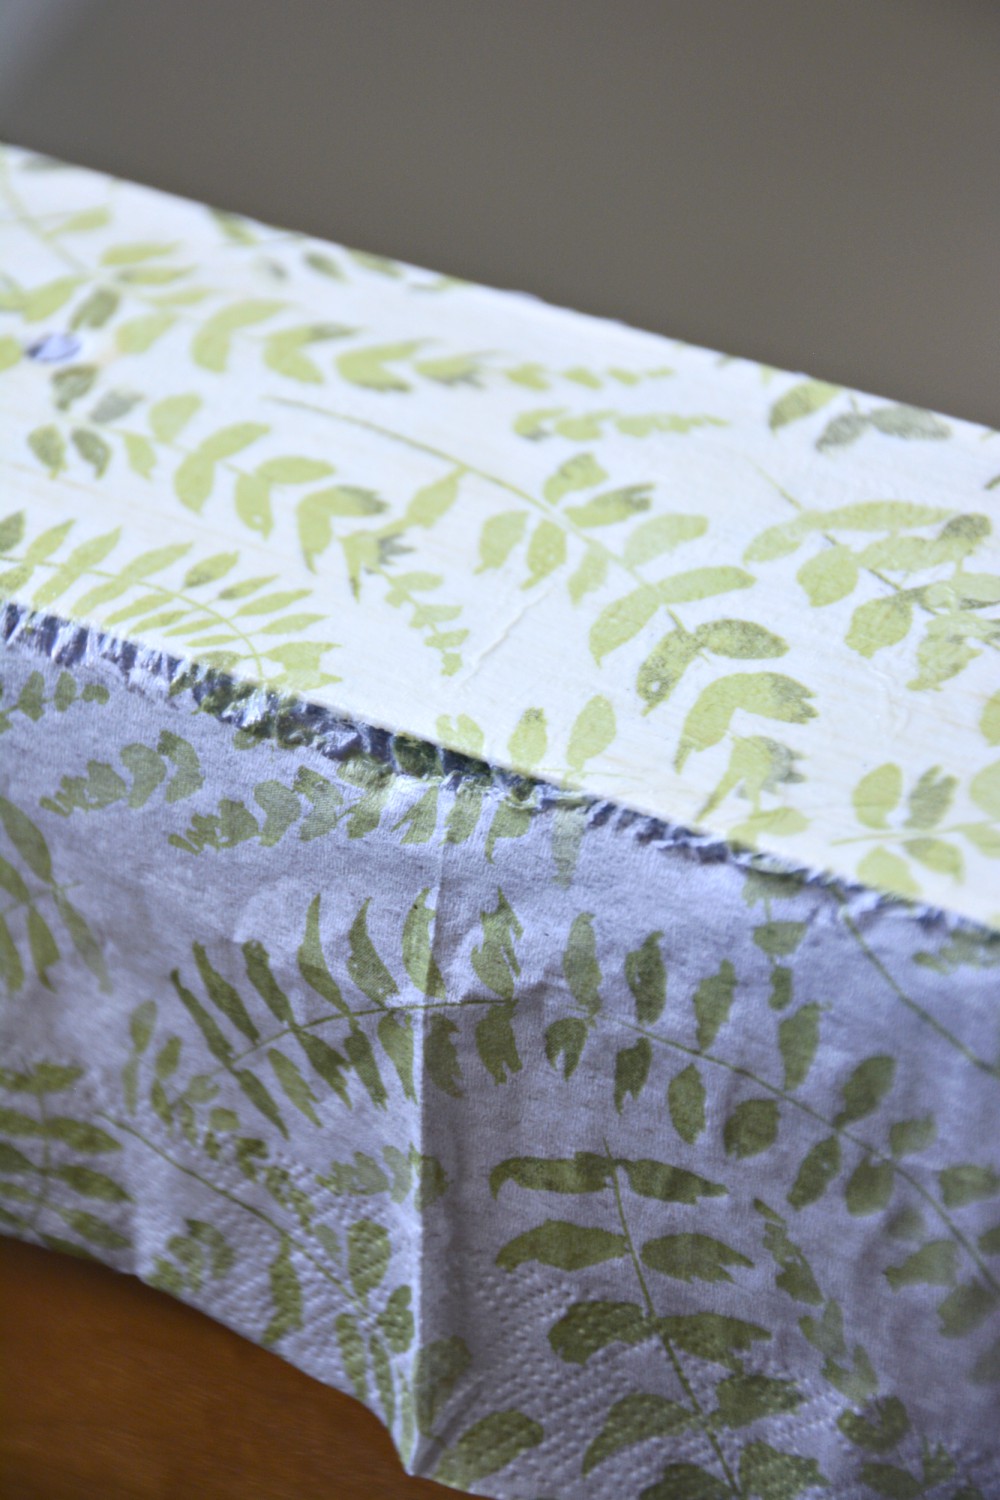
- Cut napkins to fit surface. Allow excess on all side to allow some wiggle room. If desired cut off textured band around edges of napkins. It won’t make a huge difference but I prefer not to have the little change in texture if I don’t need the full length of the napkin.
- Separate the patterned ply of each napkin piece. Most napkins will be either 2 or 3 ply. You only want the ply that is printed with the pattern.

- Brush Polycrylic onto surface of drawer.
- Place napkin onto Polycrylic as smoothly as possible. Gently smooth out any air bubbles, making sure all of the napkin surface is touching the Polycrylic.

- You can now either wait for the Polycrylic to dry or you can go right ahead and brush on a coat of Polycrylic over top of the napkin. Here’s how I make the decision: If the napkin is super fragile and well saturated it’s best to wait. If the napkin still seems sturdy and isn’t heavily saturated go ahead and topcoat. If you waited to topcoat, be sure to add a topcoat before you move onto the next step.
- Allow the Polycrylic to fully dry and then remove the excess napkin using a sanding sponge. Keep the sanding sponge verticle and brush downward over the entire edge until all of the extra napkin breaks free.
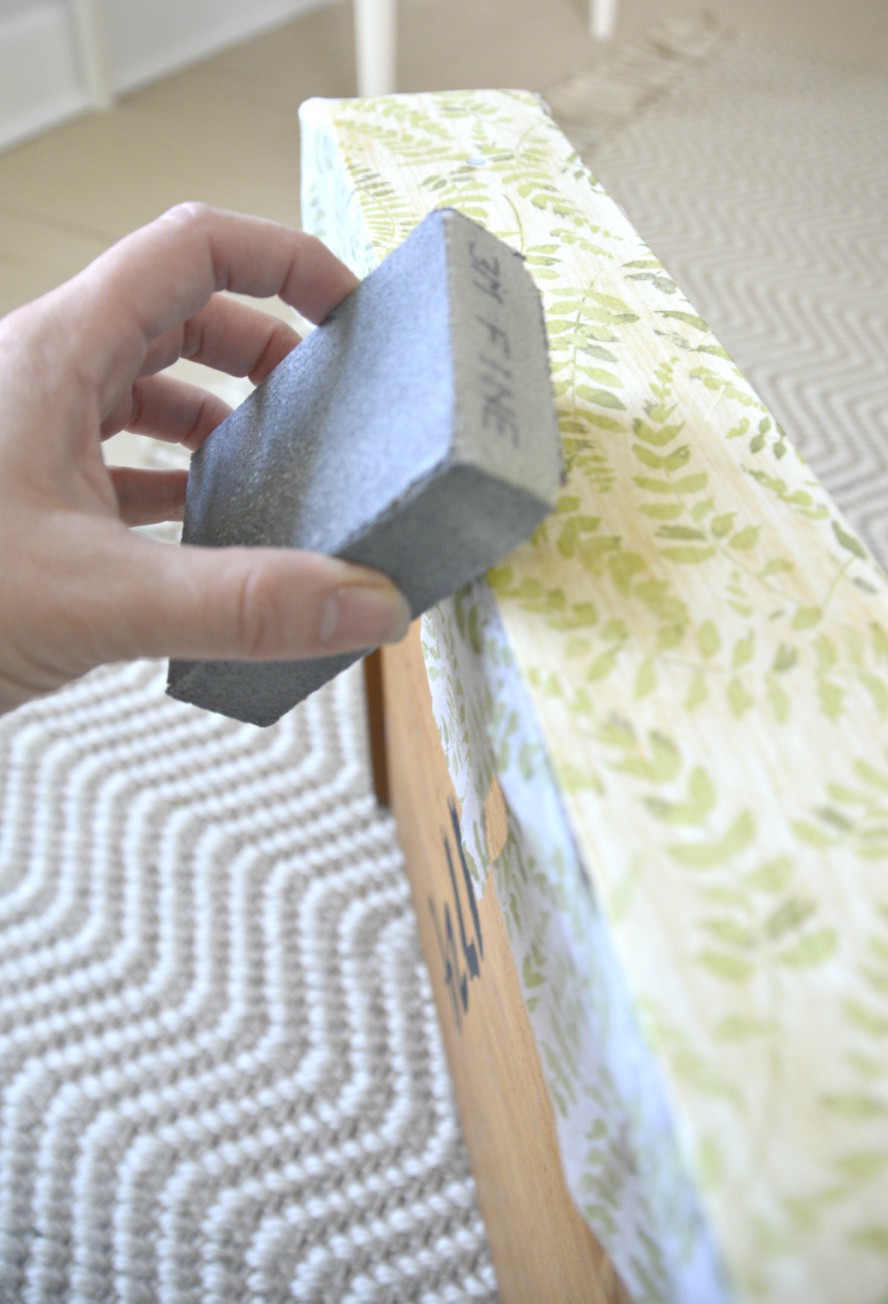
- Give the entire napkin surface a fine sanding to knock back any texture. Be careful so you don’t rip through the napkin or tear any of it off. If the napkin doesn’t seem fully adhered, STOP, and add another coat of Polycrylic before sanding.

I love how the wood grain bled through the paint on this piece!! Really adds to the natural vibe we’re going for in our boys’ space AND it provided a bit more background color to show off the cute little ceramic knobs.
Next week I’m hoping to have the painted bed frames ready to share. At least a sneak peek anyway! We still need to order another twin mattress and build one set of bed rails.
Now go stop over and visit the other ORC linking participants. So much progress is being made and there is tons of inspiration to glean.
Until next time,
![]()
The desk turned out so cute!!
Thank you Emy!
great job on the desk!
I am loving all the personalized touches you are doing!
Thank you Hilary! 🙂 DIY is how we make design affordable in our house!
Oh that is so clever, and it turned out well. Fern print is so pretty. I’ll be looking around for places to use this idea. Thanks for sharing it.
Glad you like the technique. Come back and share if you decide to give it a try!
it turned out SO cute, jess, and it is so you!
Thanks Cassie! I think I’m finally settling into my decorating groove for our house. Eclectic Bohemian Botanical Farmhouse….maybe!? Hehe
I love it! That came out beautifully!
Thanks Jillian!
That is incredible! I never would have thought of using napkins to add a print and now I want to try it on everything!! Thanks for some major diy inspo!!
🙂 Go for it!
The napkin drawer came out great, I wouldn’t have guessed it was a napkin.
Thanks Jenny! Napkin decoupage is one of my favorite techniques. And, using the Polycrylic really creates a seamless look.
Goes to show,if a person needs a good example of how it should be done,go to the pros on blog land. This desk is so cute and perfect for your boys for while to come. Lucky buy for $8,would be perfect for several situations.Hope your boys love it.
Happy weekend
Thank you JaneEllen! Your comments always make my day. 🙂
Oh that is so clever, and it turned out well. Fern print is so pretty. I’ll be looking around for places to use this idea. Thanks for sharing it.
Thank you!
What a great bargain and I love your makeover. Looks great!
Thanks Dannyelle. I can’t resist a good bargain…especially when I have the perfect place for it. Thankfully, the design plan came together exactly how I was hoping as well!
Genius alternative to stencil and wallpaper! I’ve never used napkin on furniture, but this looks great!
I really love this technique! Infinite possibilities!
That is so creative! I would have never thought to do that. It looks great!
Thank you Nicki!